

Today we are going to focus on setting up Swagger to provide API documentation. Having interactive documentation helps with API discover-ability and provides an interface to test our API. On large development teams where there is often turnover, having dynamically generated documentation is very valuable.
Updating the web service
First, we browse to our Azure Boards, and create a branch for this piece of work, a familiar workflow for us now.
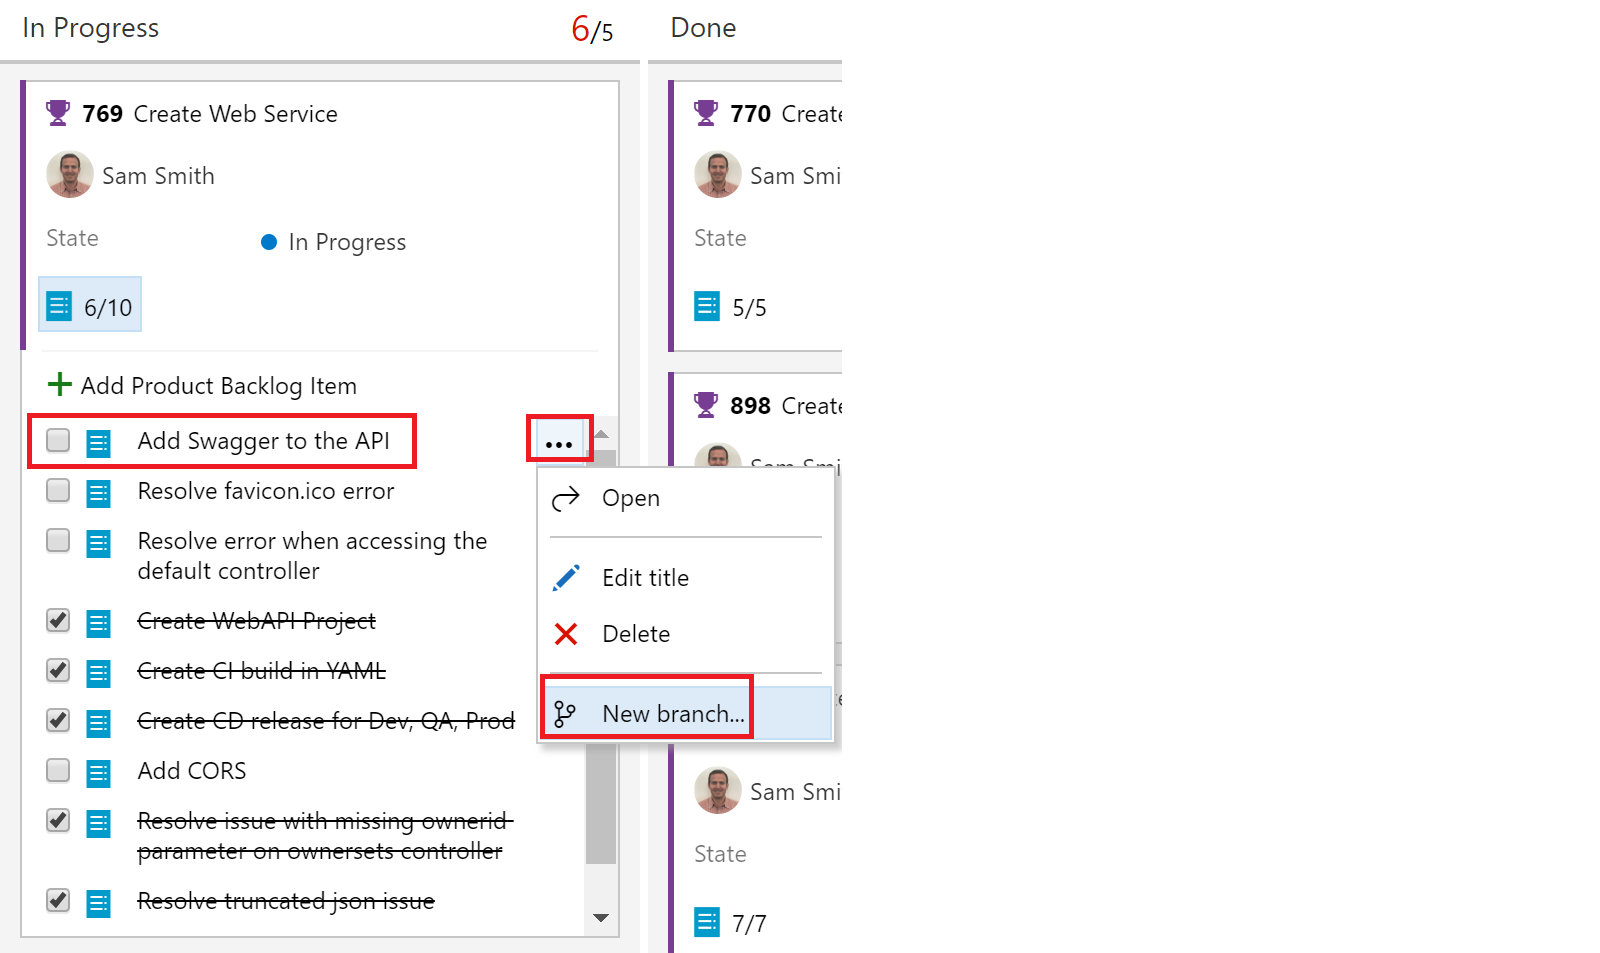
We name the branch “Swagger”

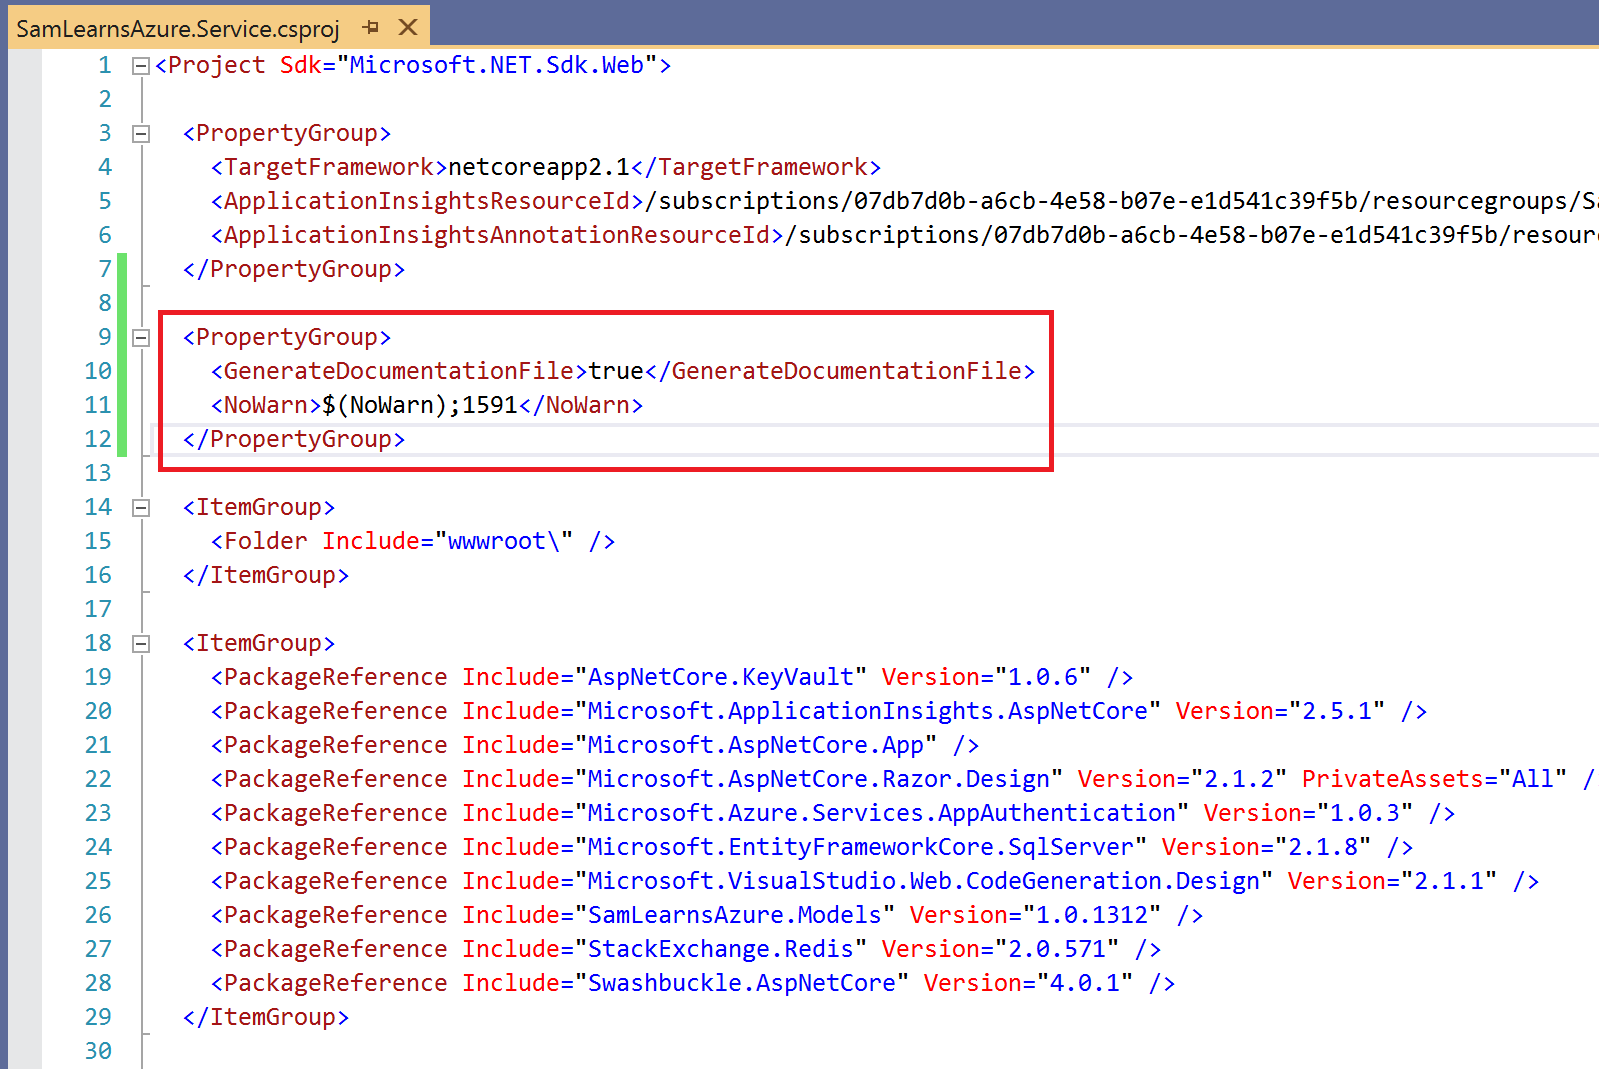
Opening the branch in Visual Studio, we add the NuGet package “Swashbuckle.AspNetCore” to the web service. Next we edit the project file to add the lines below to enable automatic documentation generation. Note that this edit also suppresses a CS1591 warning that can be generated for missing XML.
  <PropertyGroup>
    <GenerateDocumentationFile>true</GenerateDocumentationFile>
    <NoWarn>$(NoWarn);1591</NoWarn>
  </PropertyGroup>
The project file looks like this after the edit. On line 28, we can also see the NuGet reference we just added.
With this added, we can jump right into the code, and add code to the Startup.cs file, in the ConfigureServices function, to initialize and start the Swagger documentation generation when the project starts. This works by extracting the XML documentation file from the compiled build folder.
// Register the Swagger generator, defining 1 or more Swagger documents
services.AddSwaggerGen(c =>
{
    c.SwaggerDoc("v1", new Info { Title = "SamLearnsAzure API", Version = "v1" });

    string xmlFile = $"{Assembly.GetExecutingAssembly().GetName().Name}.xml";
    string xmlPath = Path.Combine(AppContext.BaseDirectory, xmlFile);
    c.IncludeXmlComments(xmlPath);
});
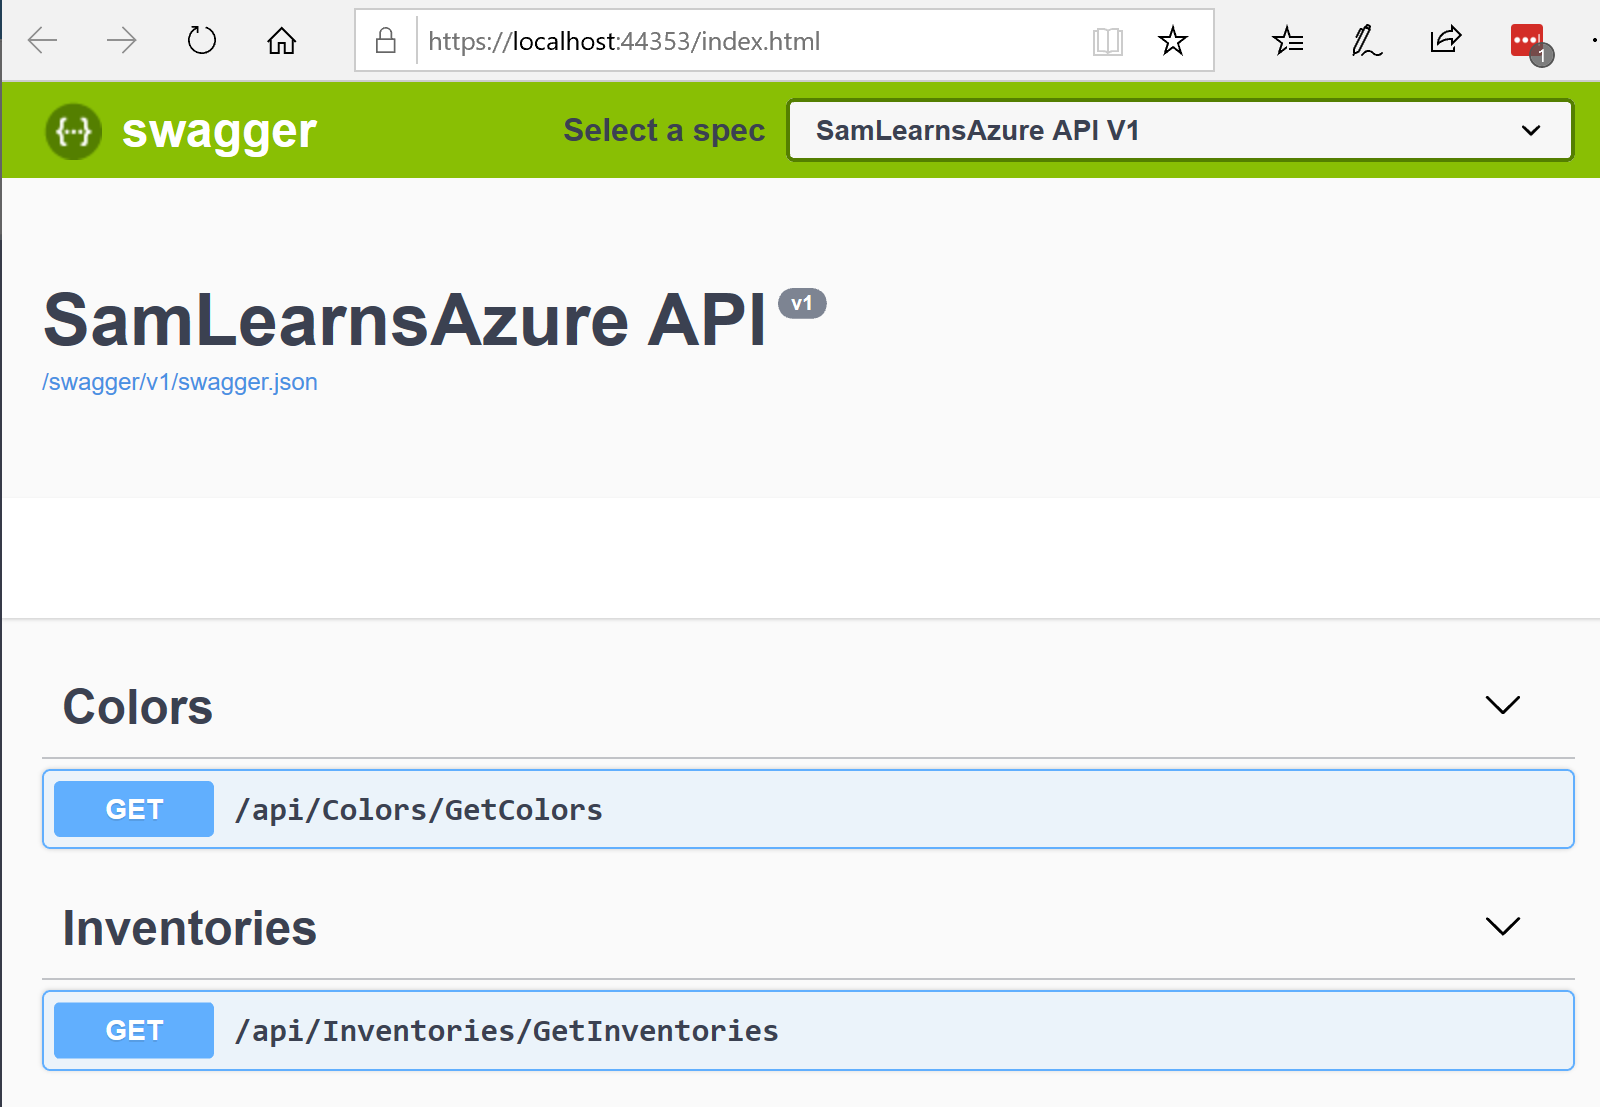
The result looks like this:

Also in the Startup.cs file, in the Configure function, we add the following code: “c.RoutePrefix = string.Empty;”. This line allows us to access the Swagger document with the default api url.
// Enable middleware to serve generated Swagger as a JSON endpoint.
app.UseSwagger();

// Enable middleware to serve swagger-ui (HTML, JS, CSS, etc.), specifying the Swagger JSON endpoint.
app.UseSwaggerUI(c =>
{
    c.SwaggerEndpoint("/swagger/v1/swagger.json", "SamLearnsAzure API V1");
    c.RoutePrefix = string.Empty;
});
This is what the Startup.cs file looks like with this update.

Reviewing Swagger in the API and enhancing its documentation
Next we run our web service and browse to the root url, in our case it’s “localhost:44353”. This redirects us to an index.html file, which has been generated by Swagger, and shows our controllers. One quick detail we notice is that there isn’t any information about these controllers.
Adding this context is relatively straight forward, we only need to add XML documentation. By adding a “///” comment above an action, it will generate the comment format as highlighted below – we only need to add the detail between the “summary”, “parameters” and “returns” tags.

After adding this detail, we can now see short descriptions of each action.

There is also some functionality here to test the API. If we scroll down a little to the owners section, we click on the “GetOwner” controller, and see a “try it out” button.
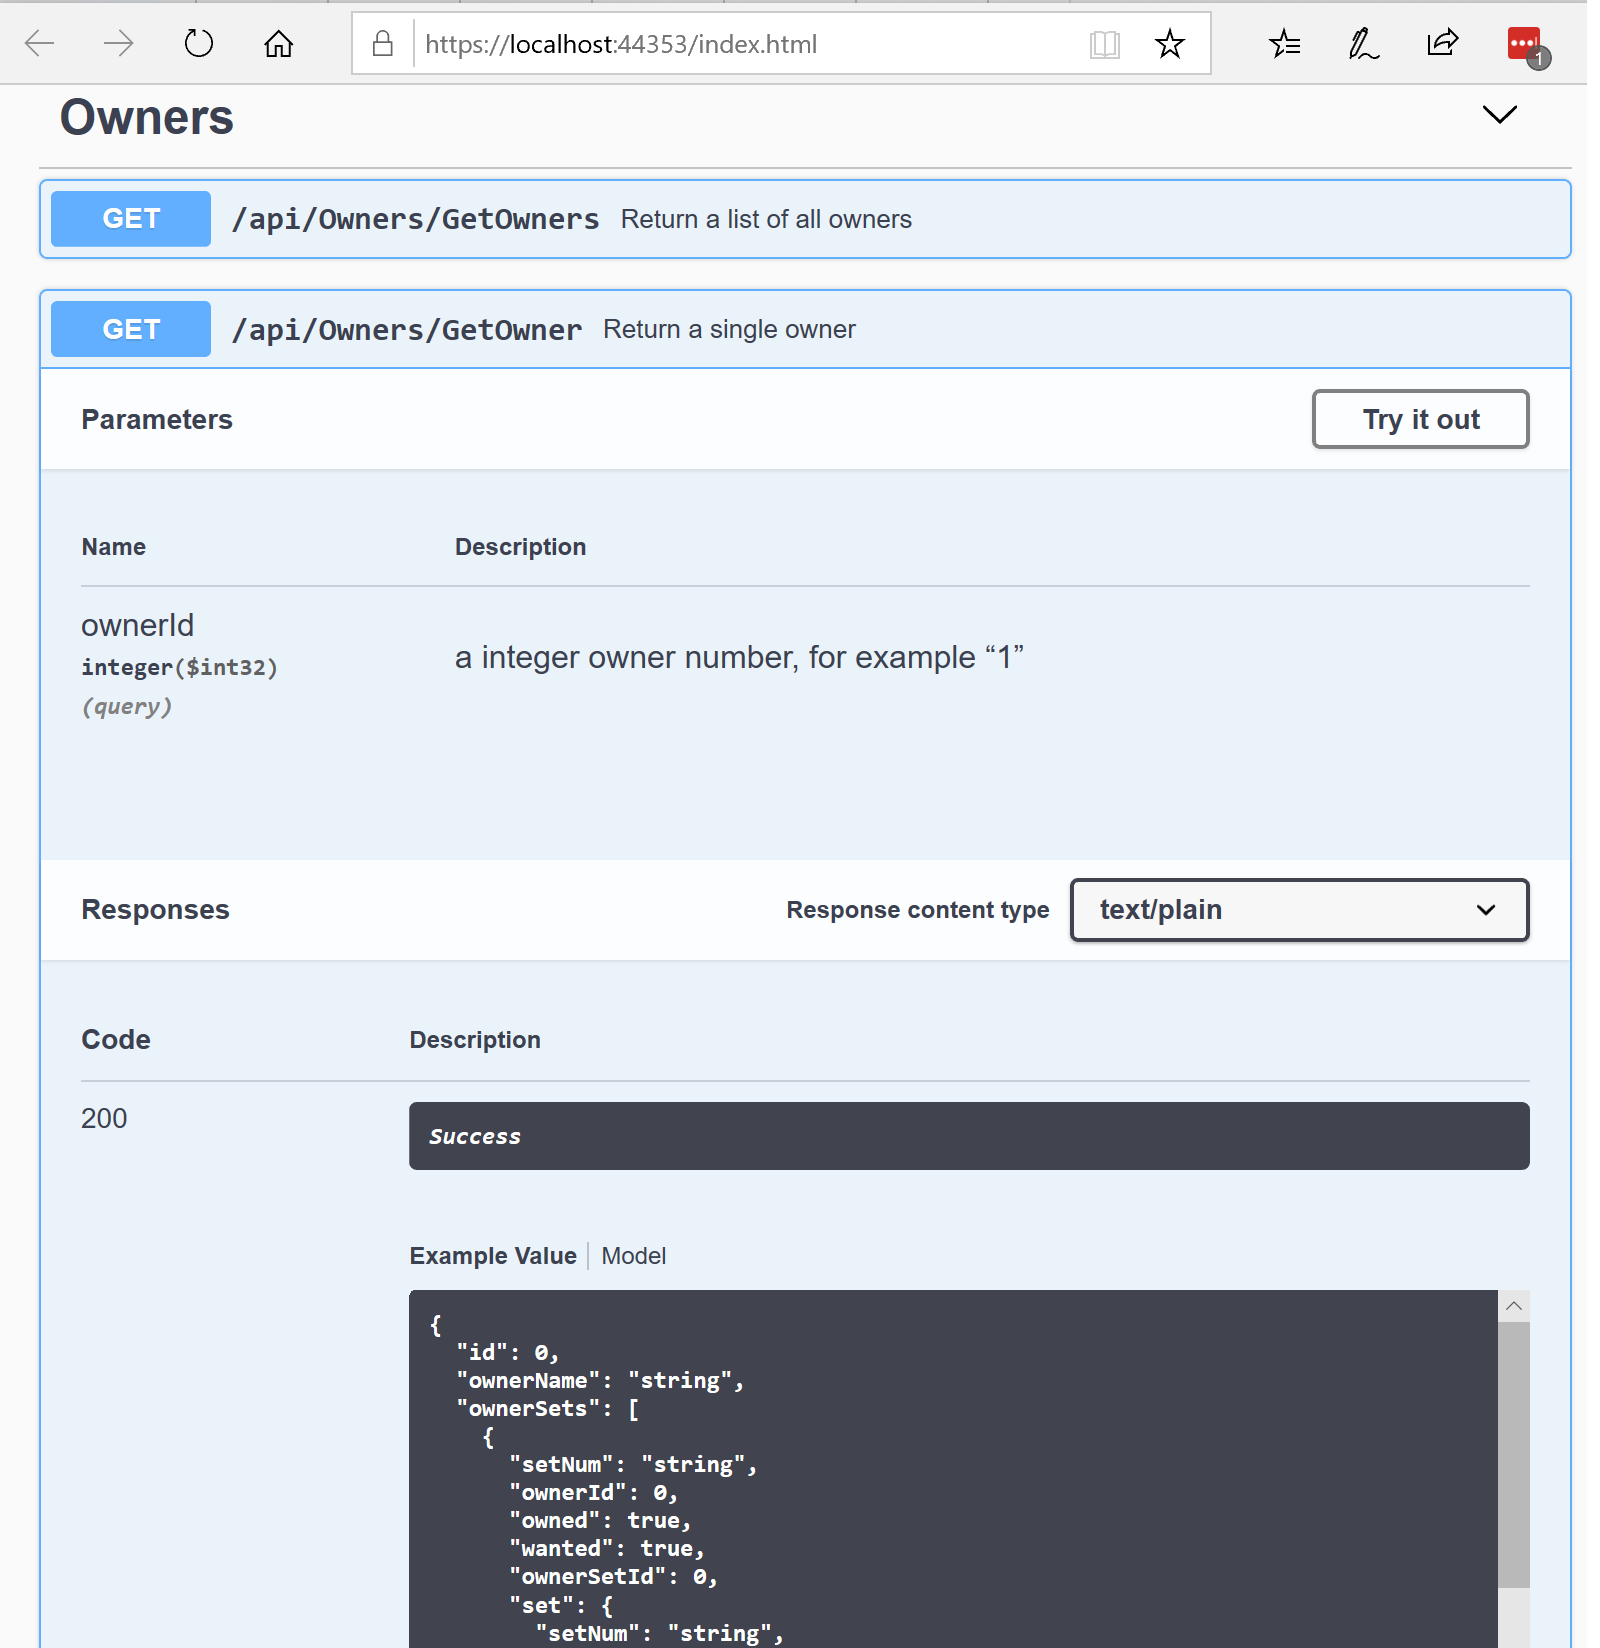
Clicking “try it out” allows us to enter a parameter value for the owner id, we use “1”.
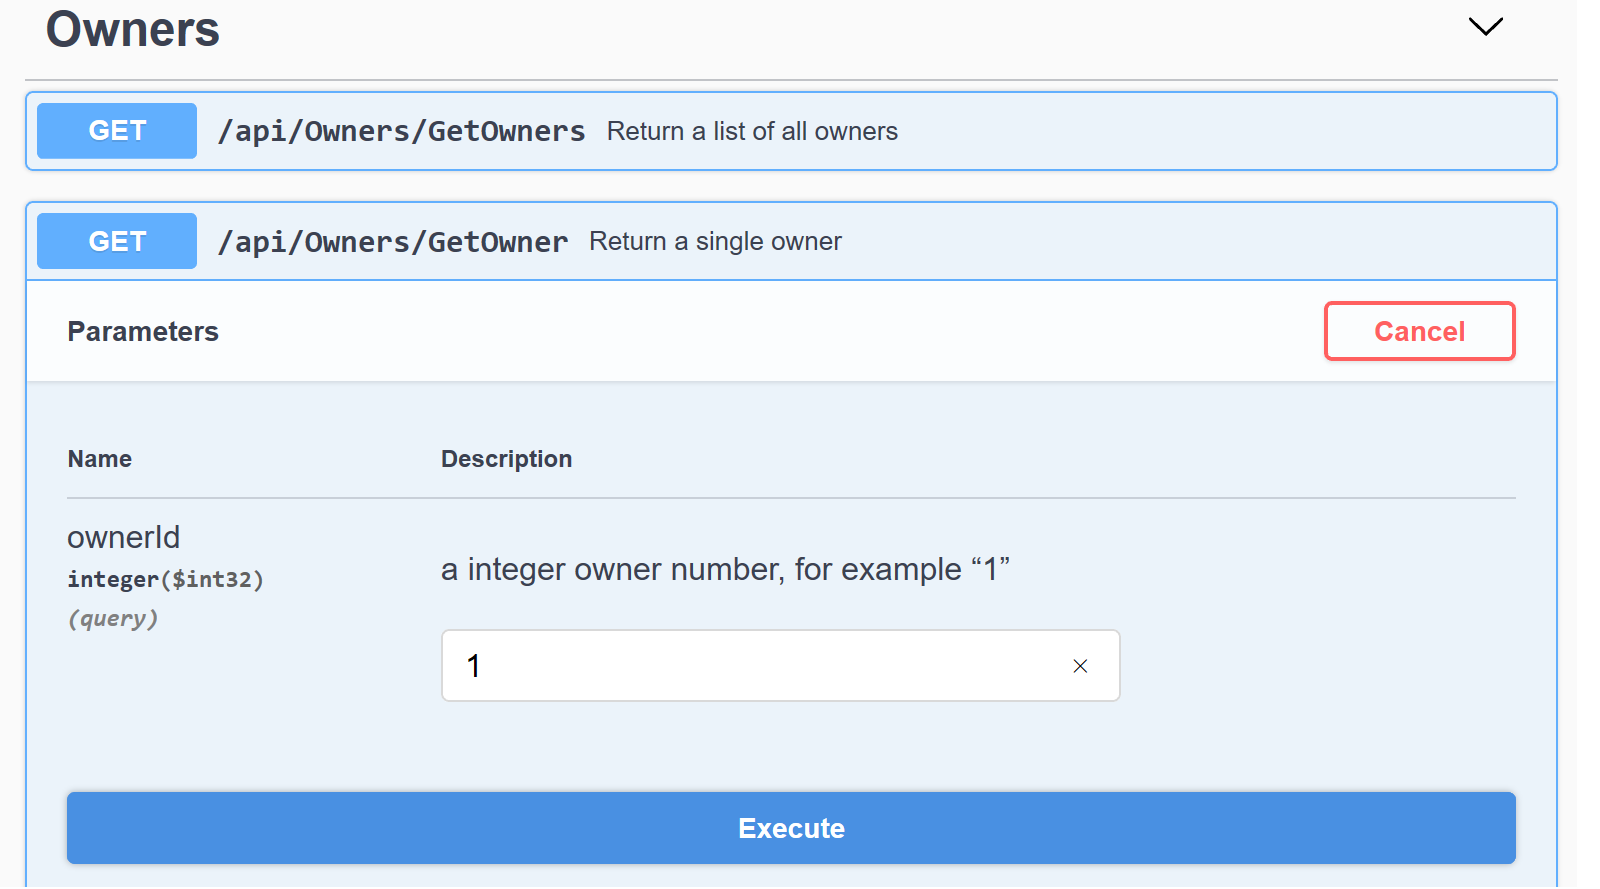
The result sends a request and returns a response we can examine – in this case a short JSON document

We can also document our models, using the same XML comments (three “///”). As well as showing up in Swagger, these will also show up as comments in the IntelliSense of our commands, and allow us to explain potentially confusing naming. Of course it’s always better to name things properly at the beginning, but most projects are well established and this isn’t an option.
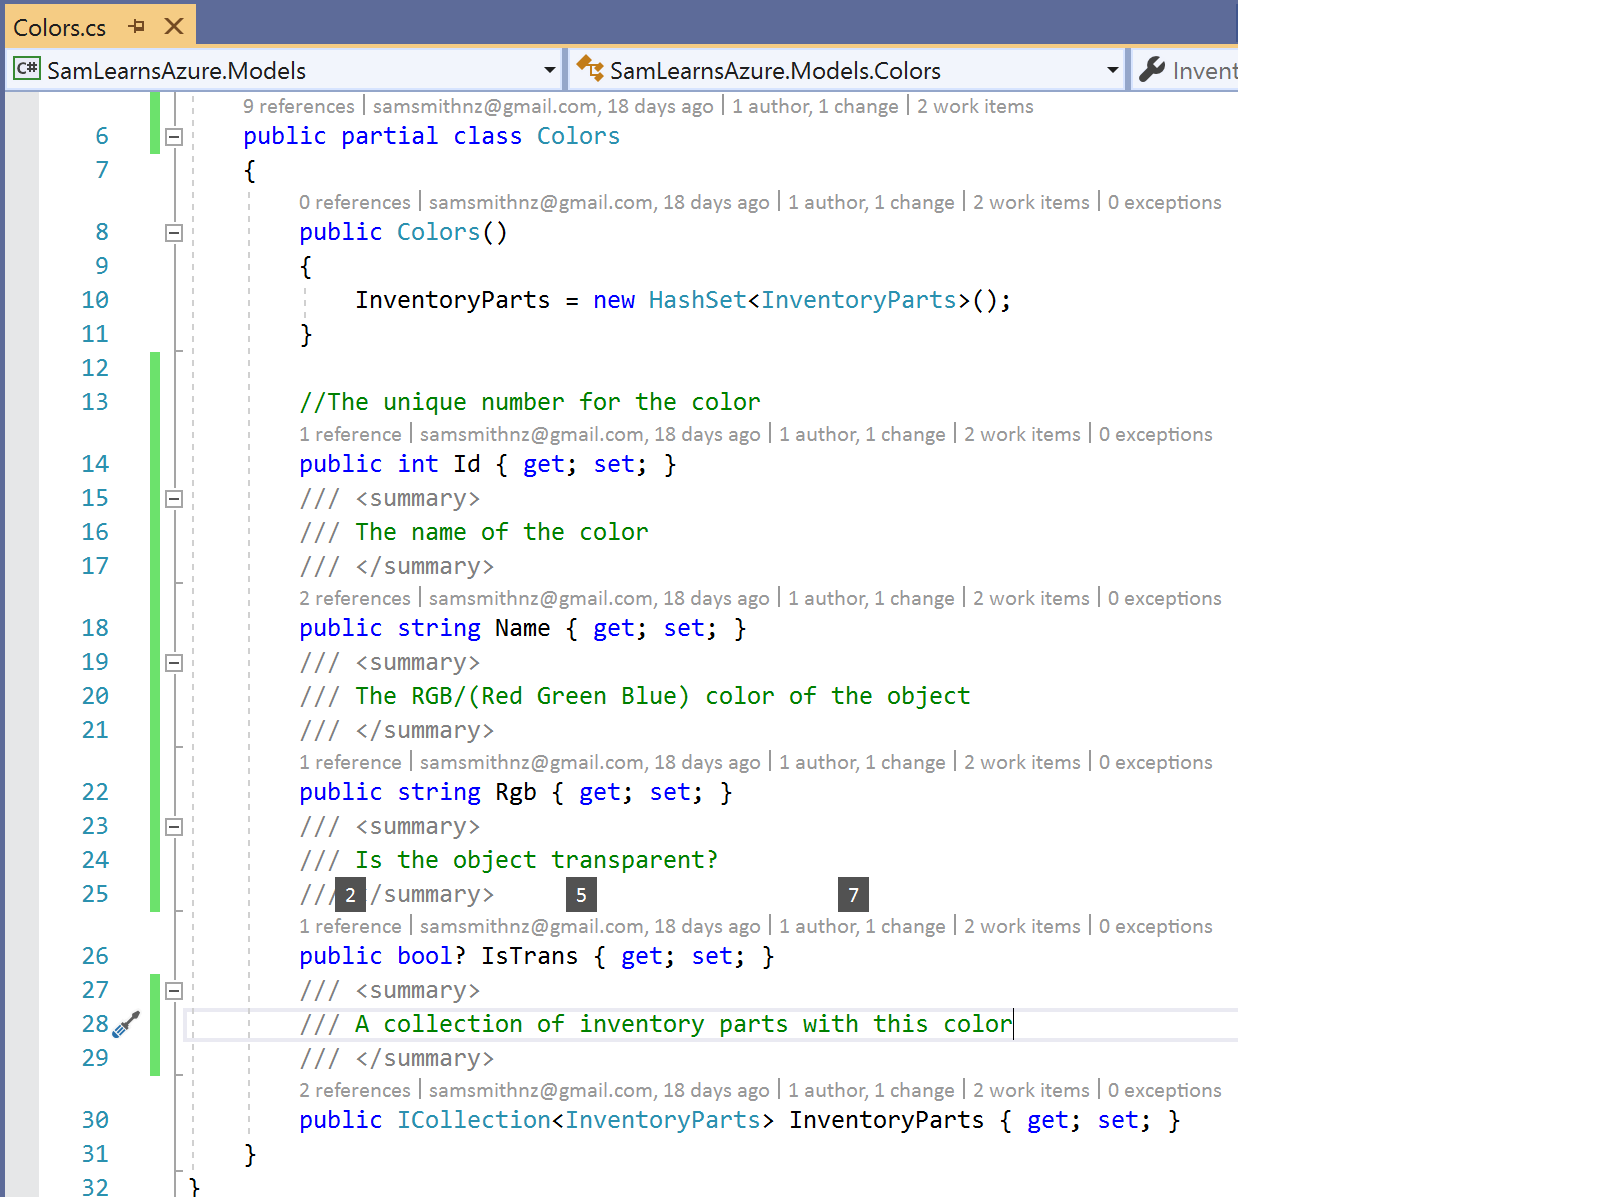
Now when we access these members we can see contextual documentation for these values, that help explain their meaning and purpose.

Resolving the FavIcon.ico error for a web api
While looking at the console, we noticed that this error kept appearing in Chrome. We decided to resolve this here in the Web API too.

We searched the internet, until we found a nice neutral, free icon, saving it as “favicon.ico” to our web service “wwwroot” folder. That is it! The problem is fixed.

Updating the pull request and monitoring the build
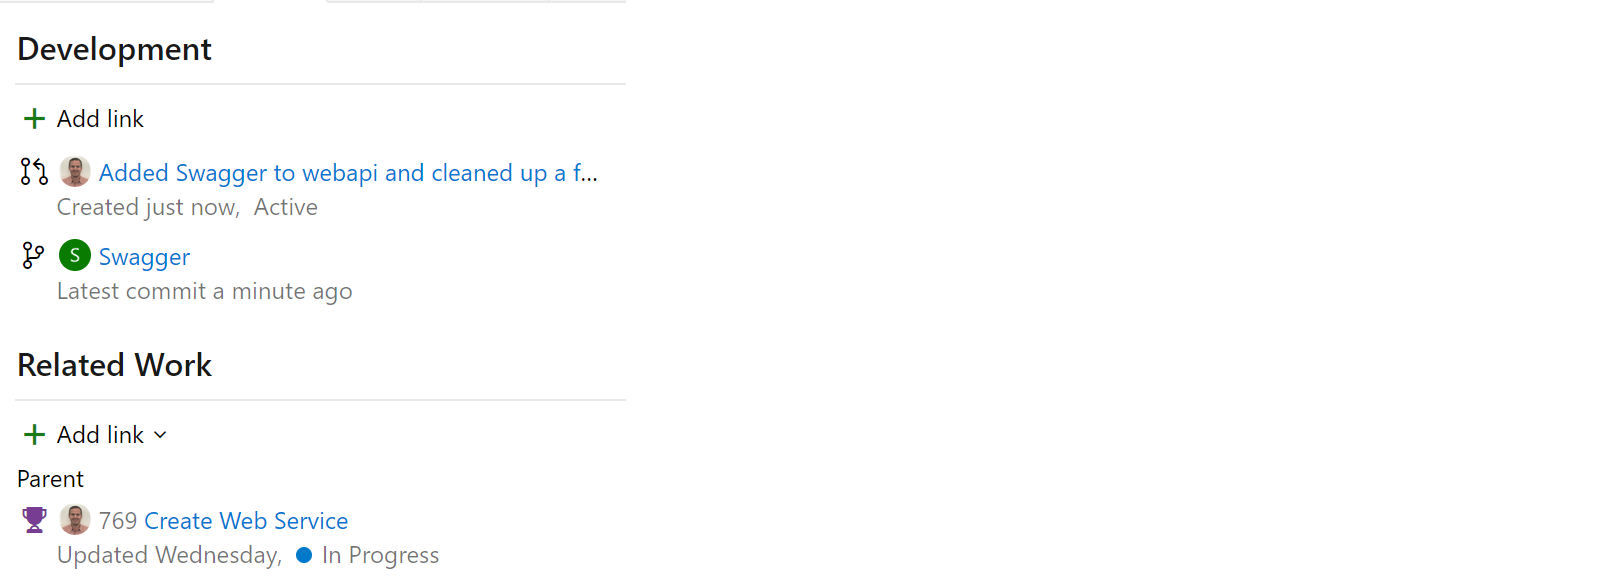
Of course, we wrap up by committing the code, creating a new Pull Request. In our work item, we can see this progress in the “Development” section.
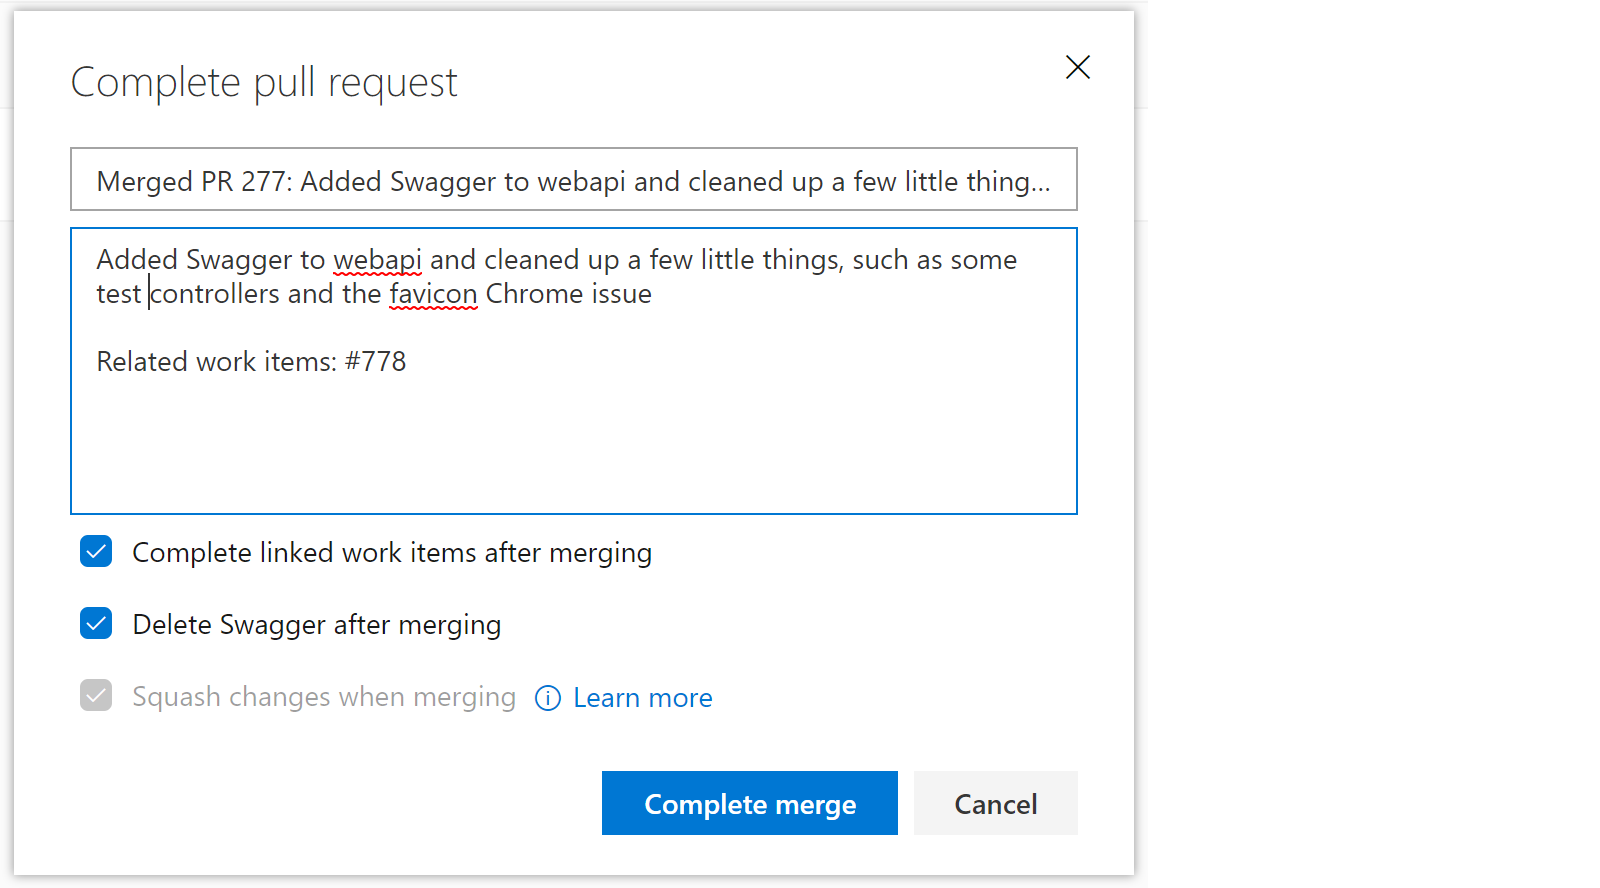
With the build complete, we complete the Pull Request, also ensuring we check the box to complete the work item, allowing our code to merge and release – we have documentation!
Wrap-up
This was a nice quick task, and we have successfully added Swagger and documentation to our web service. While we don’t need to, it’s also possible to brand and update the documentation if required, by editing the styles of the Swagger design.
References
- Swagger overview: https://docs.microsoft.com/en-us/aspnet/core/tutorials/web-api-help-pages-using-swagger?view=aspnetcore-2.1
- Getting started with Swashbuckle in ASP DotNet Core: https://docs.microsoft.com/en-us/aspnet/core/tutorials/getting-started-with-swashbuckle?view=aspnetcore-2.2&tabs=visual-studio

One comment