

Today we are going to optimize our SQL data access, using Redis to cache our data calls. Caching data typically works best on static lists of items that don’t update often – such as a list of countries or colors. Data that does update often – such as stock prices or inventory levels, are not great candidates for caching. However, these rules are fuzzy and depend on your situation – you can still, for example, cache a stock price for a very short amount of time – say 5-10 seconds, or even a few minutes, if the end users don’t require real time data. This is really about data classification and assigning the correct timeout to the correct data. There are two main Redis architectures that we usually consider:
- In the first, and the one we will use today, we check the cache for data. If the data is in the cache we will use it, otherwise we will go to the database to get it, and then store it in the cache for a certain amount of time – in our case probably a couple of hours for product info, and a couple of minutes for user info. This one is simpler to setup, but adds more code to our data access, which must now check the Redis cache and then if required, the database. Additionally, if the user information is updated, they may have to wait a few minutes to see their changes reflected on the website.
- In the second, we have a separate job that is syncing the Redis cache with the database. If the database is updated, this job also updates the Redis cache. This obviously simplifies much of our data access, as most calls will only have to access the Redis cache, but the downside is that if there is an outage, some time may elapse before the cache has been repopulated. Additionally we now have a new job to maintain to keep the data up to date.
Creating the Redis Cache
We start with the process we are very familiar with, starting in Azure Boards and creating a new branch for our Redis item, then opening that branch in Visual Studio. We start by adding Redis to the ARM template, and then publishing it to our dev environment. From all respects, a Redis cache is a database: we connect to Redis with a connection string, we extract and save data into it as a database, and Redis is considered to be part of the database and AI domain. Where Redis differs is that the data is meant to be temporary – Redis should not be used for long term data storage.
Below we are see the next ARM template resource we create for the Redis cache.

Once created, we also save each of the access keys from the new resources to put into key vault – using the “Primary connection string”.

Next we add a new NuGet package to our web service project, “StackExchange.Redis”. In our startup.cs, we add the Redis intialization code. Note that in the screenshot on the second to last line we have “GetDatabase(0)”, the 0 is not required as a parameter, as we only have one database.

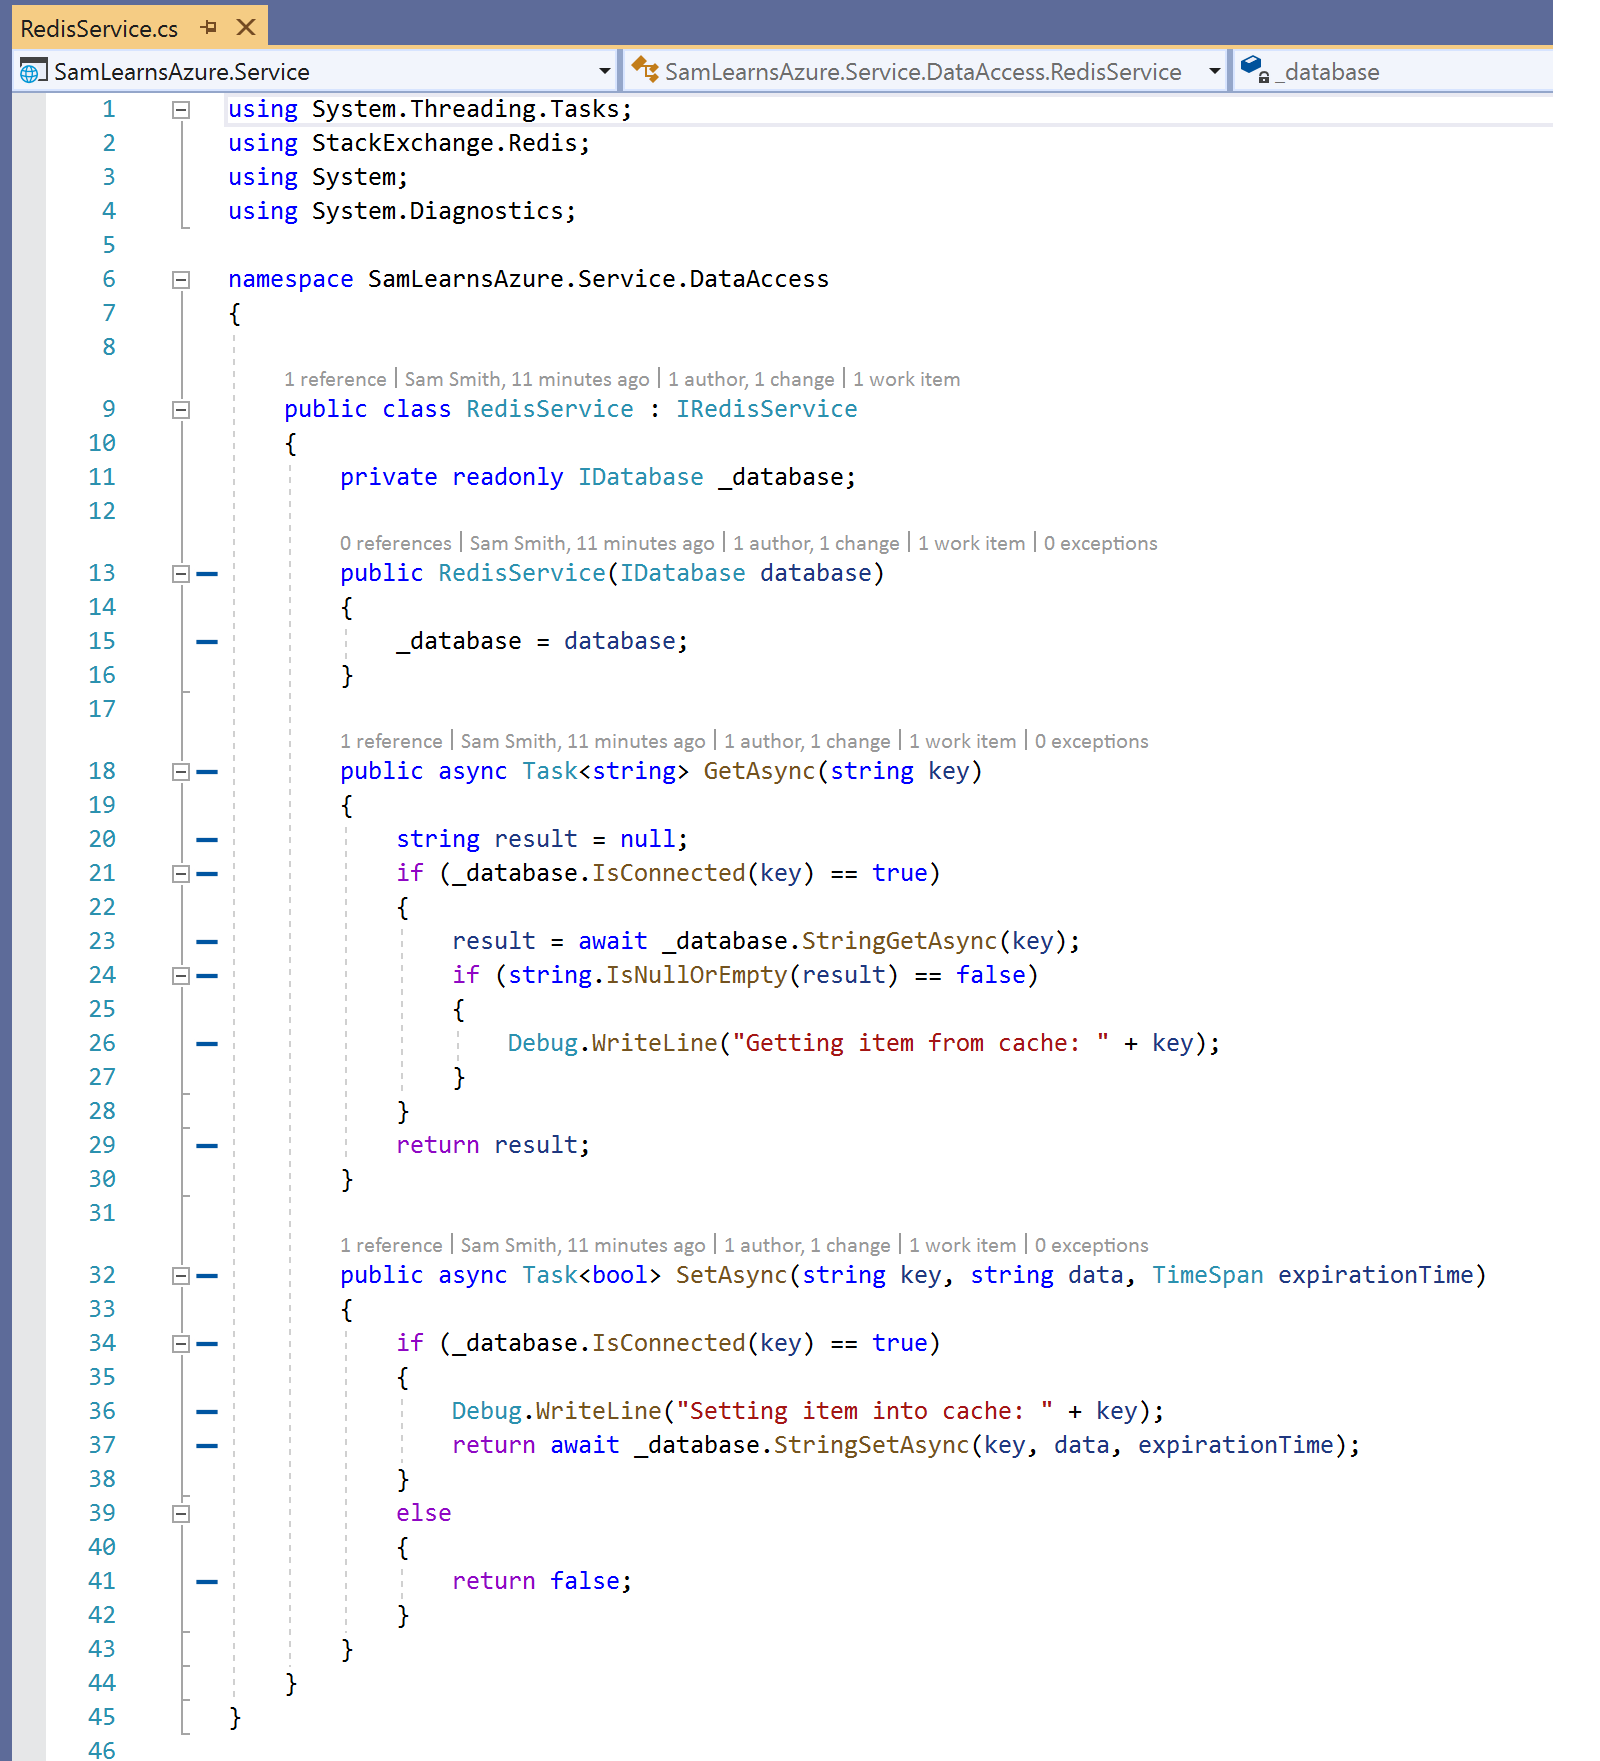
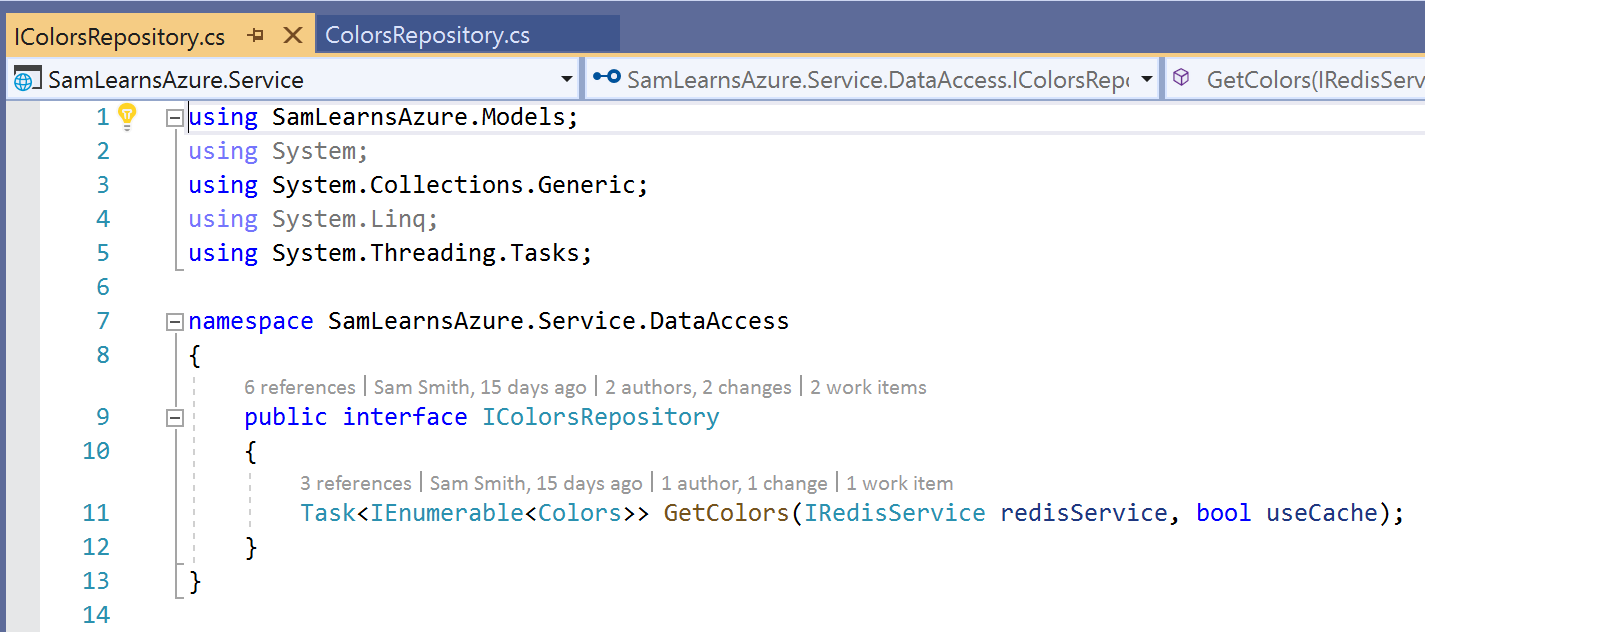
In our “DataAccess” namespace, we add a new “IRedisService.cs” interface. In this interface we are going to define two simple functions to get and set JSON data from Redis.

Then we create our Redis service class, fleshing out the interface, initializing with a connection to the Redis database, and then getting and setting the string data in the Redis database. This is the basic Redis data access, as Redis stores most data as in “Key Value Pair” format, where there is a key, (a string representing the data), and then the data, (another string).
Next we start to edit our data access classes in our web service. To help with testing, we are going to add a “useCache” parameter to our function, so that we can use/not use the cache if required. This will really help with out testing
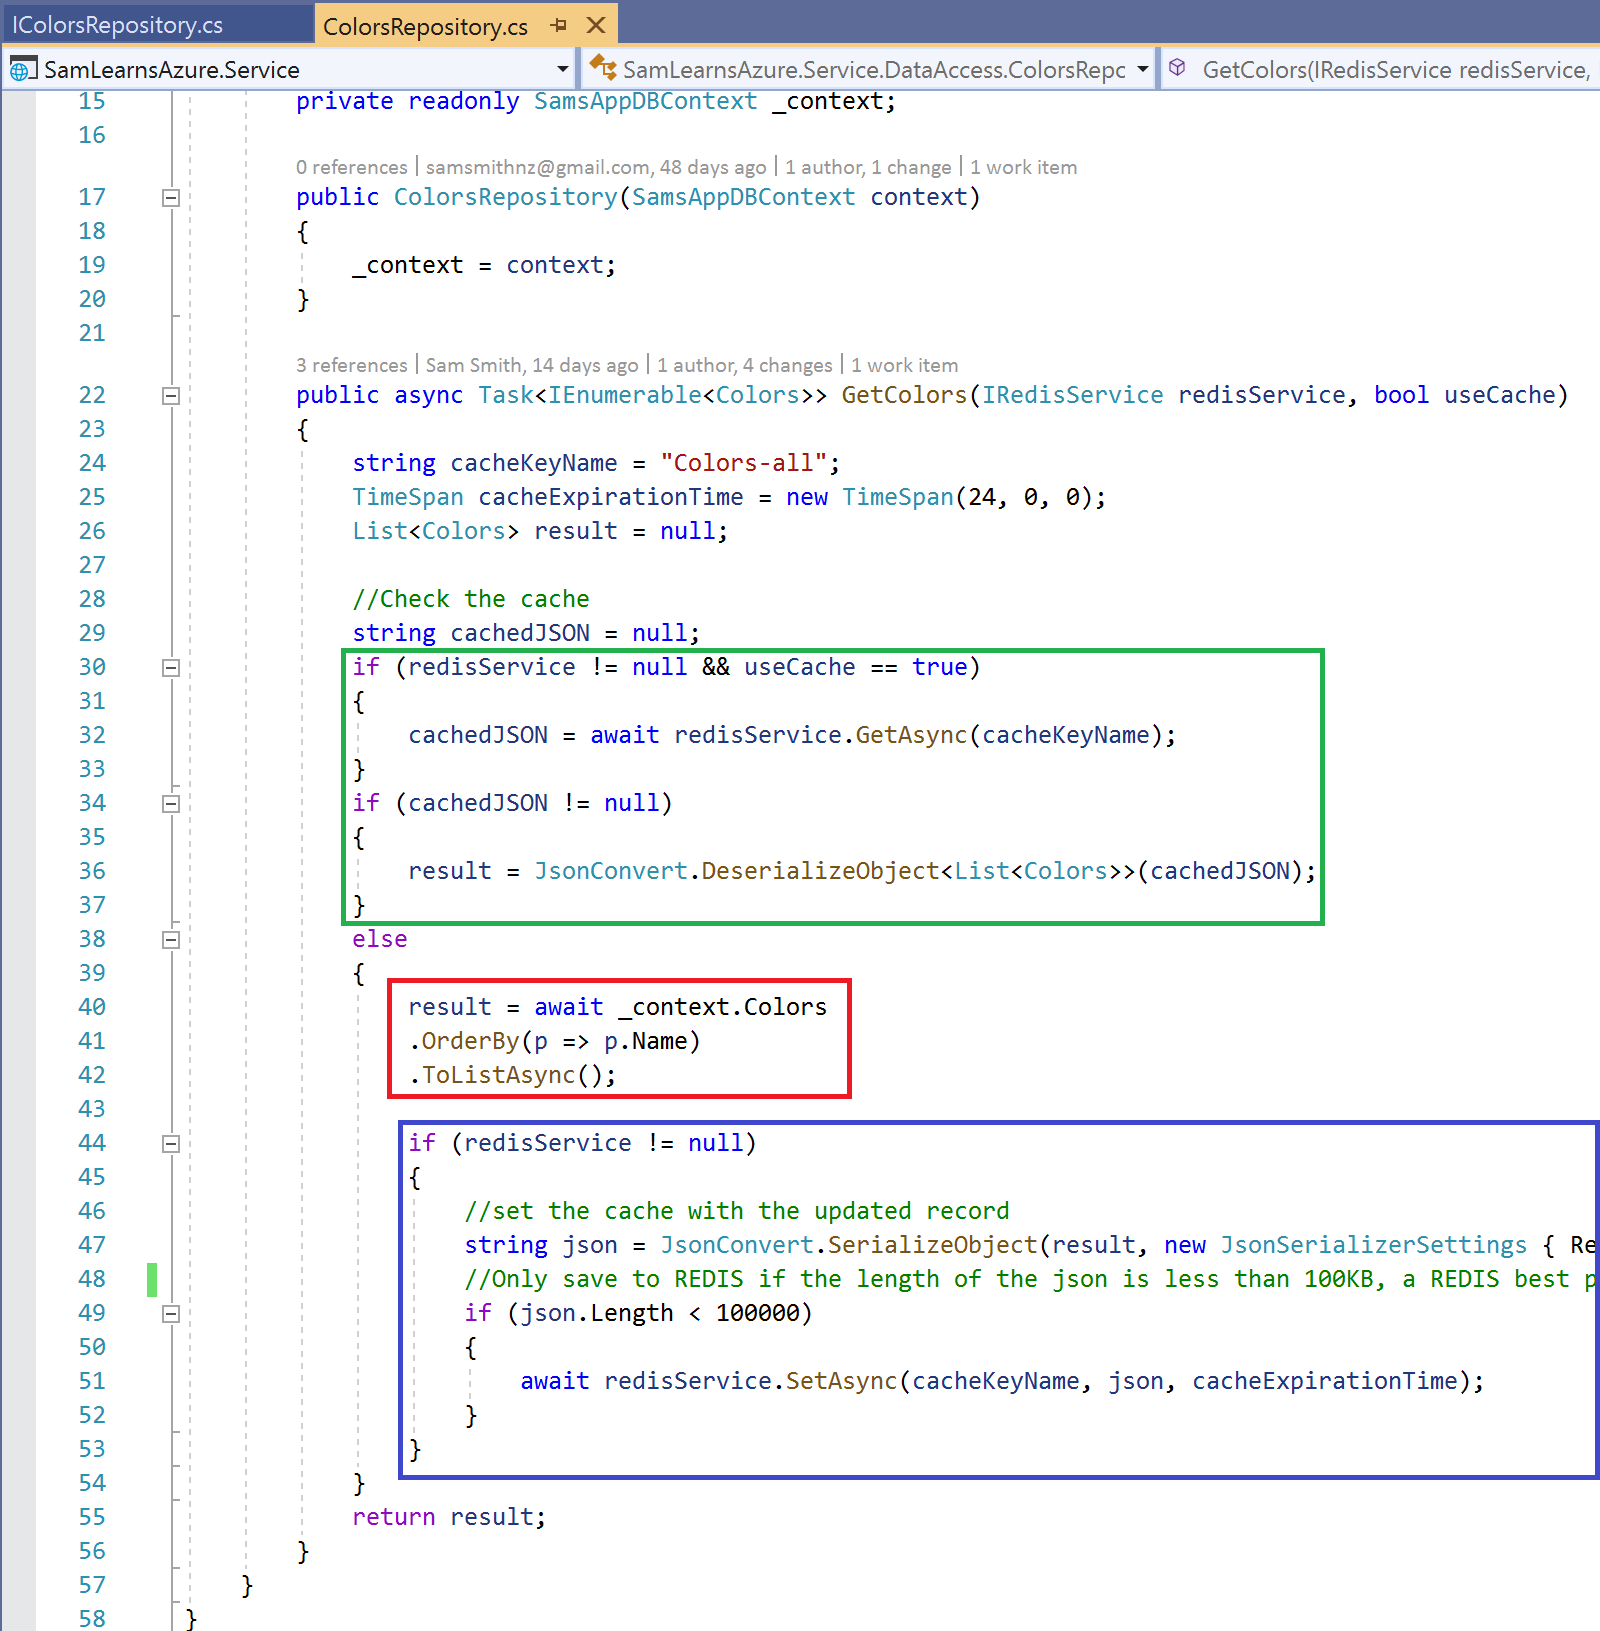
Now we start to edit our data access to access the cache. There are three sections highlighted here
- In green: we check to see if we are using the cache, and if we are, we check Redis to see if our data is present. If we can find it, we get it and deserialize the string to convert it to the correct data type – in this case: “List<Colors>”.
- In red: We don’t have the data in Redis, so we extract the data from the database
- In blue: Now that we have the data, we serialize the JSON to a string and then save the string to the Redis cache, using the key defined on line 24. Note that best practice is that we don’t store documents in Redis larger than 100KB, so we are adding a check here to ensure this doesn’t happen.
Finally, we update our integration tests, and create “with cache” and “without cache” versions of our tests. This allows us to compare performance using Redis and not. Running them side by side, we can see a slight improvement , the call to get colors with the cache runs in 0.889s, verses 1.228s without the cache. (note that the test explorer rounds the times to the nearest second when it’s over 1s). While this doesn’t seem like much in this example, imagine this at a high scale, with thousands or millions of hits – this would really save a lot of processing time on our databases.

Wrapup
Today we setup a basic Redis infrastructure. We configured it in out ARM templates, and setup our web service data access and corresponding tests.
References
- Azure Redis: https://azure.microsoft.com/en-us/services/cache/
- Redis Caching guidelines:
https://docs.microsoft.com/en-us/azure/architecture/best-practices/caching#building-a-custom-redis-cache

One comment