

Today we are going to setup our Azure DevOps project, our first, but critical step in building our vision. We are also going to create an SPN, and setup our branch policies.
Creating the new project
In our Azure DevOps instance, we create a new project “SamLearnsAzure”. We are setting the visibility to “Public”, which is really the equivalent to a public GitHub project. In the advanced settings, we select “Git” for “version control”, and “Scum” for the “work item process”.

Creating the SPN
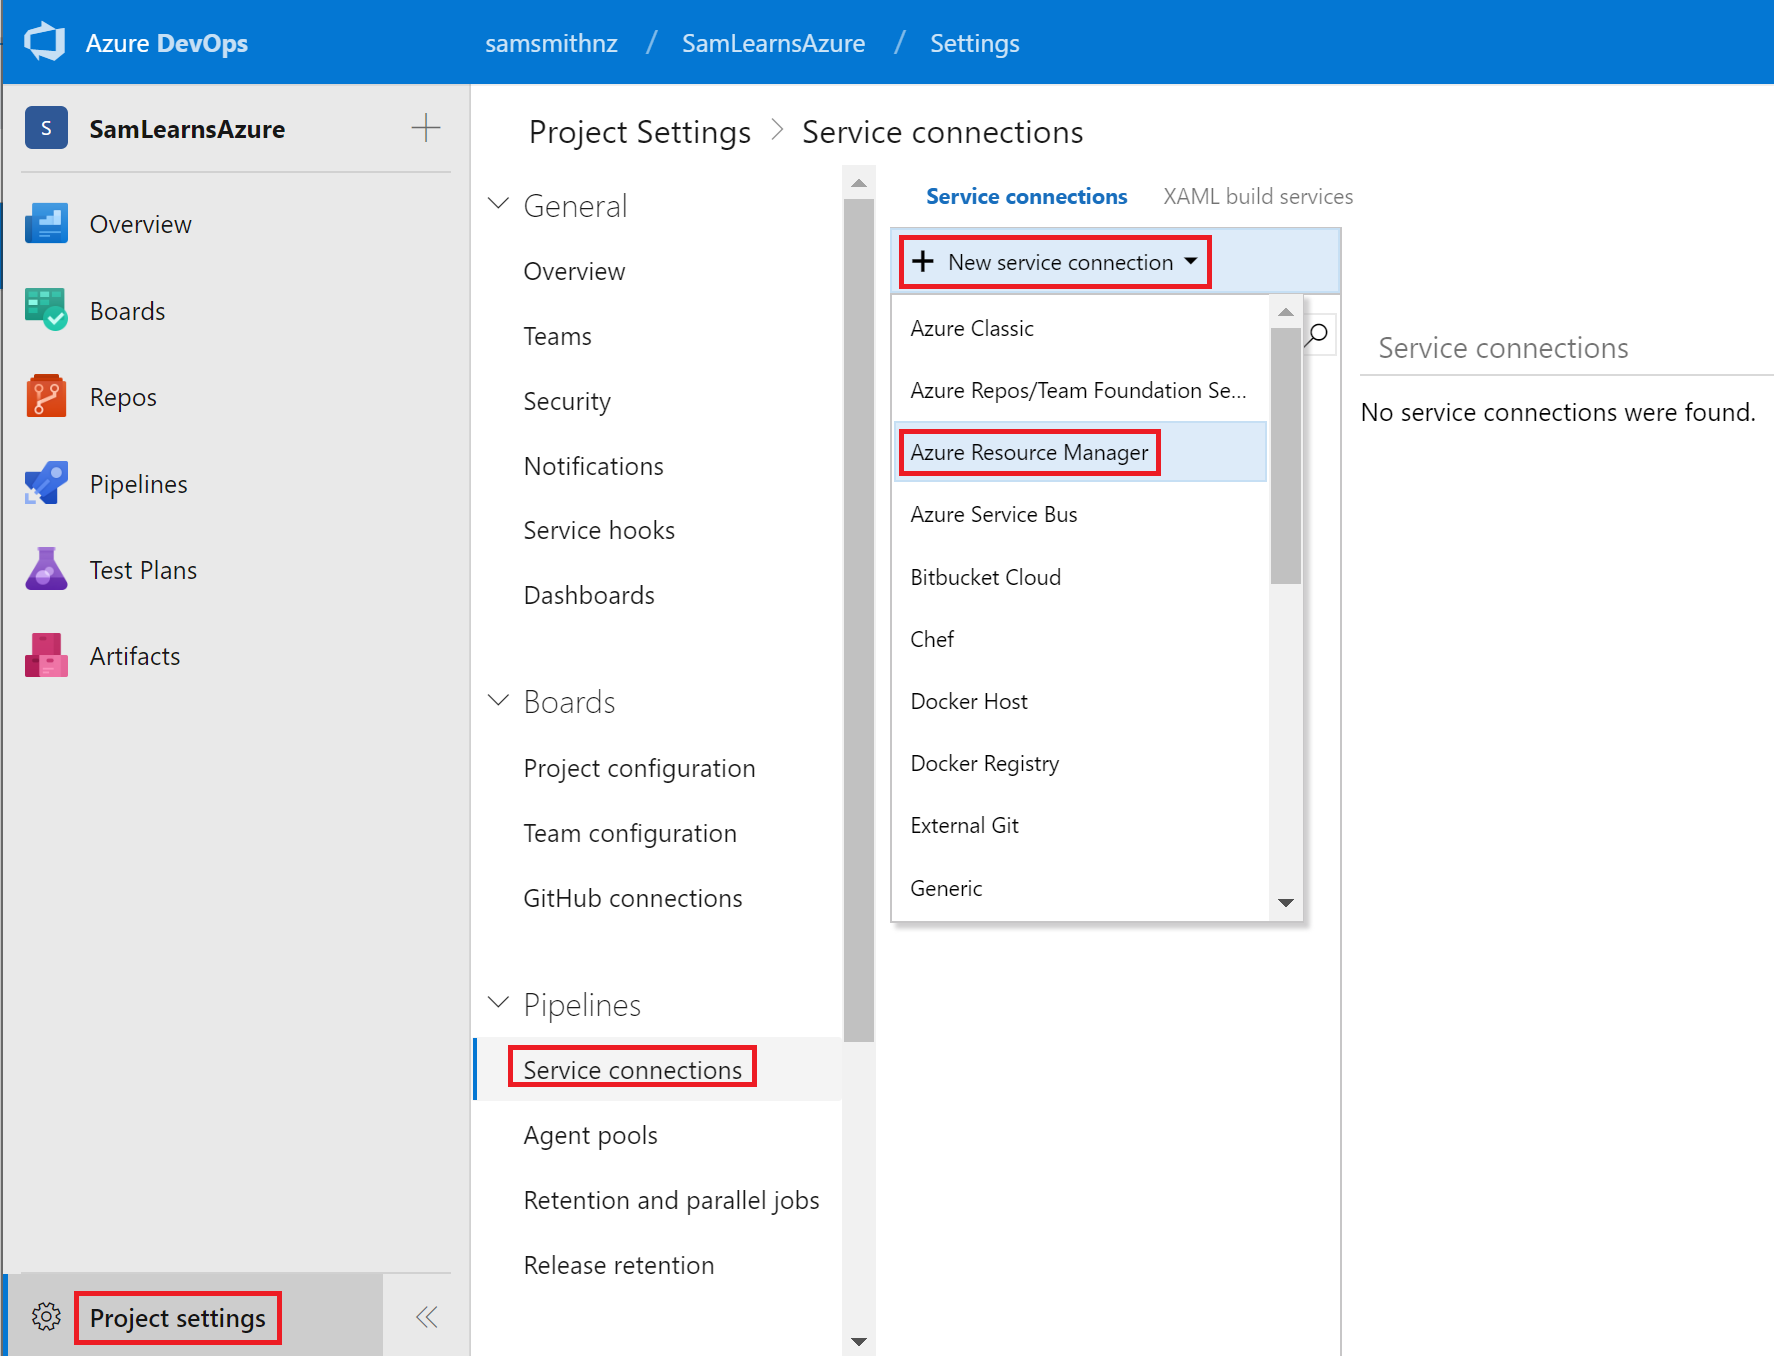
With the project created and open, we click on the “Project Settings” button in the bottom left so that we can setup the rules and options we want to use going forward. In the “Pipelines”, “Service Connections” section, we are going to create a “SPN”, short for “Service Principle Network”, which will allow us to setup authentication and access to external resources. In this case, we need to setup a SPN to access our instance of the Azure Portal we will be using. To setup the SPN, click the “New service connection” option, and choose “Azure Resource Manager” from the drop down list.
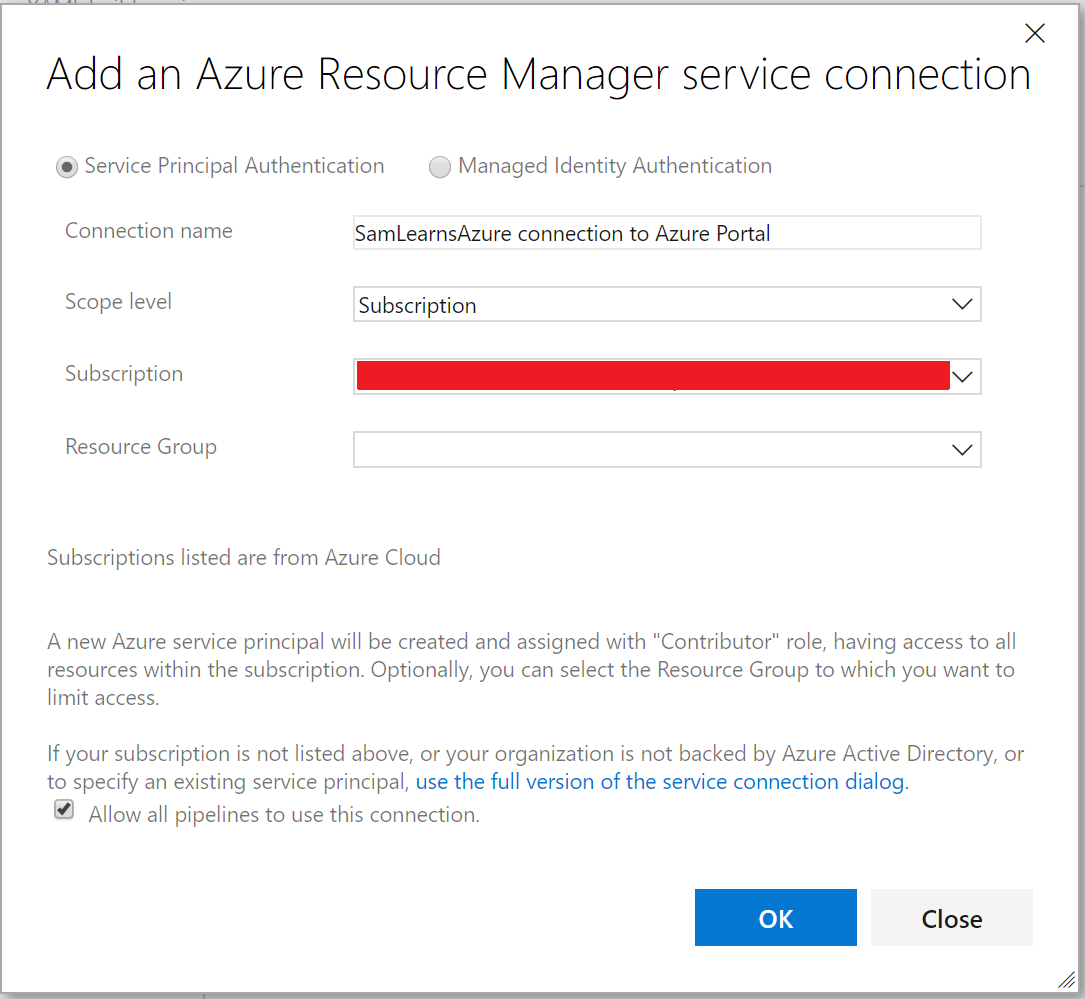
In the dialog that appears, enter a descriptive name for the SPN. You will need to have sufficient access to your Azure resources. Note that while you can create a SPN for just a specific resource group, in this case we have given the project access to the entire subscription (by leaving the resource group box empty). Clicking ok caused a verification of authentication to the external resource (the Azure Portal), which after successfully completing, created the SPN.
Initializing the repository
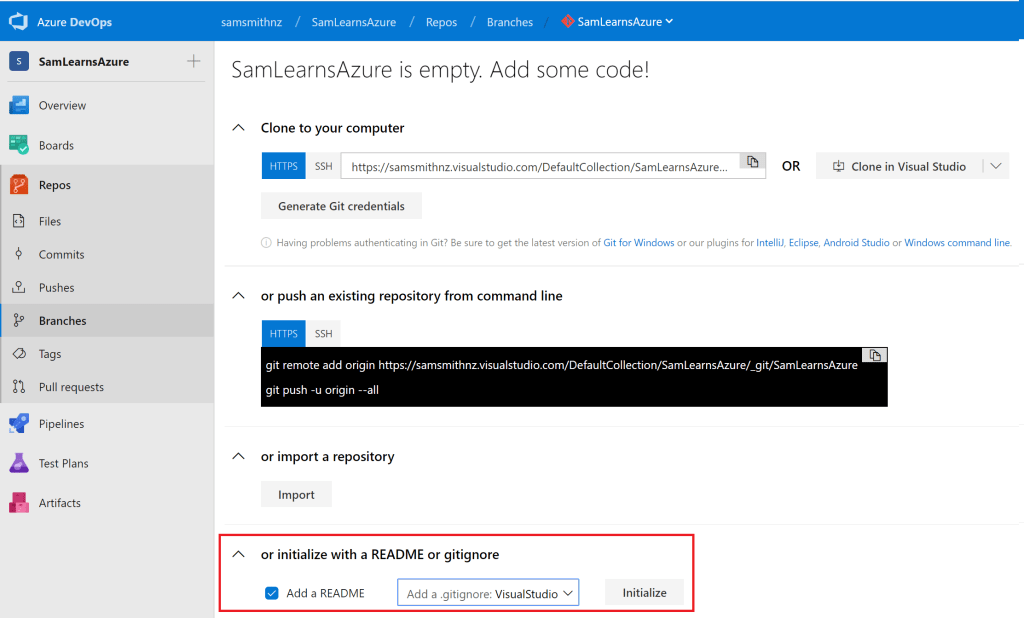
Next we are going to setup the branch policies. We first need to initialize our repository, using the fourth “initialize with READMe or gitignore” option at the bottom. In the dropdown, we select “VisualStudio” for the .gitignore file – which will use a prebuilt gitignore file to ignore temporary files that Visual Studio creates.
Branch policies
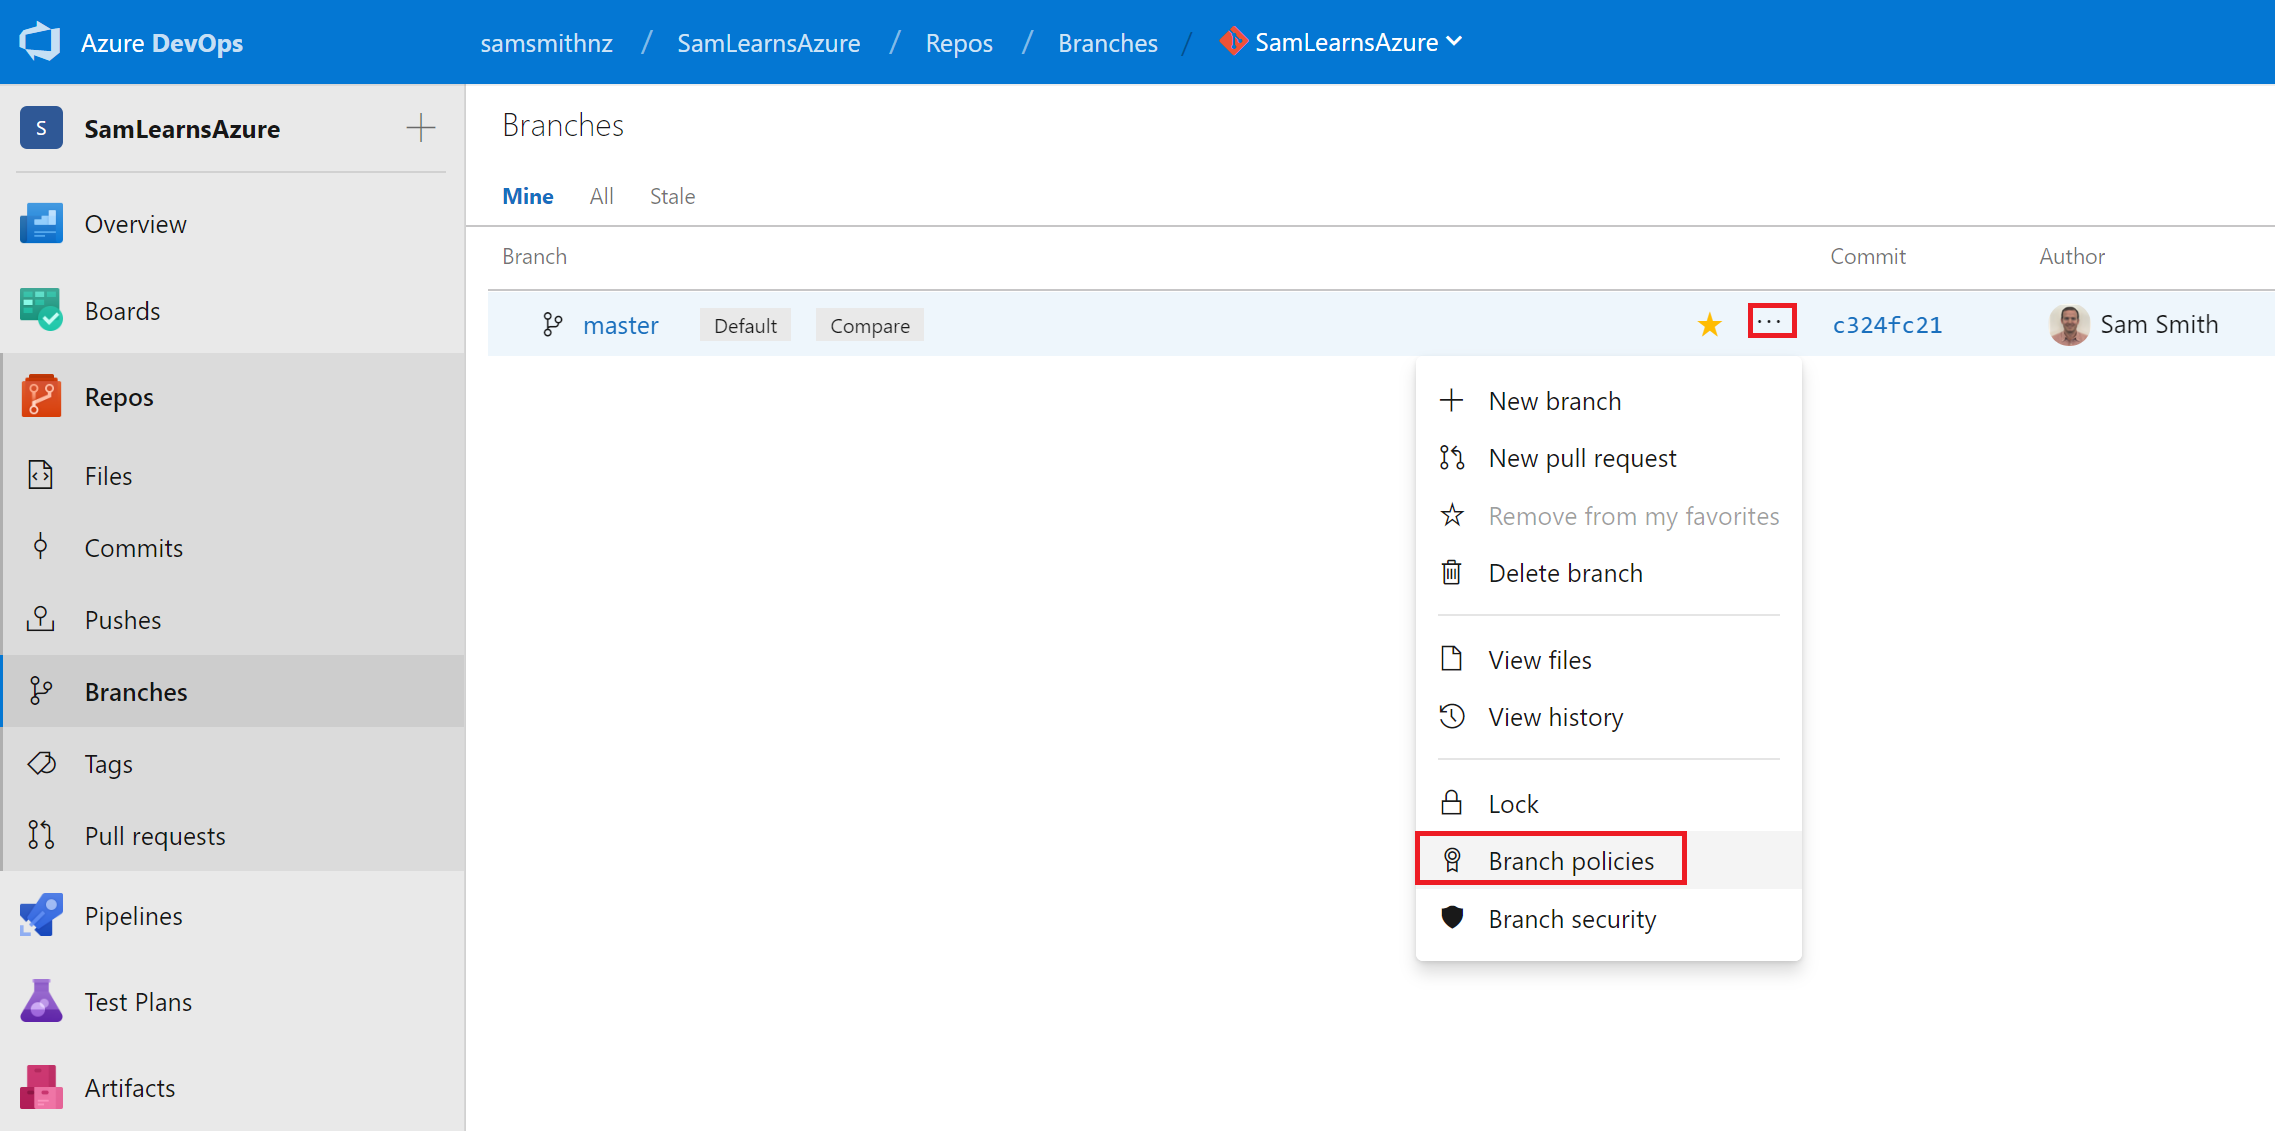
In the branches screen that is now displayed, we click on the 3 dots on the “master” branch line, and in the popup menu that displays, select branch policies. Note that you can also access branch polices from the “Project Settings” button in the bottom left.
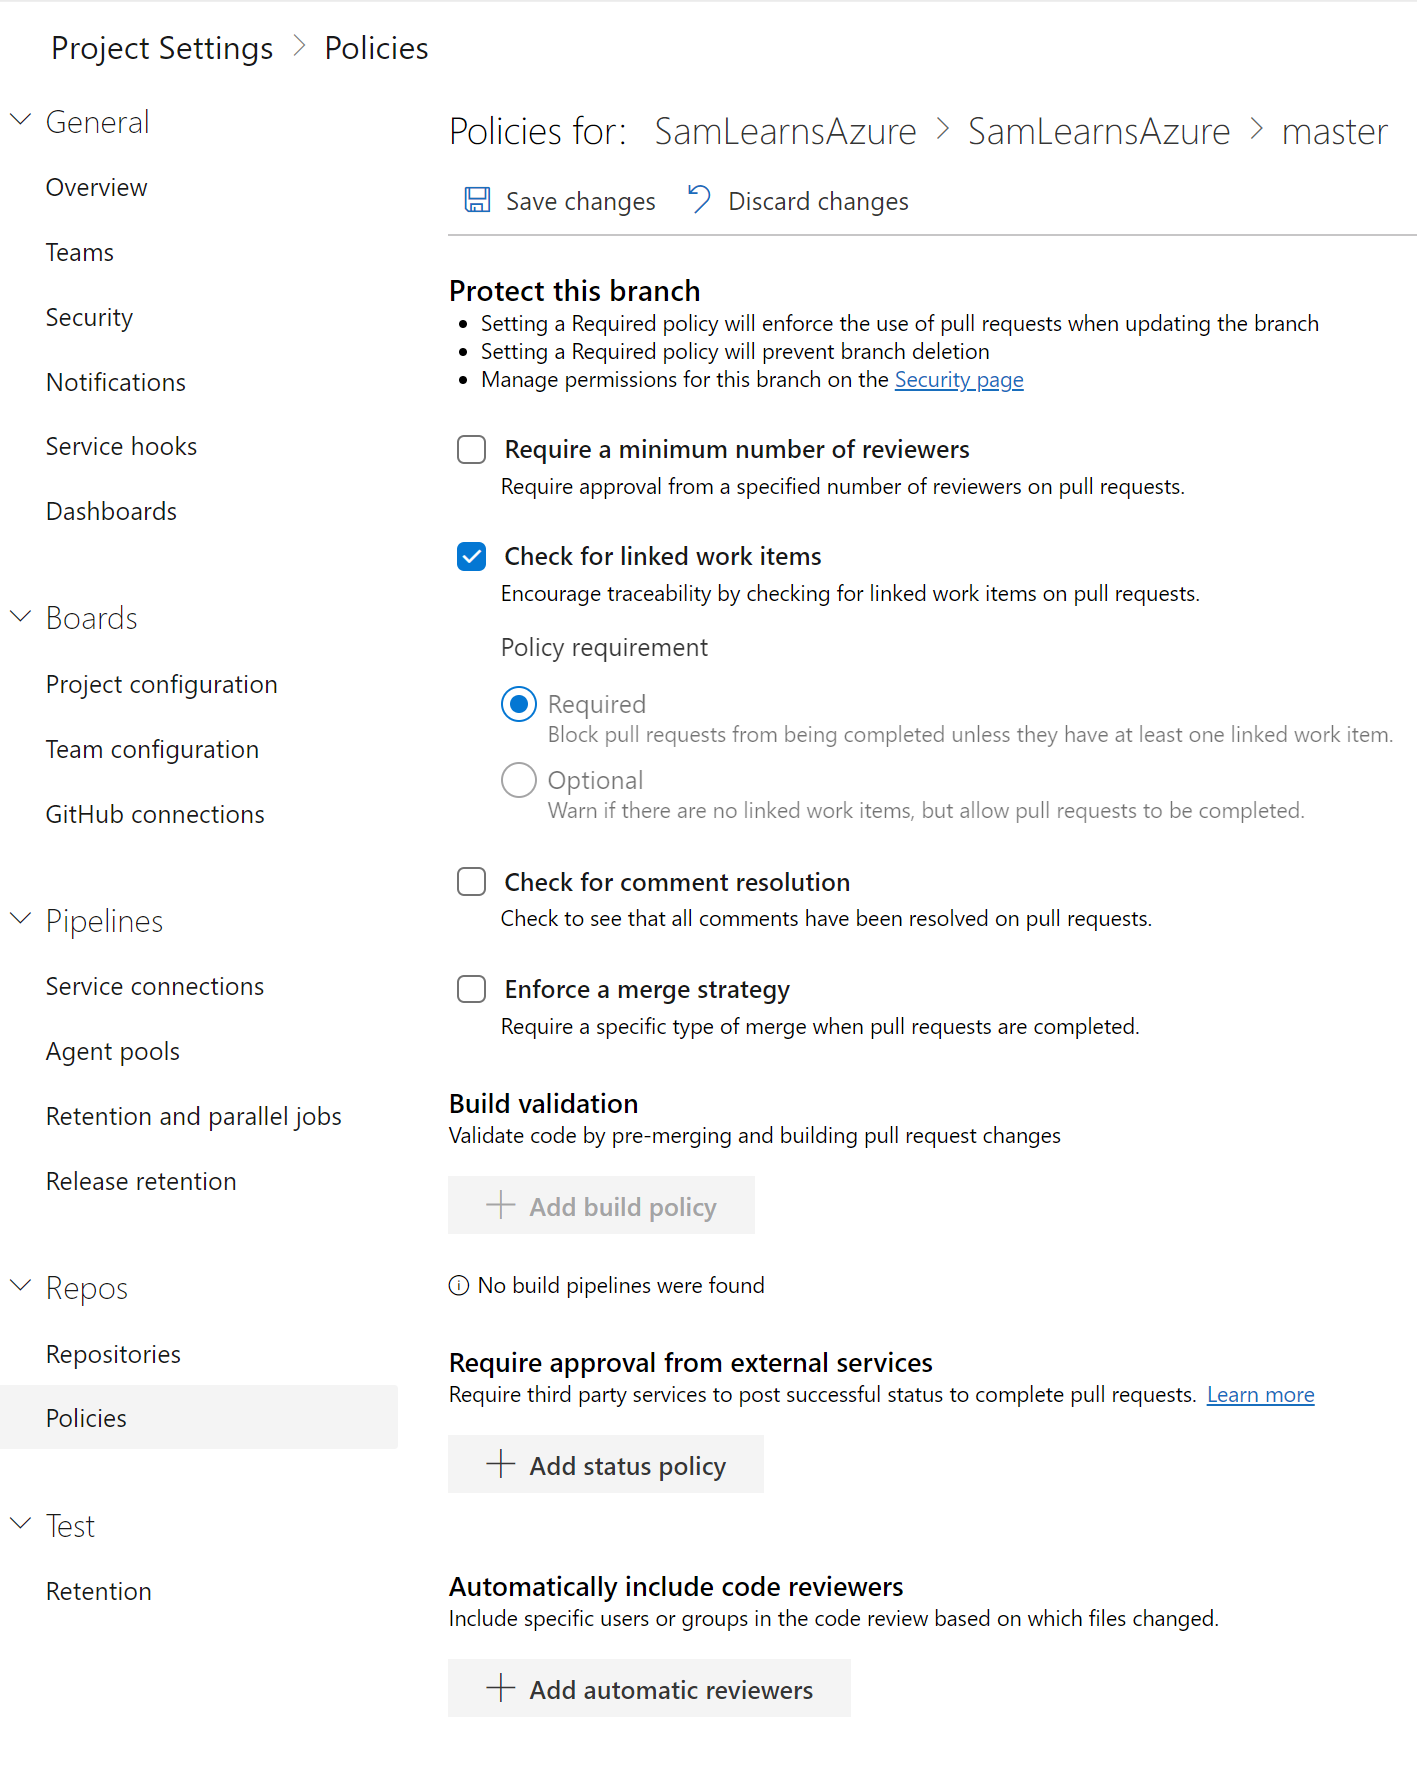
Branch policies will enforce rules on code submissions, such as the number of code reviewers, linked work items, resolved comments, successful builds. This helps us to ensure our team is following the process and “definition of done” that was agreed upon at the start of the project. When starting a pull request (a merge of a feature branch to master), the branch policies help to ensure we have the highest quality code merging into master. In the land of DevOps, where a master change could trigger a release to production, these automated rules are critical to our success. We are going to enable the rules:
- Check for linked work items (Required): to ensure that all code has a corresponding work item to track our work
- Check for comment resolution (Required): to ensure that all comments in pull requests are resolved before completing the request
- Enforce a merge strategy (Squash): always squash, to condense our commits at the completion of the pull request into one commit
- Build Validation (required): We don’t have any builds to link, but later, once we do, we will require all builds to complete successfully.
- Later, once/if we have a team, we will also add “Automatically include code reviewers”, and “require a minimum number of reviewers”, but as our team is really just one (me), these aren’t going to help the project much. In the interim, we will ask for a few special, guest code reviews from friends.
Wrapup
We’ve created our Azure DevOps project, configured our repo, setup our branch policies, and we are ready to add some work items to the boards.

One comment