

HTTPS is so important to ensure that we keep our data safe. It can also affect the amount of traffic to your site – if your site has HTTPS enabled, search indexers will rank it higher than a site with just HTTP. Today we are going to add a custom domain to our website, with a free certificate from “Let’s Encrypt”, all wrapped up in ARM templates and DevOps. While “Let’s Encrypt” certificates are free, they only last for three months, so we also need to setup a job to automatically renew these certificates periodically.
One last restriction we have is that we have one domain to play with: “SamLearnsAzure.com”. To address this, we will also setup subdomains for our dev and QA environments. The final setup will look like this:
- Development: https://dev.SamLearnsAzure.com
- QA: https://qa.SamLearnsAzure.com
- Production: https://SamLearnsAzure.com
Creating Let’s Encrypt principal
First, we need to create a new application registration principal . This principal will have permissions to create certificates and update the web application. We are going to start this with the Azure-CLI, opening up a console in the portal, and running this code to create the new application registration.
$application = New-AzADApplication -DisplayName "SamLearnsAzureLetsEncrypt" -IdentifierUris "http://SamLearnsAzureLetsEncrypt.com"

$servicePrincipal = New-AzADServicePrincipal -ApplicationId $application.ApplicationId

$servicePrincipalCredential = New-AzADServicePrincipalCredential -ServicePrincipalObject $servicePrincipal -EndDate (Get-Date).AddYears(5)
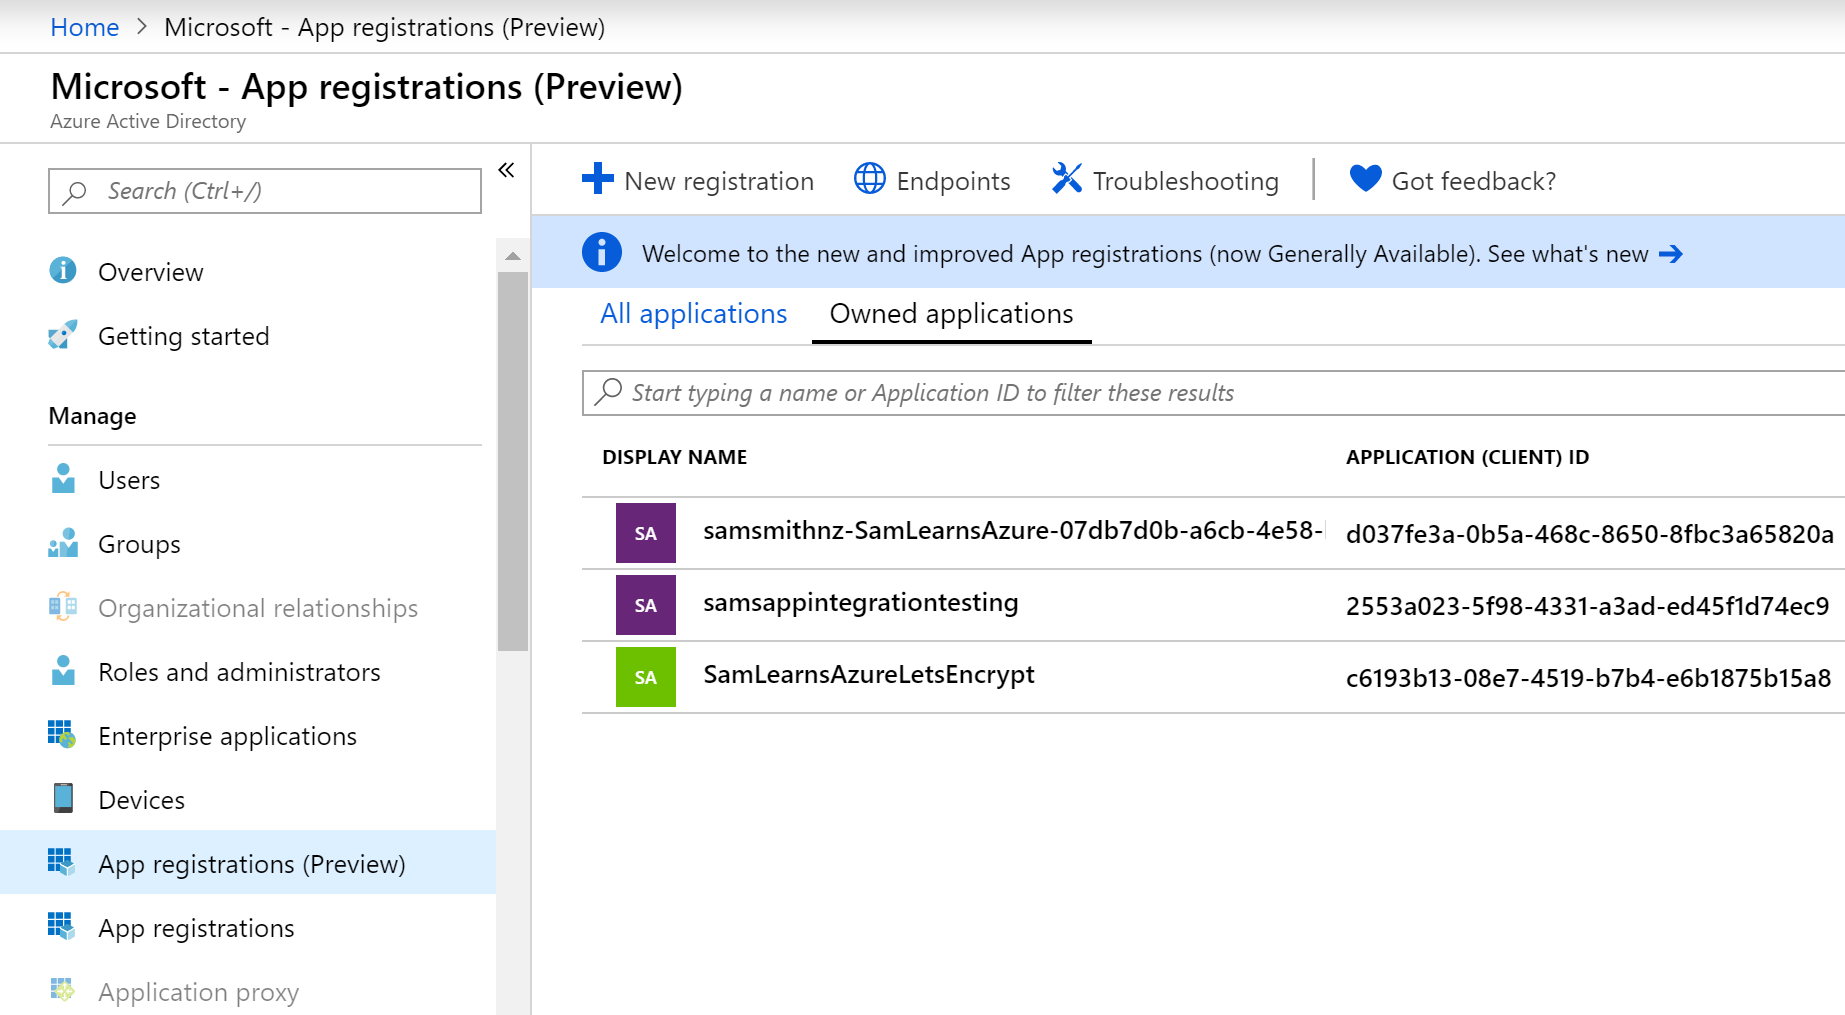
We now see “SamLearnsAzureLetsEncrypt” in the app registrations list in our active directory. We need three important pieces of information from this object.
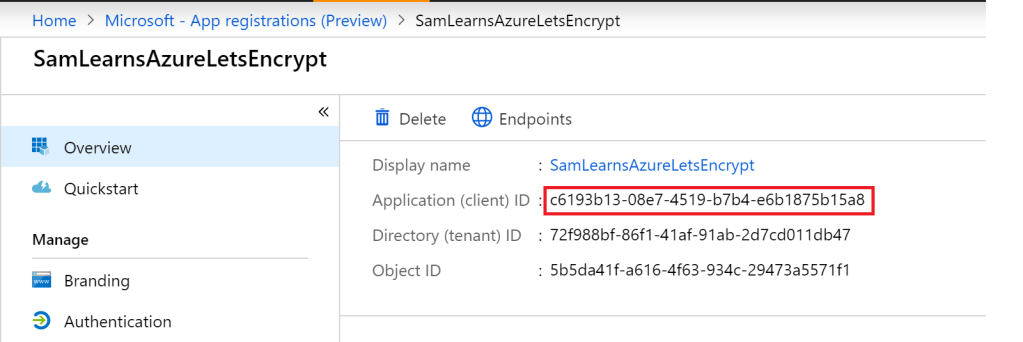
Clicking on the app registration, we can see the first important piece of information we need, the “Application (client) ID”.
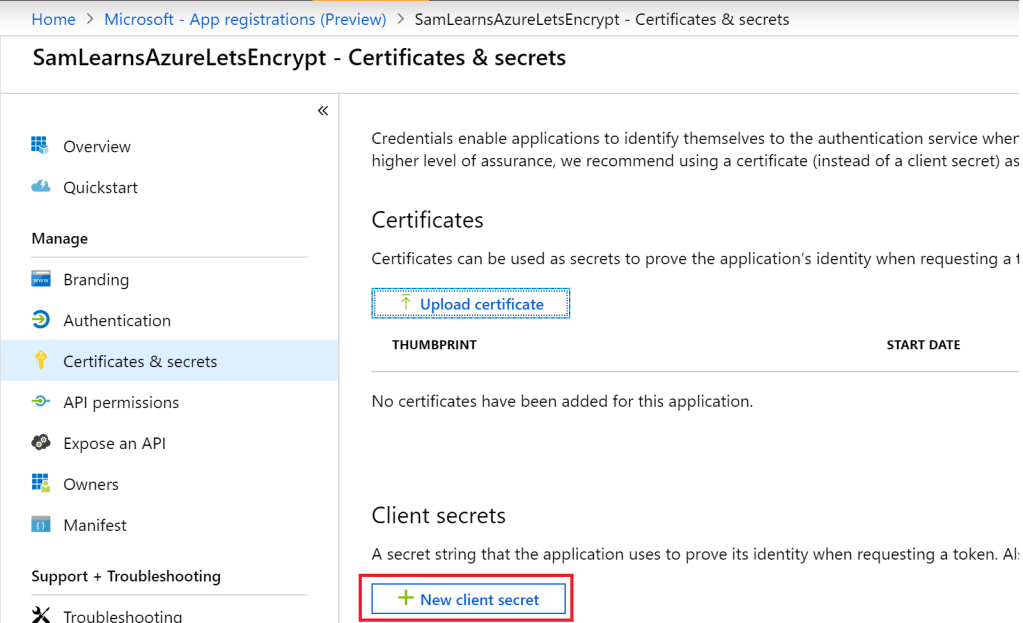
Next we are going to create a client secret, clicking on “Certificates & secrets”, and then clicking the “New client secret” button.
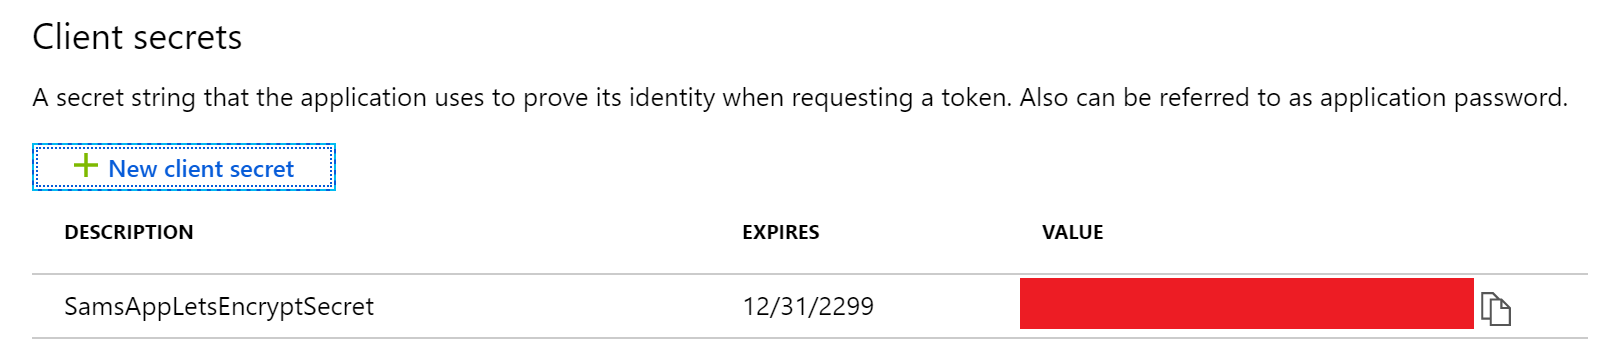
In the dialog that appears, we add a name for the client secret, we will call it “SamsAppLetsEncryptSecret”, and set the expiration date to “never”.

A new client secret is displayed – but just once! We copy this as the second important piece of information, the “client secret”
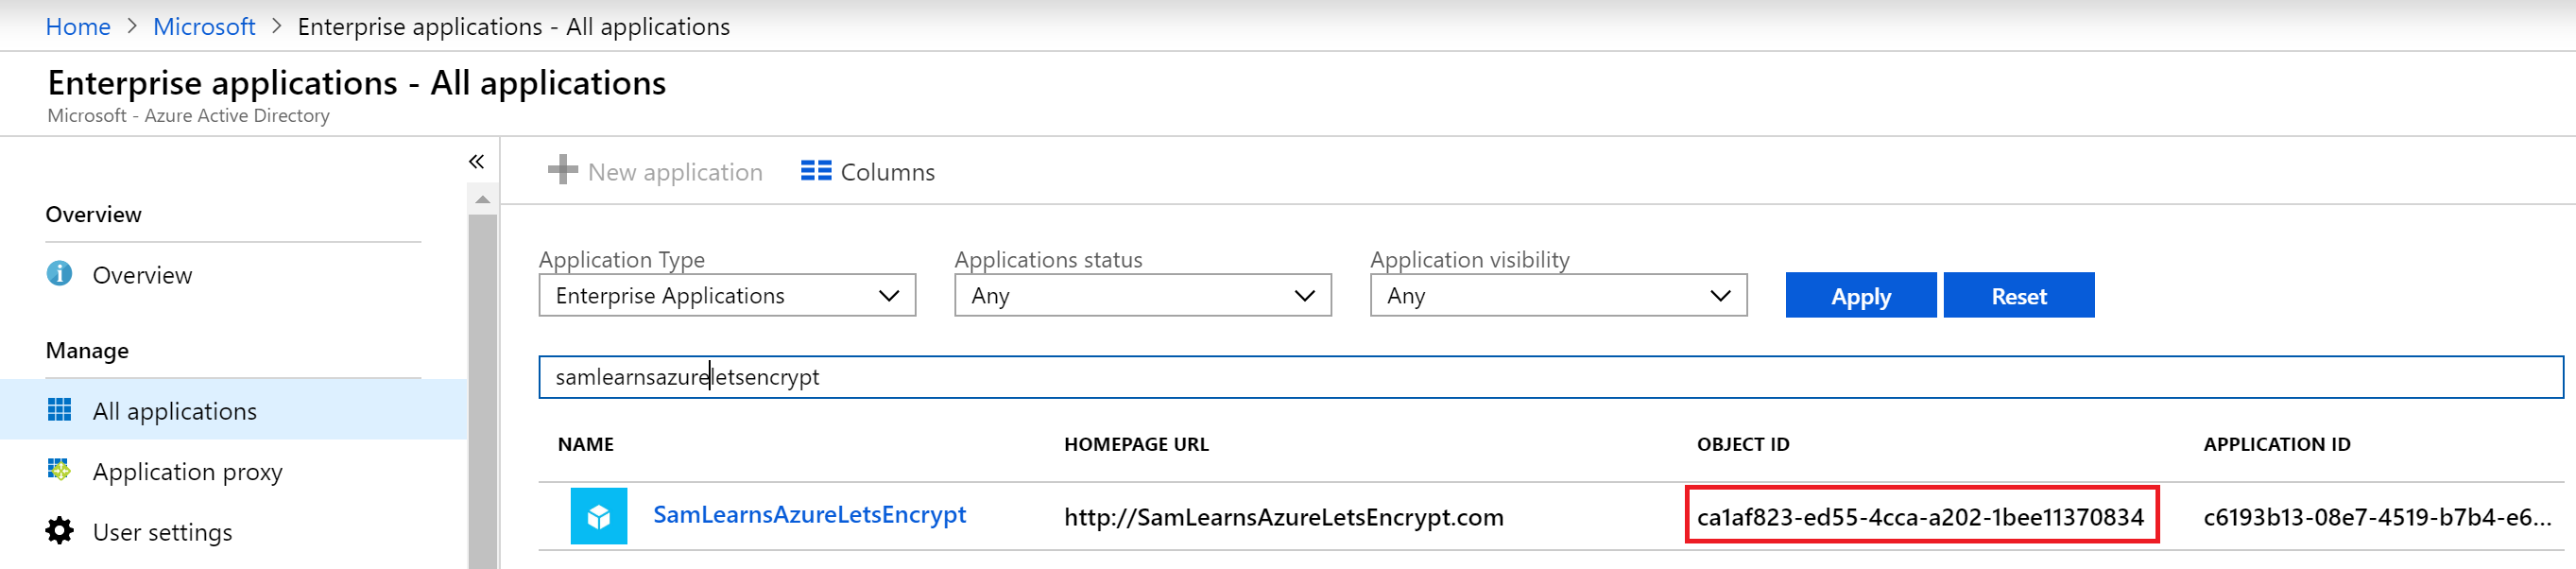
Finally, we need the object id, and for some reason, we need to get this from “Enterprise applications”, instead of the object id in the “app registrations”.
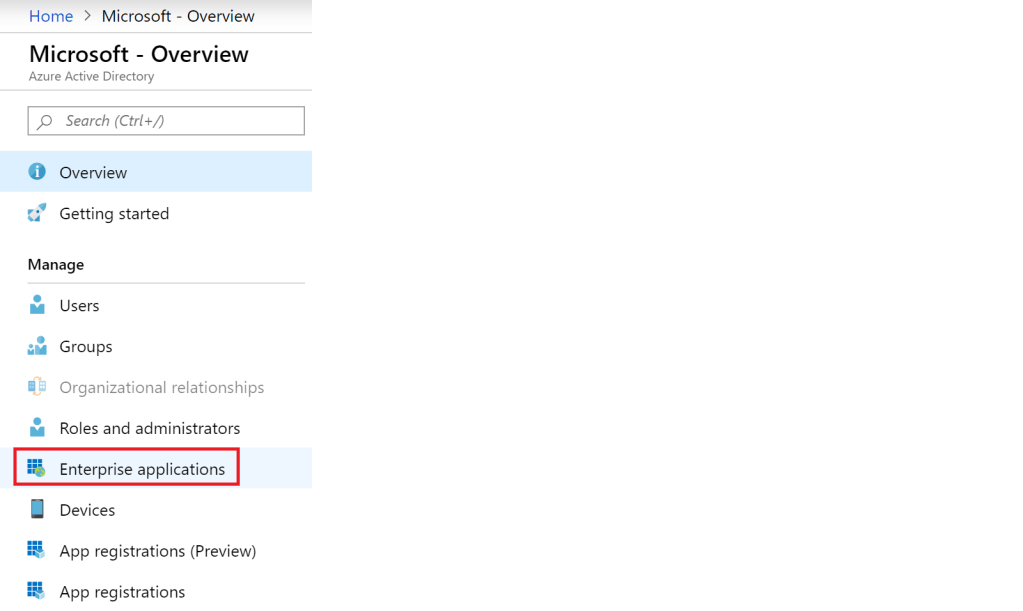
In the “Enterprise applications” list, we search for our resource “SamLearnsAzureLetsEncypt”, and make a note of the object ID, this is our third and final important piece of information we need.
Setup ARM Templates
Now that we have the data we need, we can start adding some parameters to our ARM template. We default the domain for dev, “dev.samlearnsazure.com” and create a unique id for the role assignment with the “letsEncryptUniqueRoleAssignmentGuid” parameter. Both of these parameters will need to be customized for each environment. Then we add the 3 pieces of important information we noted in the previous section, “application (client) id”, client secret, and object id. As previously noted, if you copy the wrong object id, you will find this process a lot more challenging, because the object id is the enterprise object id, not the principal object id.

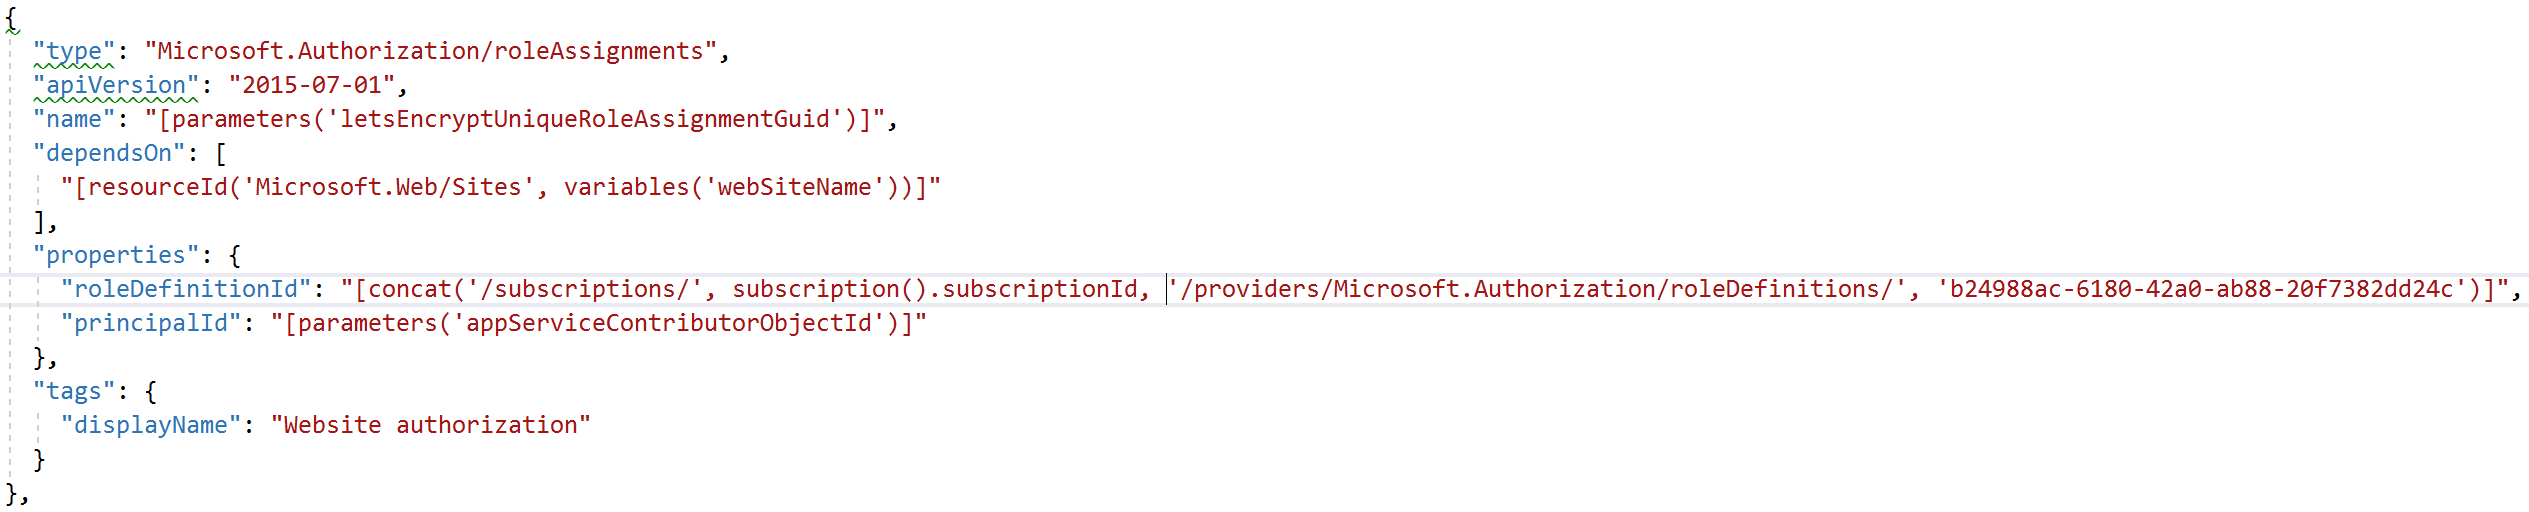
Next we add a new “role assignment”, that creates a rule for the service principal to have authorization to install the certificates. This will connect our new “SamLearnsAzureLetsEncrypt” to have contributor access to our subscription. Note that we could not find a way to limit this to just resource groups.
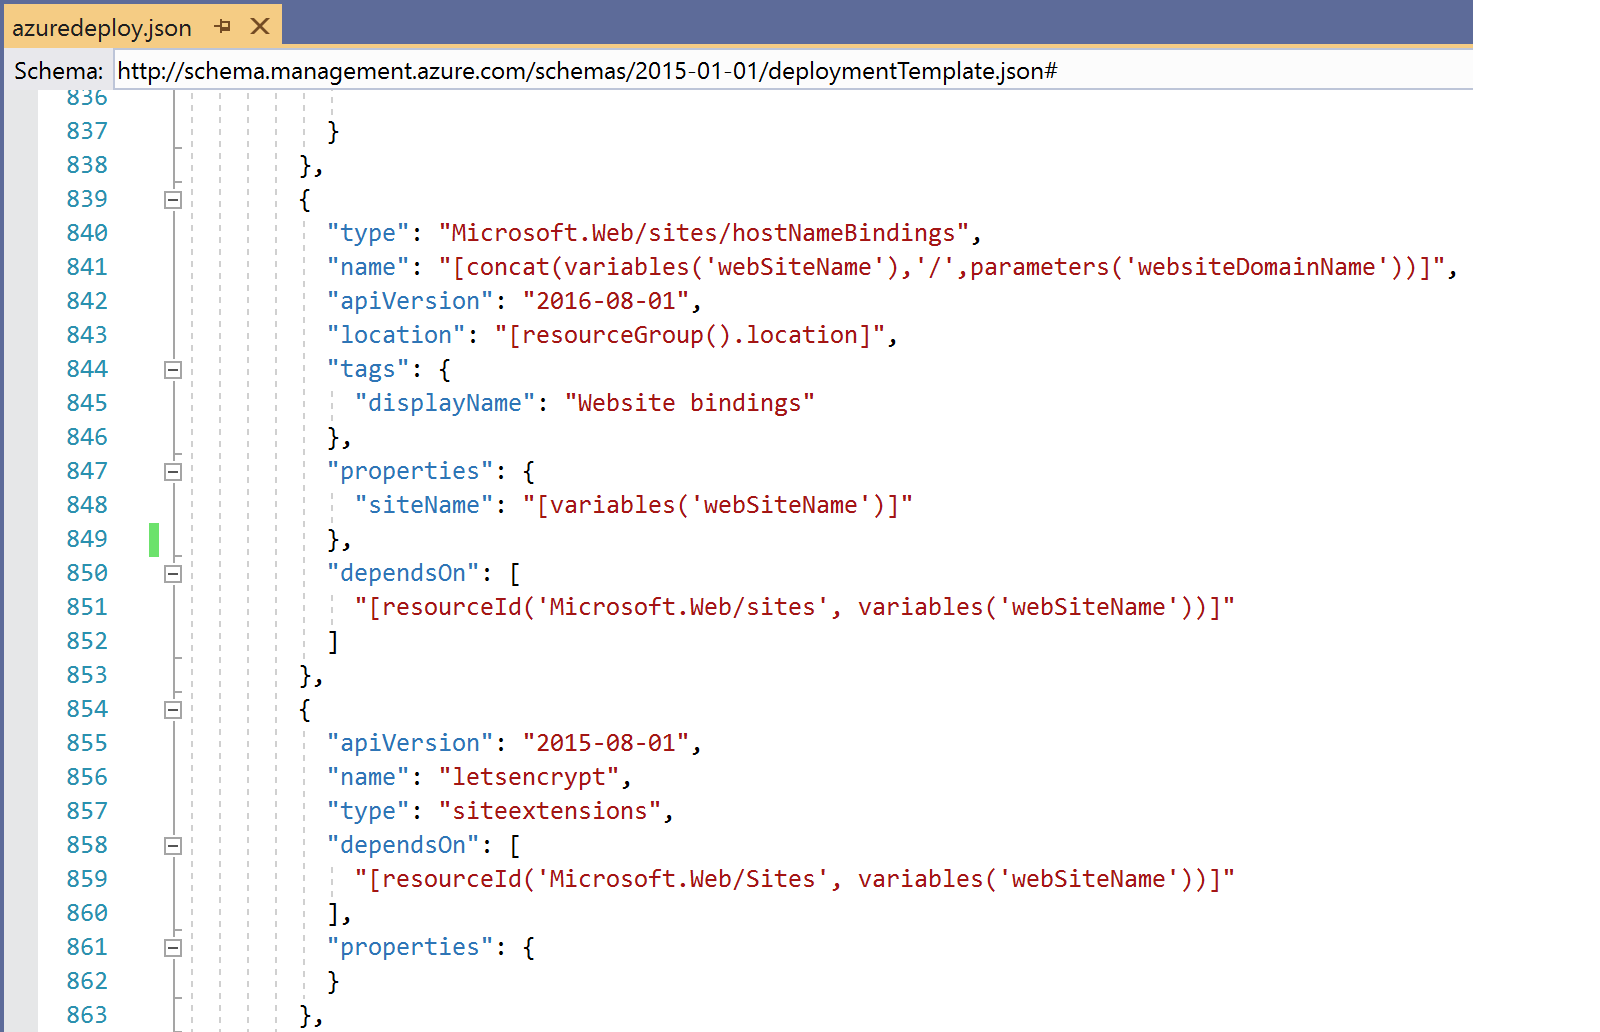
Then we add a “hostNameBindings” resource, specifying the website domain name “dev.samlearnsazure.com”, mapping it to our web application “samsapp-dev-eu-web”. We also add the site extension “letsencrypt” – which will also install the web job for us.
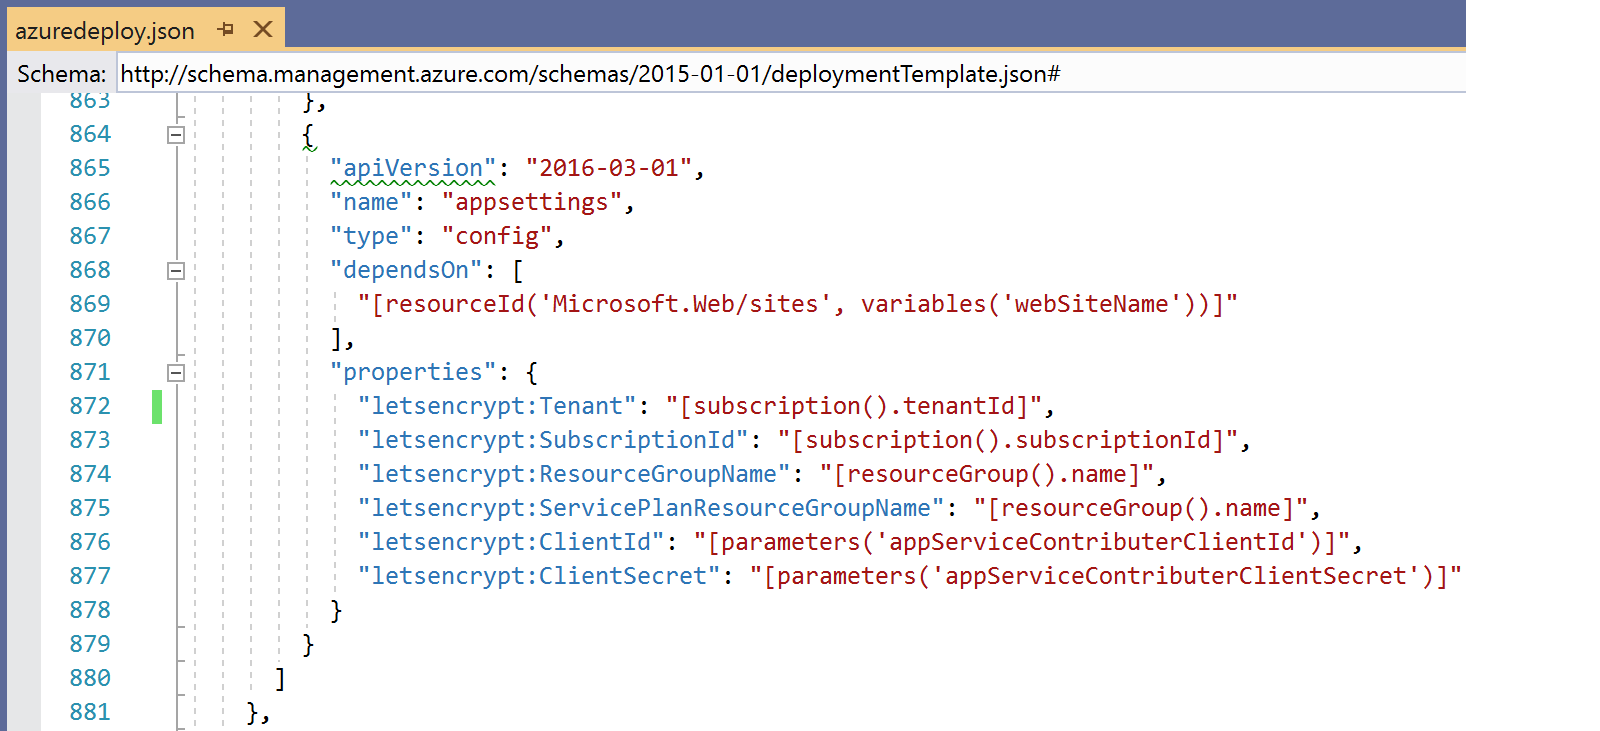
Finally, we add the application settings. Here is where we add the application (client) id and client secret parameters we setup earlier.
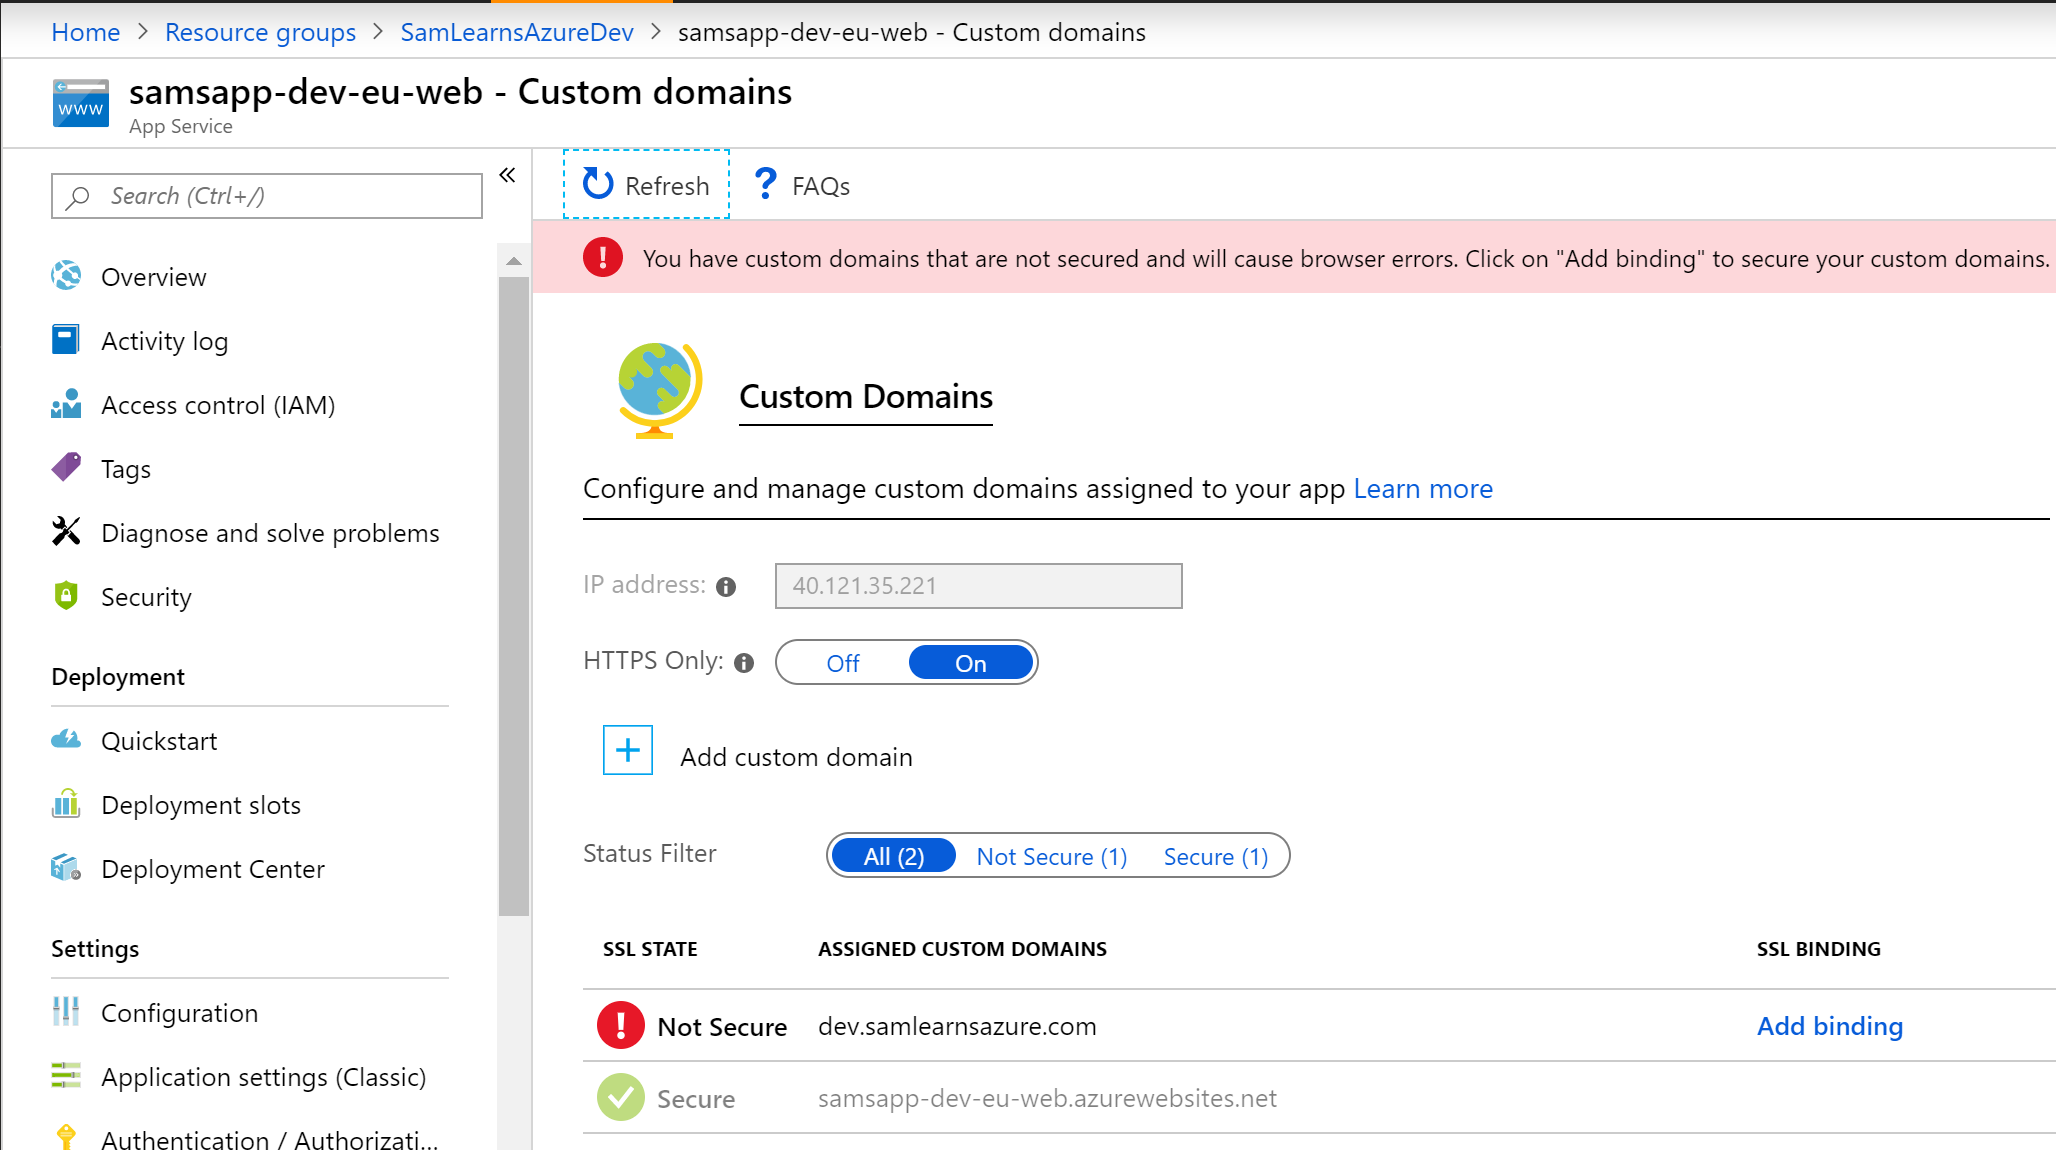
In the release, we add the new parameters, adding the client secret as a secret pipeline variable, and setting up all of the domain variables as pipeline variables. We commit this code and watch the pull request process successfully. As our pull requests also deploy to our dev environment, we can jump in and see what it looks like. In the Azure Portal, we open our web application “samsapp-dev-eu-web”, and browse to the custom domains section. Here we can see our custom “dev.samlearnsazure.com” has been setup, but doesn’t yet have a certificate associated with it, and we still can’t browse to “dev.samlearnsazure.com”, as it doesn’t know where to go.
Setup GoDaddy DNS records
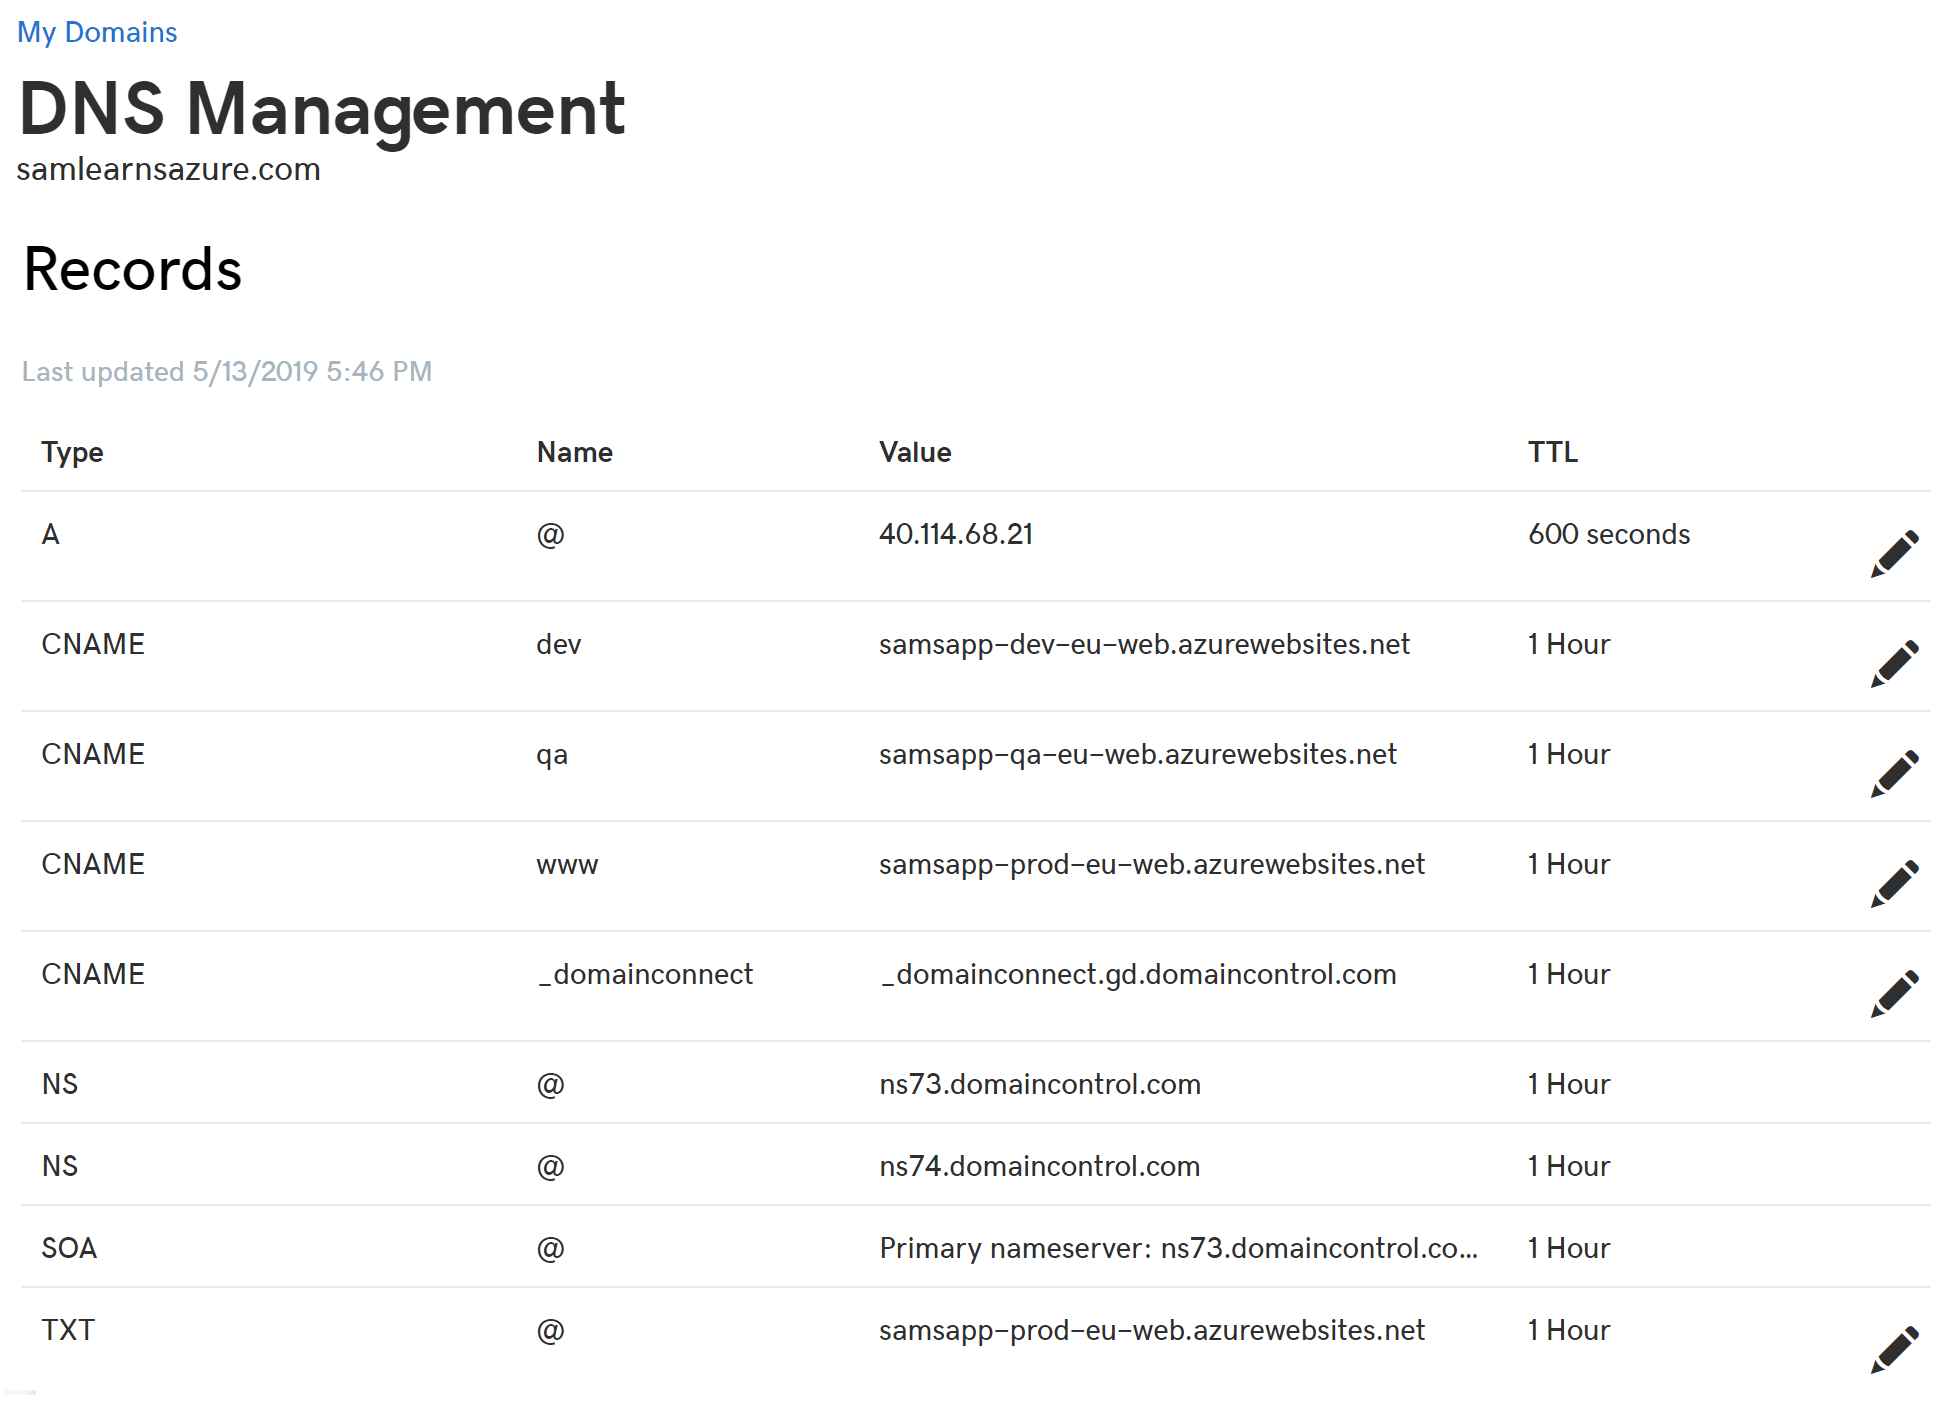
Next we need to setup the DNS mappings in our domain registrar, GoDaddy.com, so that our domain names know which web application to be directed to. There are a few things we edited here:
- We set the A record for the name “@” to the IP address of the production website. The IP address can be found in the “Custom domains” section of the web application. We should only use the A record for the root domains
- We set the CNAME record for the name “www” to “samsapp-prod-eu-web.azurewebsites.net”, to point “samlearnsazure.com” to our production website
- We set the CNAME record for the name “dev” to “samsapp-dev-eu-web.azurewebsites.net”, to point “dev.samlearnsazure.com” to our dev website
- We set the CNAME record for the name “qa” to “samsapp-qa-eu-web.azurewebsites.net”, to point “qa.samlearnsazure.com” to our qa website
- We leave the CNAME record for the name “_domainconnect”
- We leave all of the NS and SOA records
- We set the TXT record for the name “@” to “samsapp-prod-eu-web.azurewebsites.net”
Now that the DNS is setup, we can browse to our website. In this case we’ve browsed to “qa.samlearnsazure.com” and it worked! Now we just need to generate the certificate so we can remove that “not secure” message.

Adding Let’s Encrypt
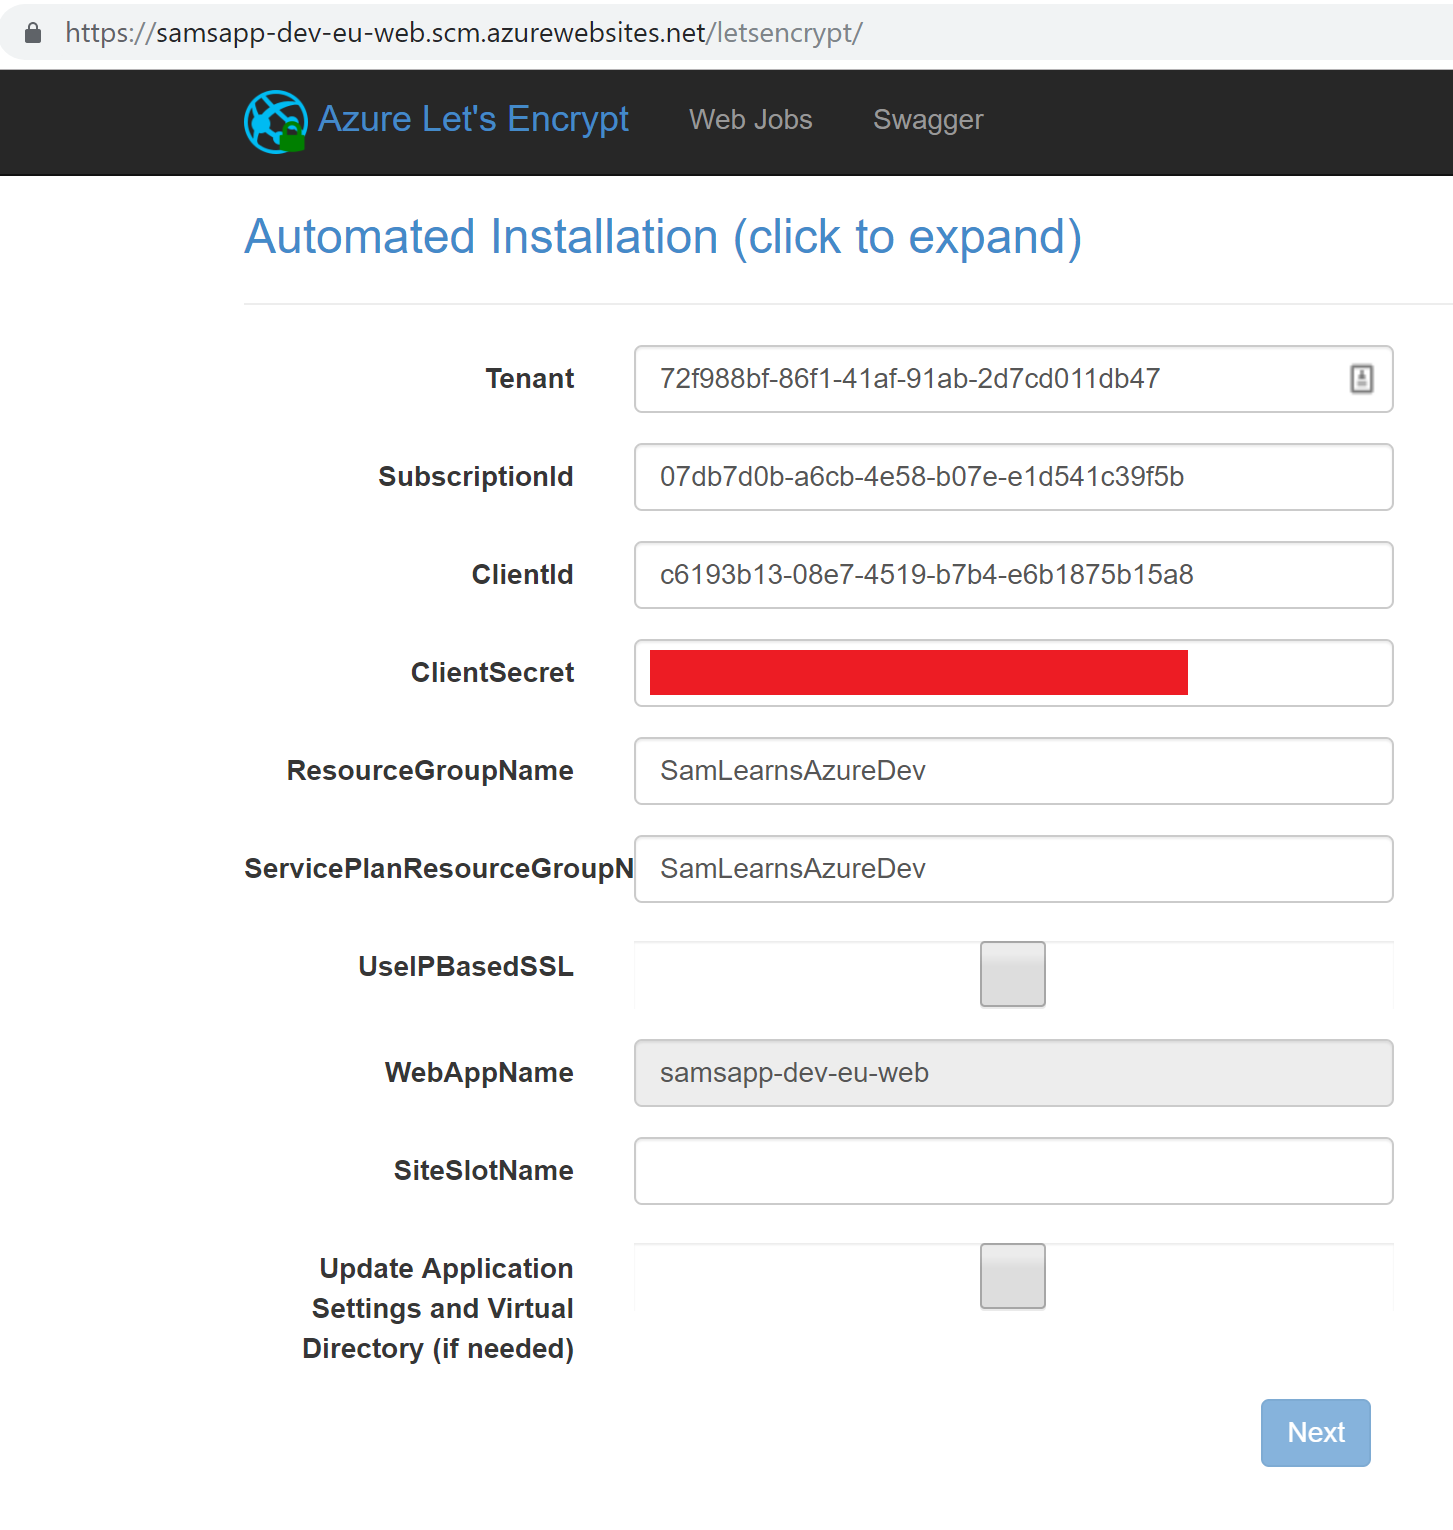
Now that the DNS is setup correctly, we can setup our certificates. This is a one time manual operation we have to do for each environment. Having a manual step is not ideal, but practically is ok – we won’t be adding a lot of domains or environments. A web job will be created as part of this process that will automatically update our certs every 3 months (as the “Let’s Encrypt” certificate only lasts three months). To start, browse to “[your app name].scm.azurewebsites.net/letsencrypt”, which for us is: “samsapp-dev-eu-web.scm.azurewebsites.net/letsencrypt”. Fortunately, all of the fields are filled out for us, so we only have to press next a few times. The first page has all of the tenant, subscription, and client id and secret stuff we added to our ARM template.
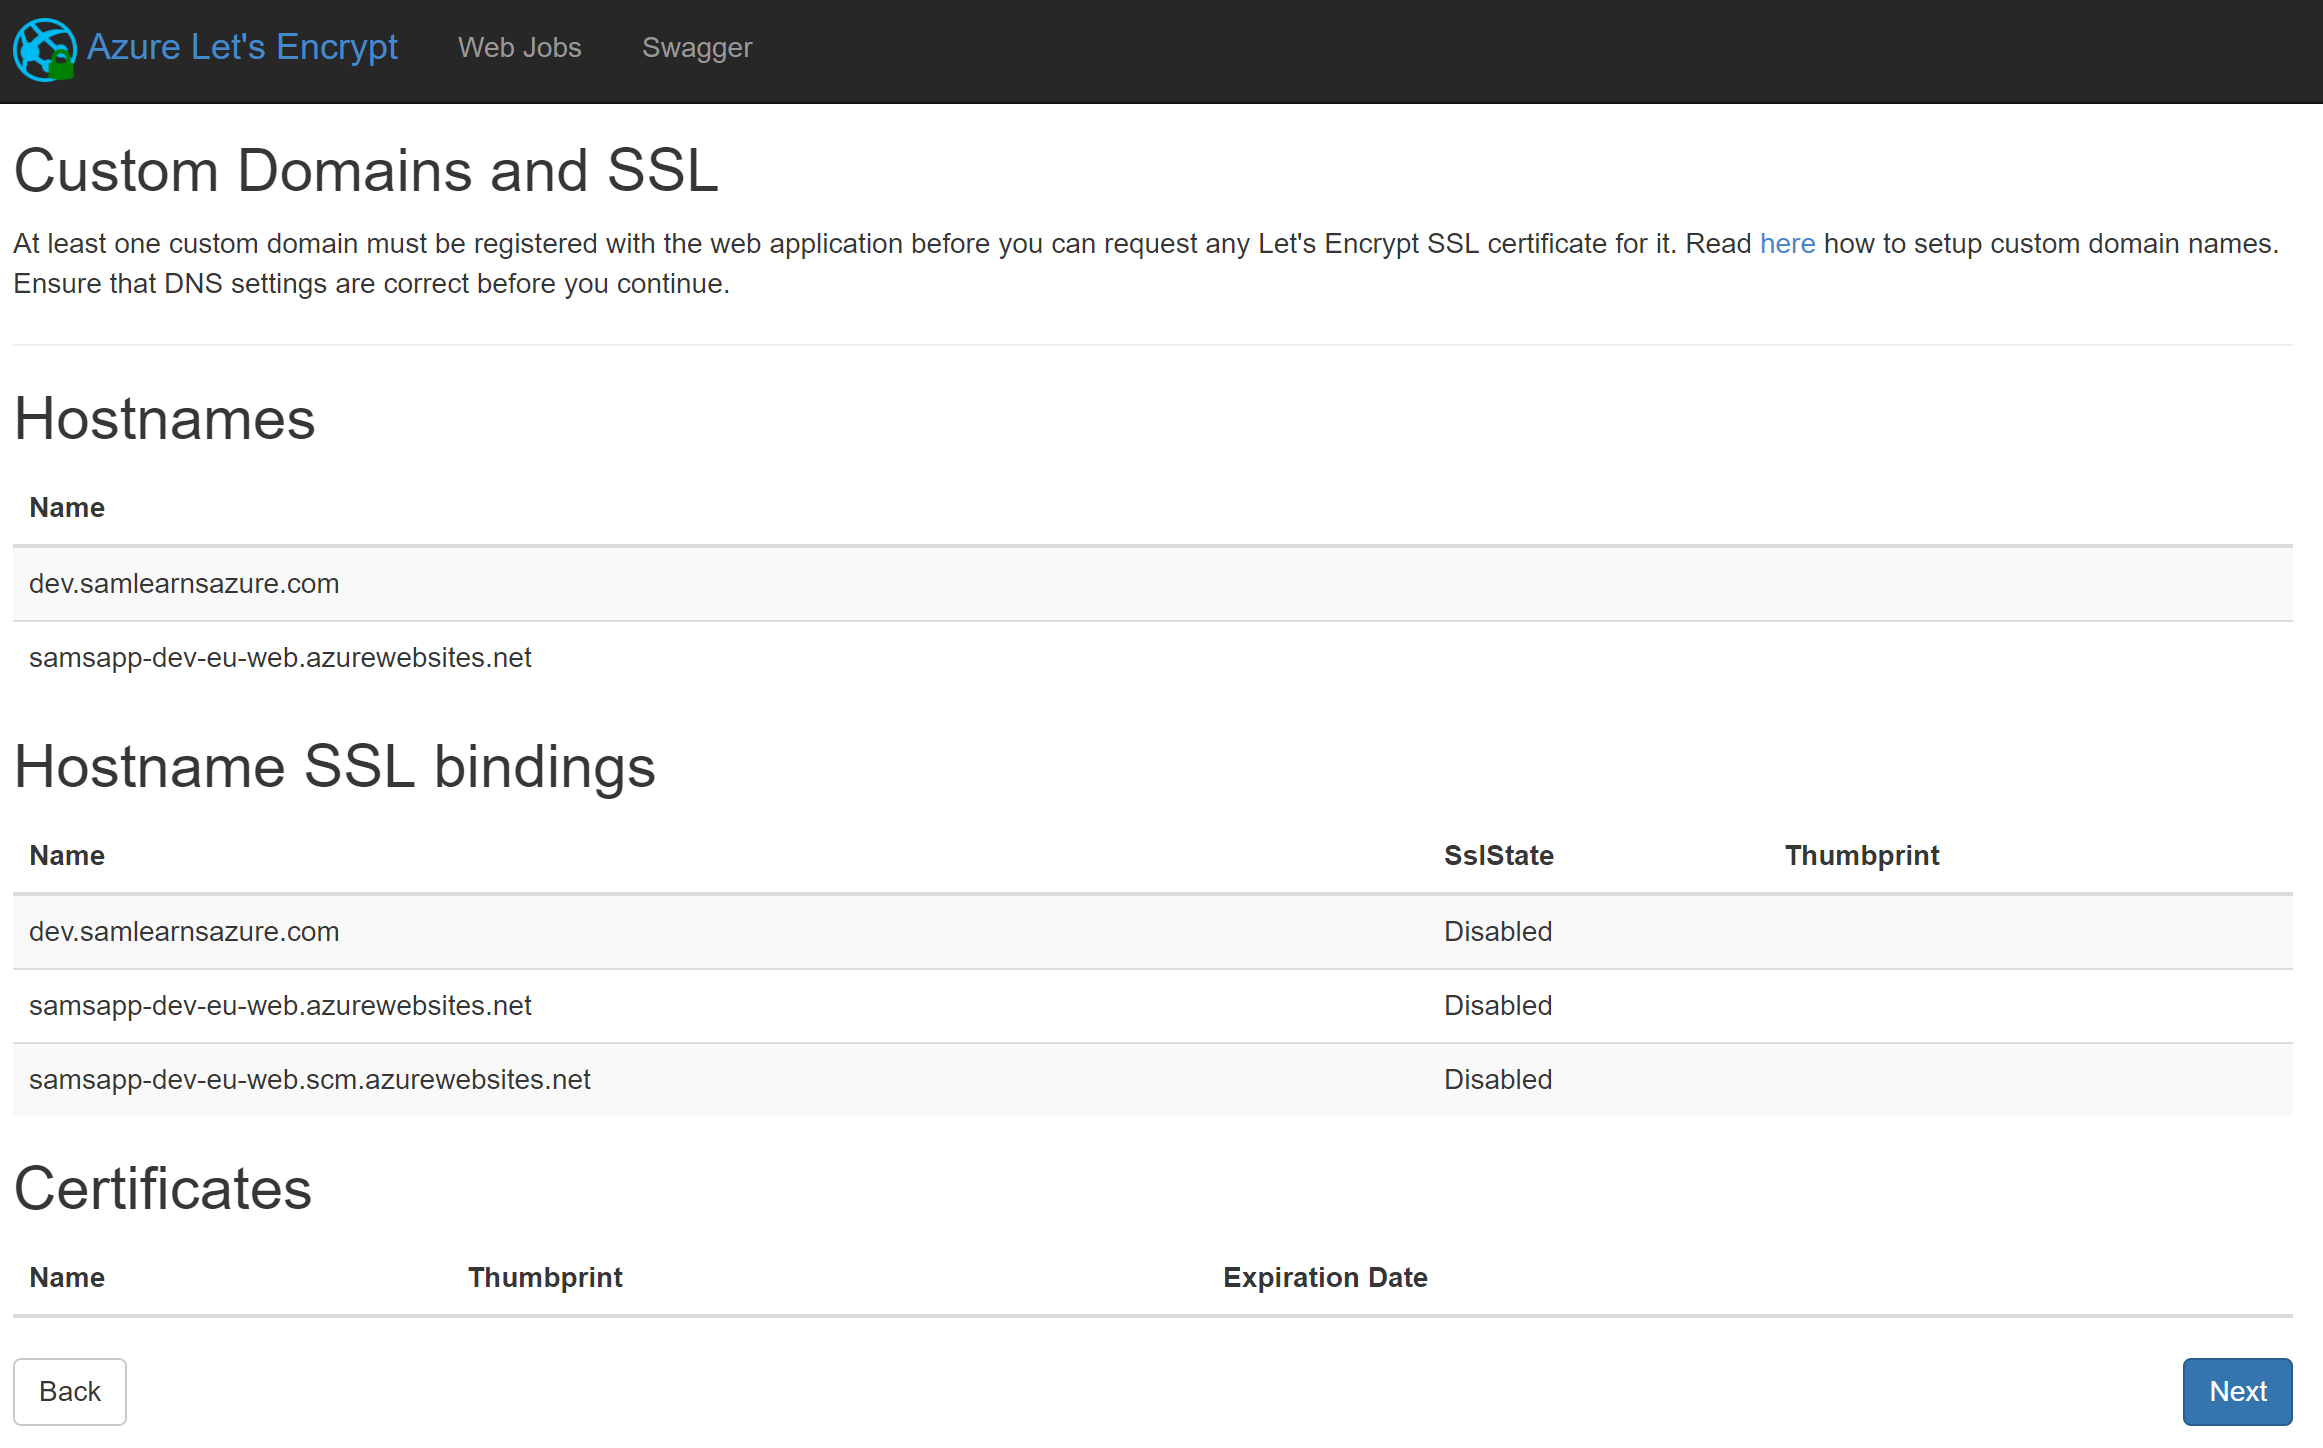
The second page has details of our host names and Hostname SSL bindings. The last section, certificates, is blank as we haven’t created the certificate yet.
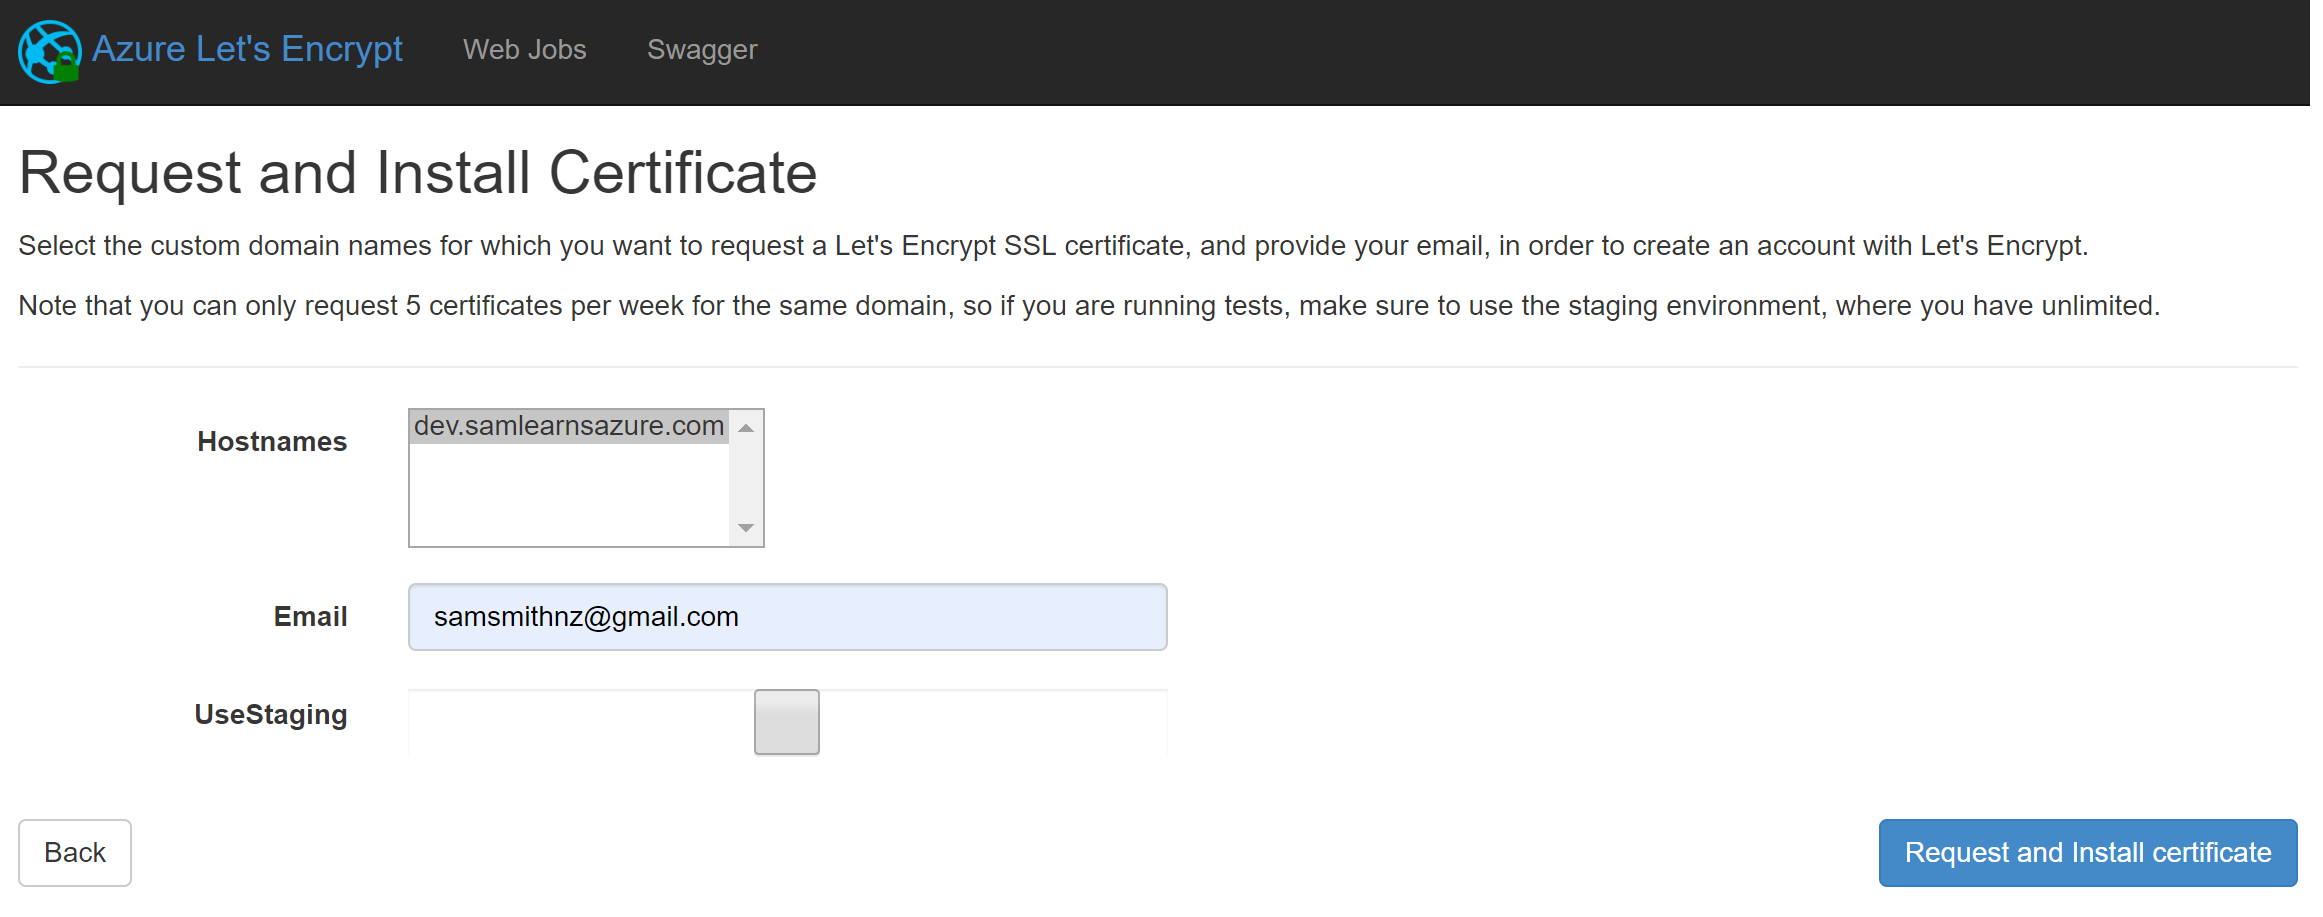
On the last page, we select the host name from the list, enter our email address, and click the “Request and Install Certificate”. Note that the production certs have a strict 5 a week limit, so if you aren’t sure this is going to work, check the “UseStaging” checkbox to enable unlimited certificate generation.
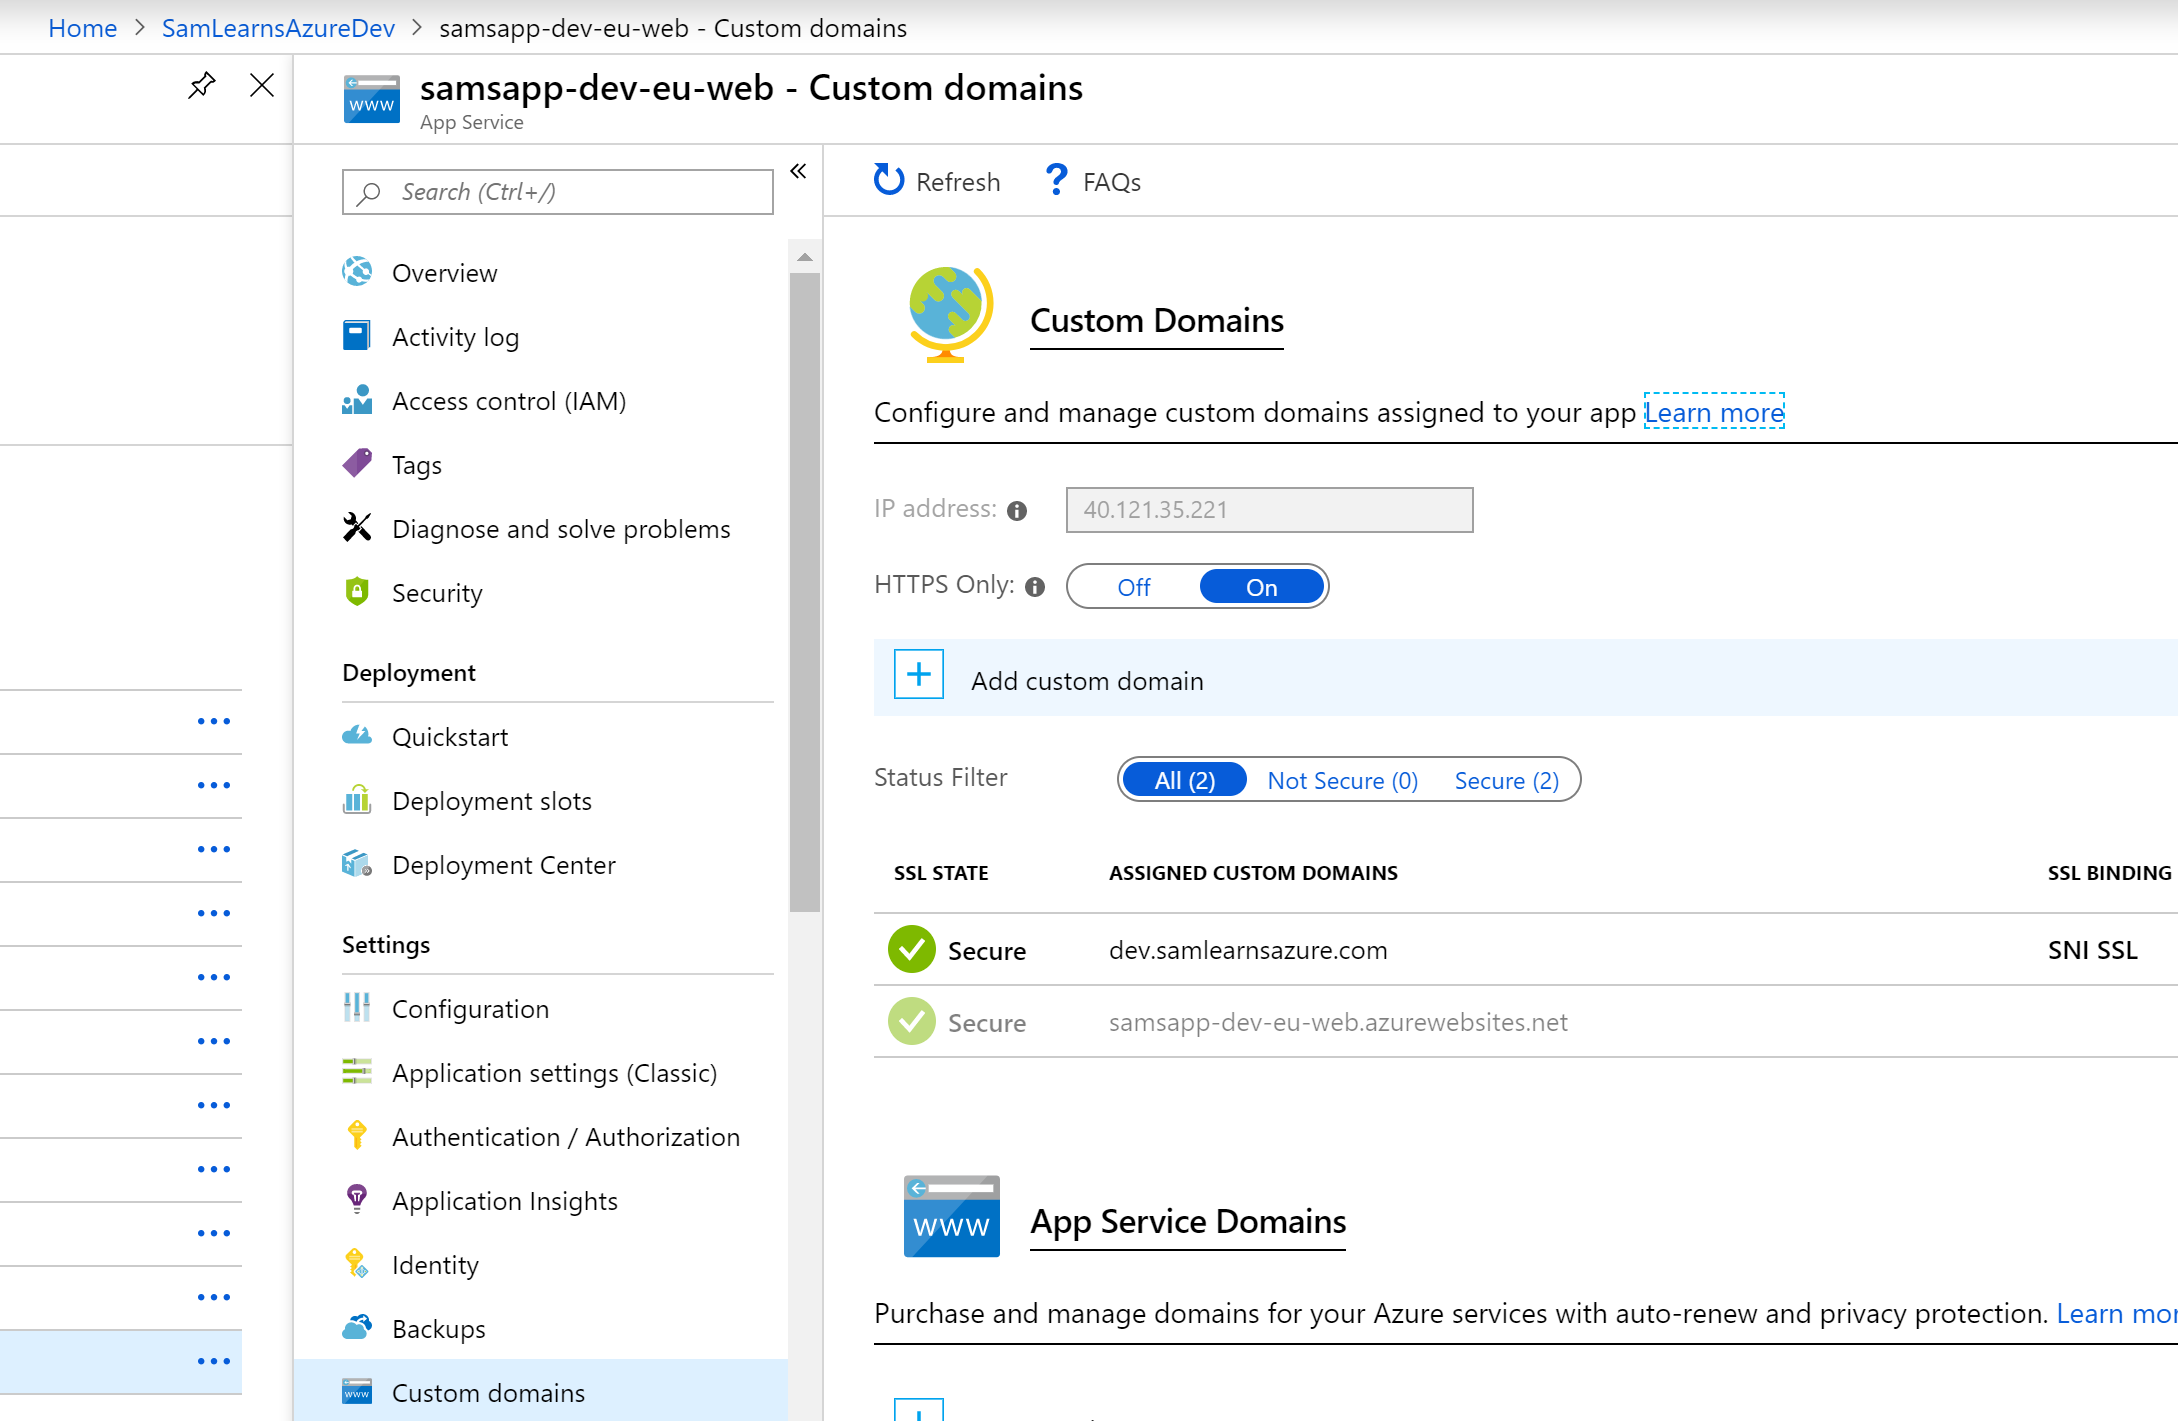
Now when we browse to our web application “Custom domains” section in our Azure portal, we can see that their is an SSL binding (aka: certificate), that matches.
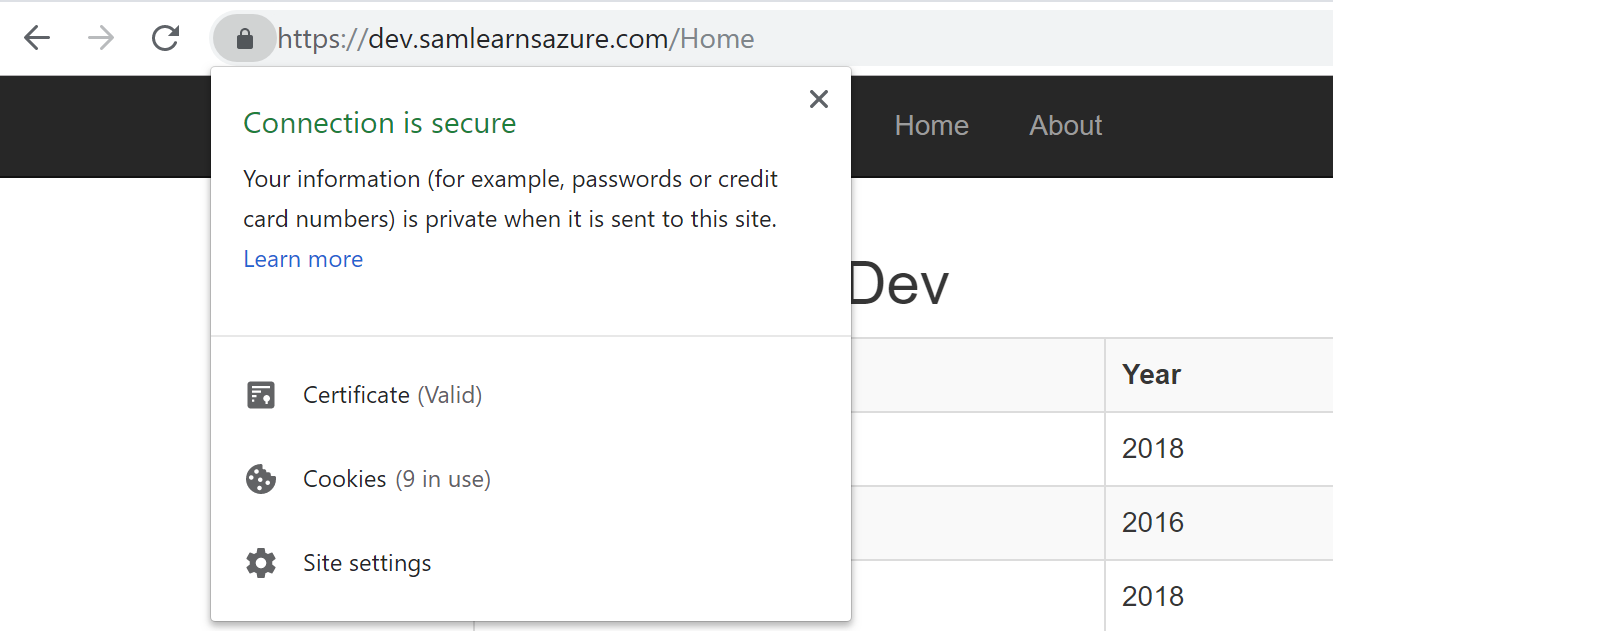
With the certificates setup, we browse to “dev.samlearnsazure.com”, and verify that the certificate has been created and is ready!
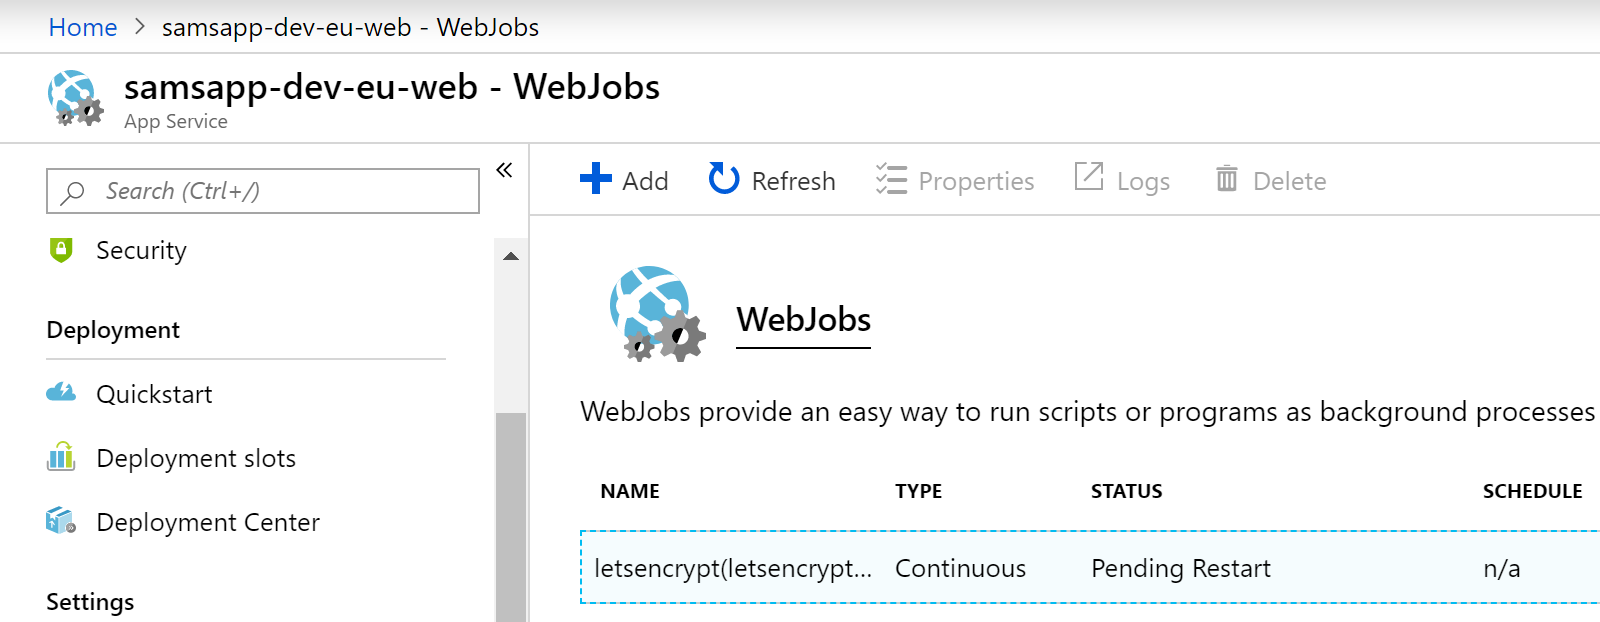
It’s worth noting that when the “Let’s Encrypt” extension is installed by the ARM Template, it also adds a web job to the web application. This job creates a new certificate when it expires (or just before) after three months.
Wrapup
Today we setup our website, with a custom domain, two sub domains, and a custom certificates for each site with “Let’s Encrypt”. Additionally, there is a web job in place to replace the certificates, so we don’t have to think about this again. We are thrilled to be able to wrap *most* of our certificate setup in DevOps. Check out our production environment: https://samlearnsazure.com!!
Note: An update to this post was created to troubleshoot the web job not running as expected after 2 months.
References
- Arm templates with Let’s Encrypt:
https://www.henrybeen.nl/add-a-ssl-certificate-to-your-azure-web-app-using-an-arm-template/ - Arm templates with Let’s Encrypt (Revisited):
https://www.henrybeen.nl/add-a-ssl-certificate-to-your-azure-web-app-using-an-arm-template-revisited/ - The enterprise object id, not the principal object id https://github.com/jayspec/AksWithVirtualNodes
- How to Install Let’s Encrypt: https://github.com/sjkp/letsencrypt-siteextension/wiki/How-to-install
- Mapping DNS:
https://docs.microsoft.com/en-us/azure/app-service/app-service-web-tutorial-custom-domain - Featured Image credit: https://strongarm.io/wp-content/uploads/2017/11/HTTPS_icon.png

2 comments