

Two weeks ago, at the Microsoft Build conference, multi-stage pipelines were announced. This was a long awaited feature, as it allows us to convert our releases as code, and store the code into our repos. Finally, our project, from the source code, to the build to the release, can be stored as infrastructure as code.
Enabling multi-stage pipelines
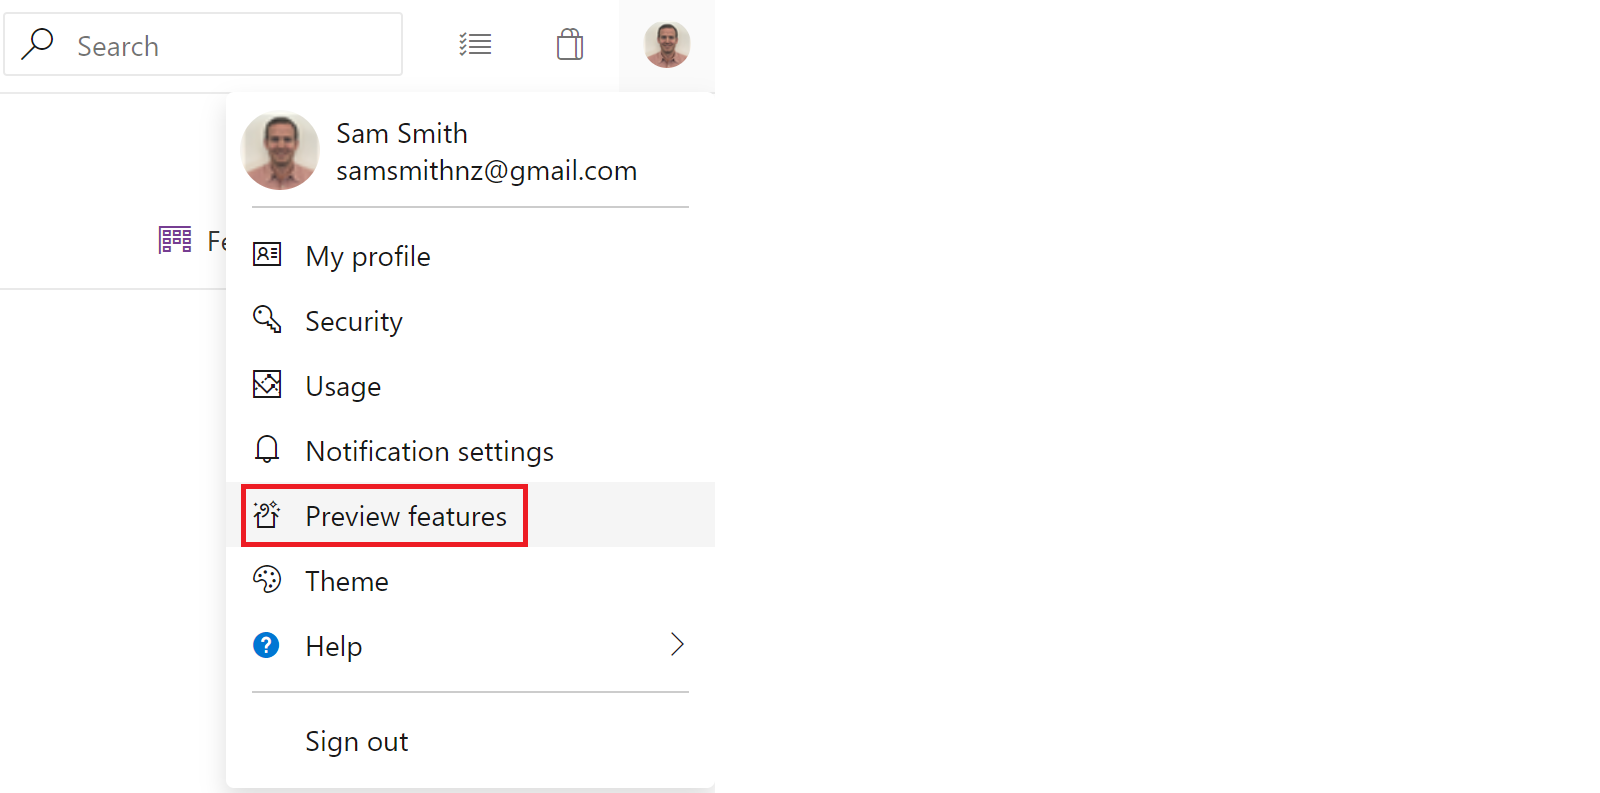
Multi-stage pipelines are currently a preview feature in Azure DevOps. To enable the multi-stage pipeline preview, we click on the project at the top of Azure DevOps, and select “preview features” from the drop down menu to show all of the Azure DevOps feature flags.
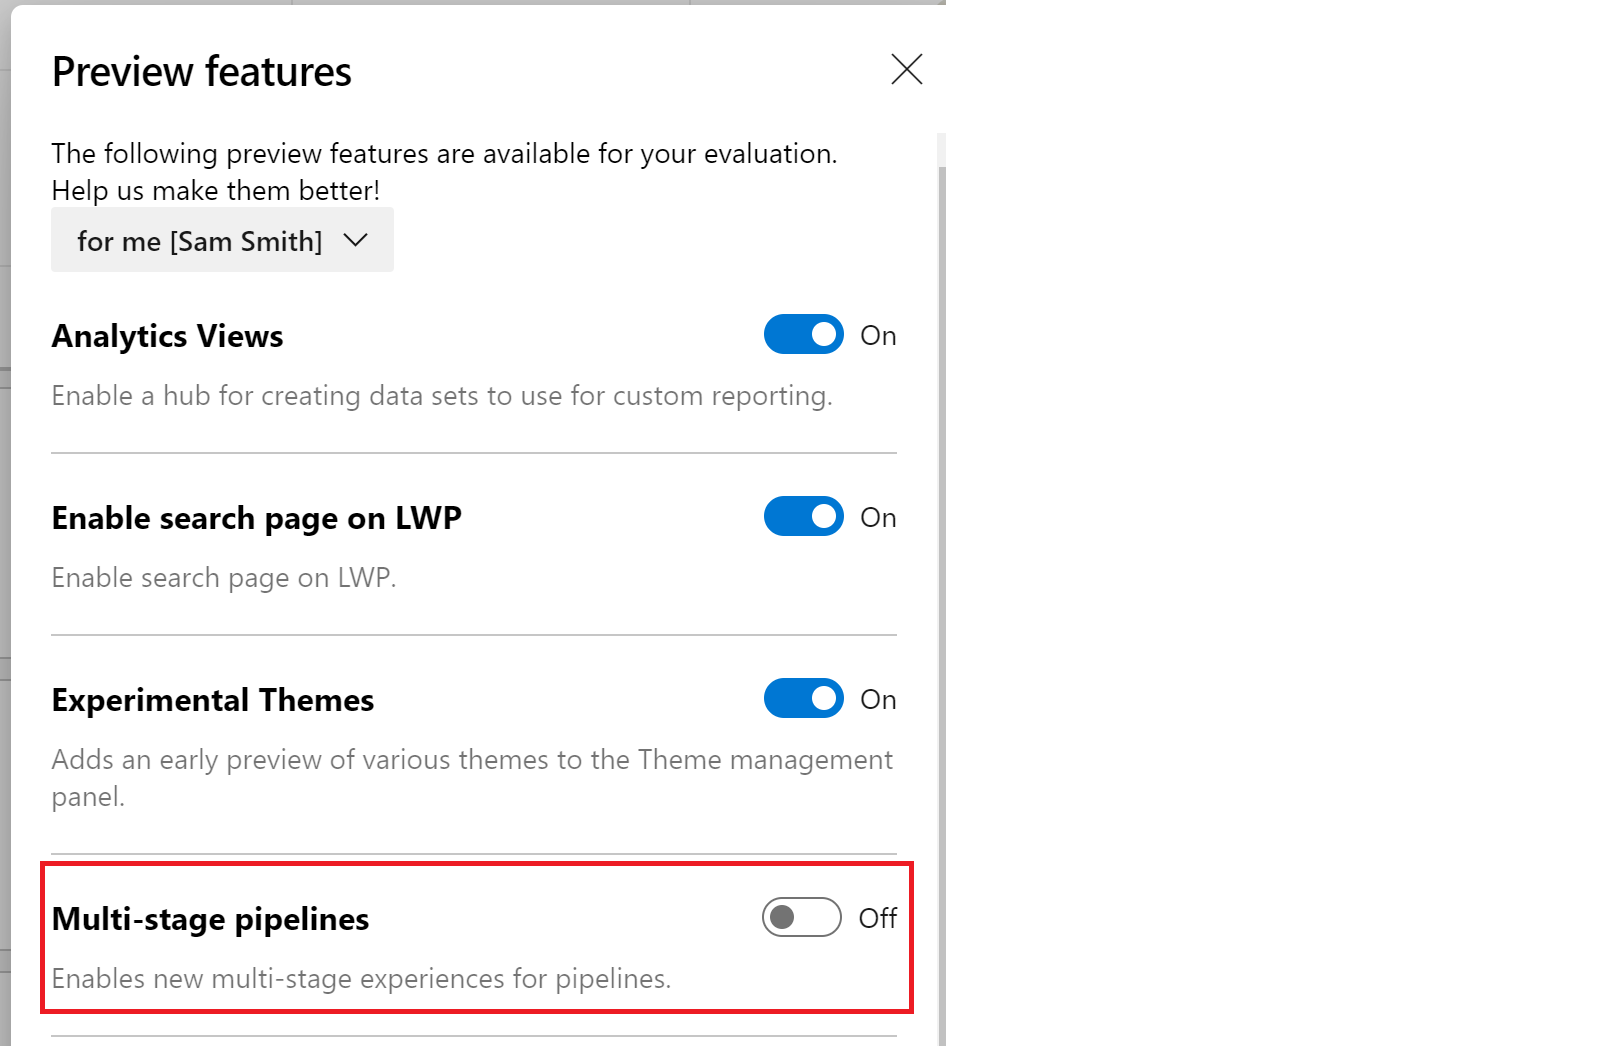
In the menu, we find and enable “Multi-stage pipelines”. Note that we already have all other features already enabled.
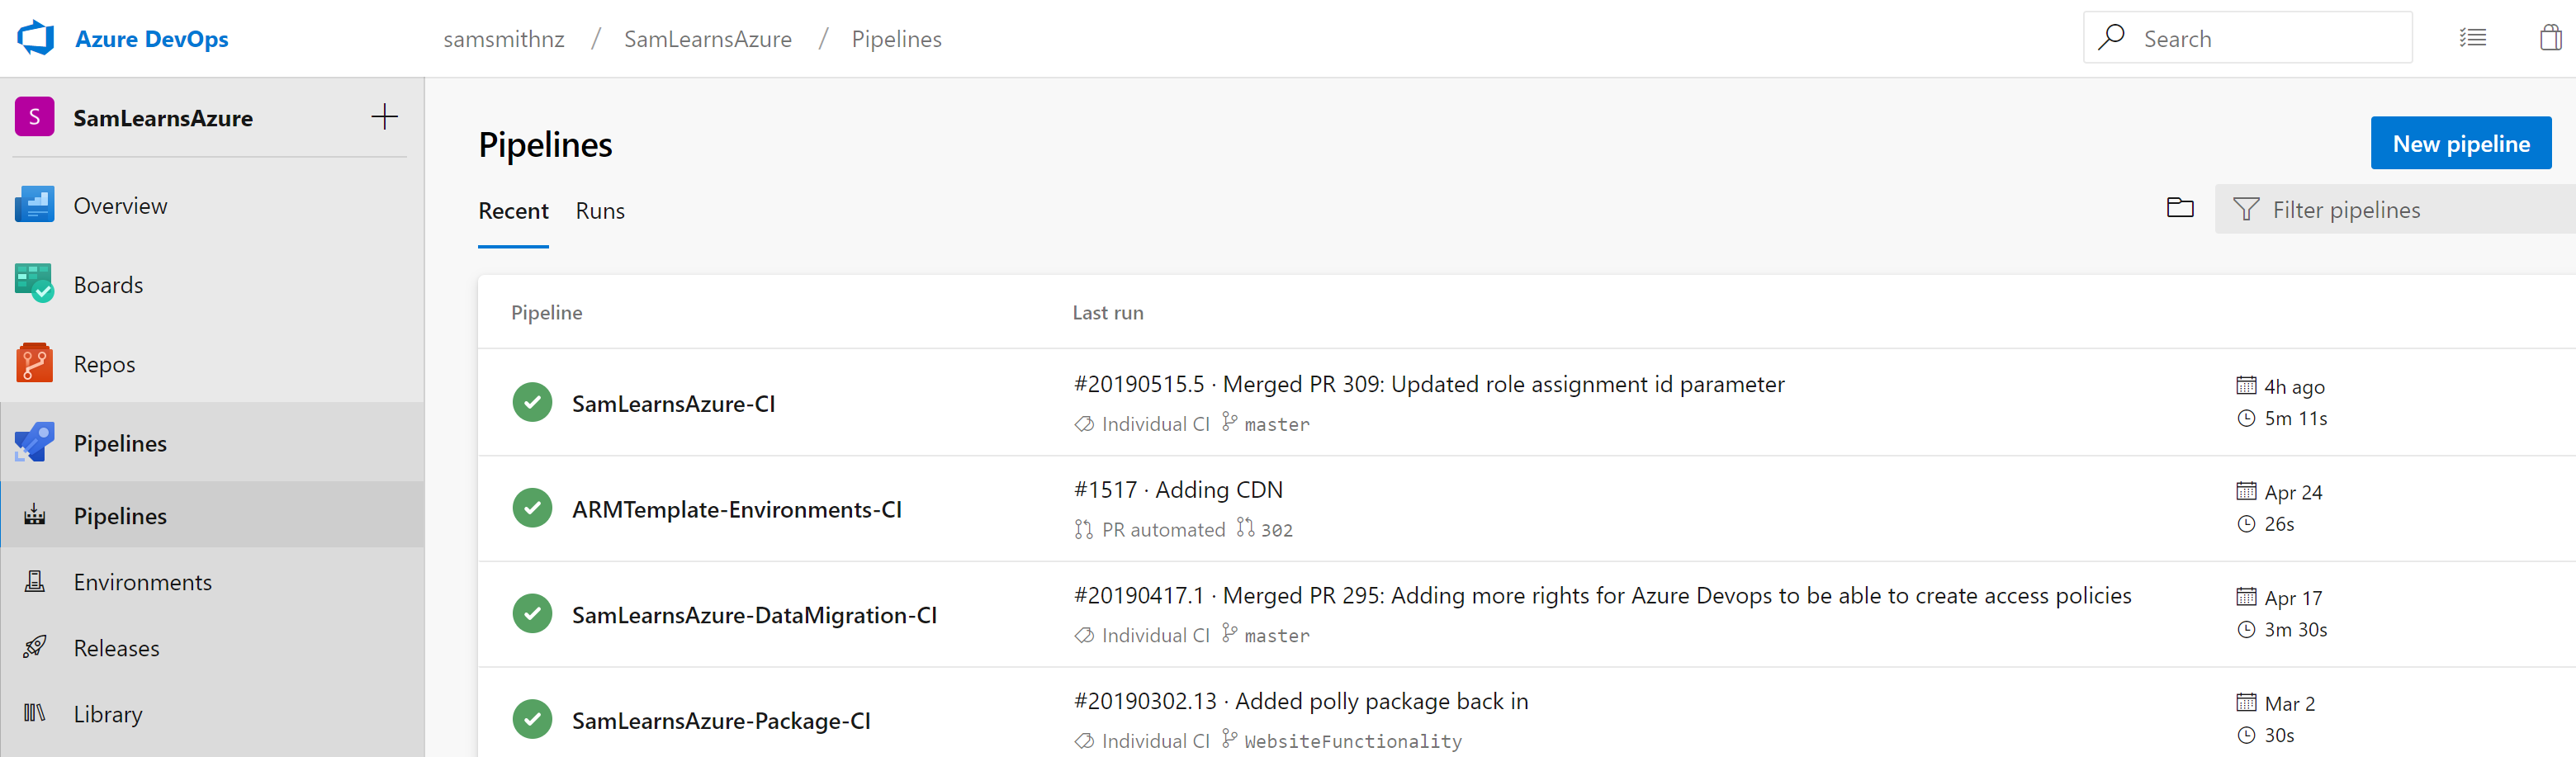
With this feature flag enabled, we next browse to “Azure Pipelines”, it now looks different. Instead of “build” menu item, there are new “Pipelines” and “Environments” menu items. Clicking on pipelines shows us our current pipelines, formerly builds. These are what we are going to build upon.
Starting the YAML from scratch
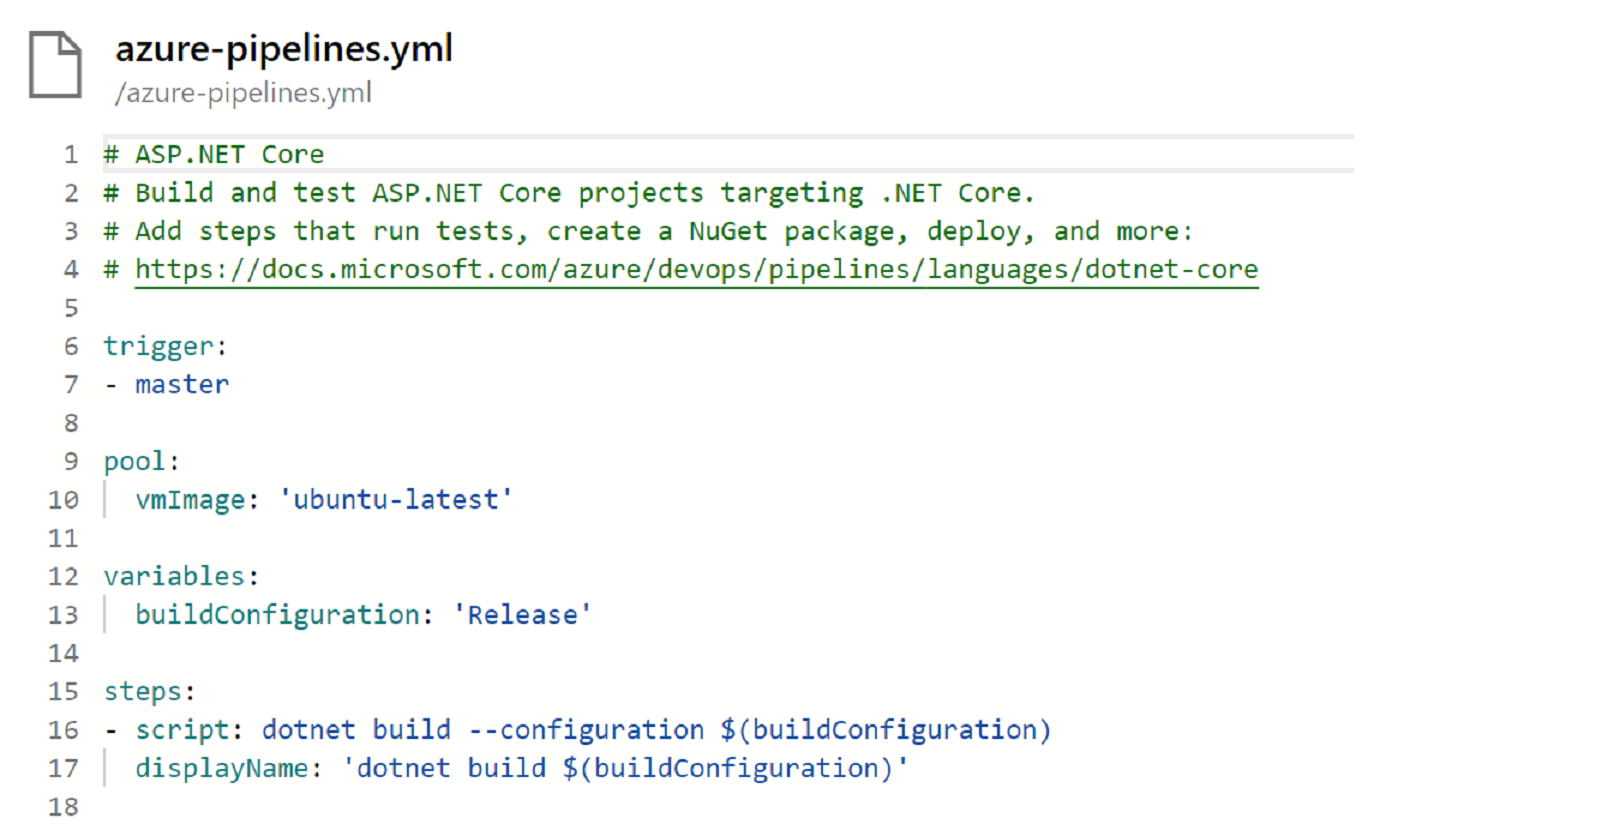
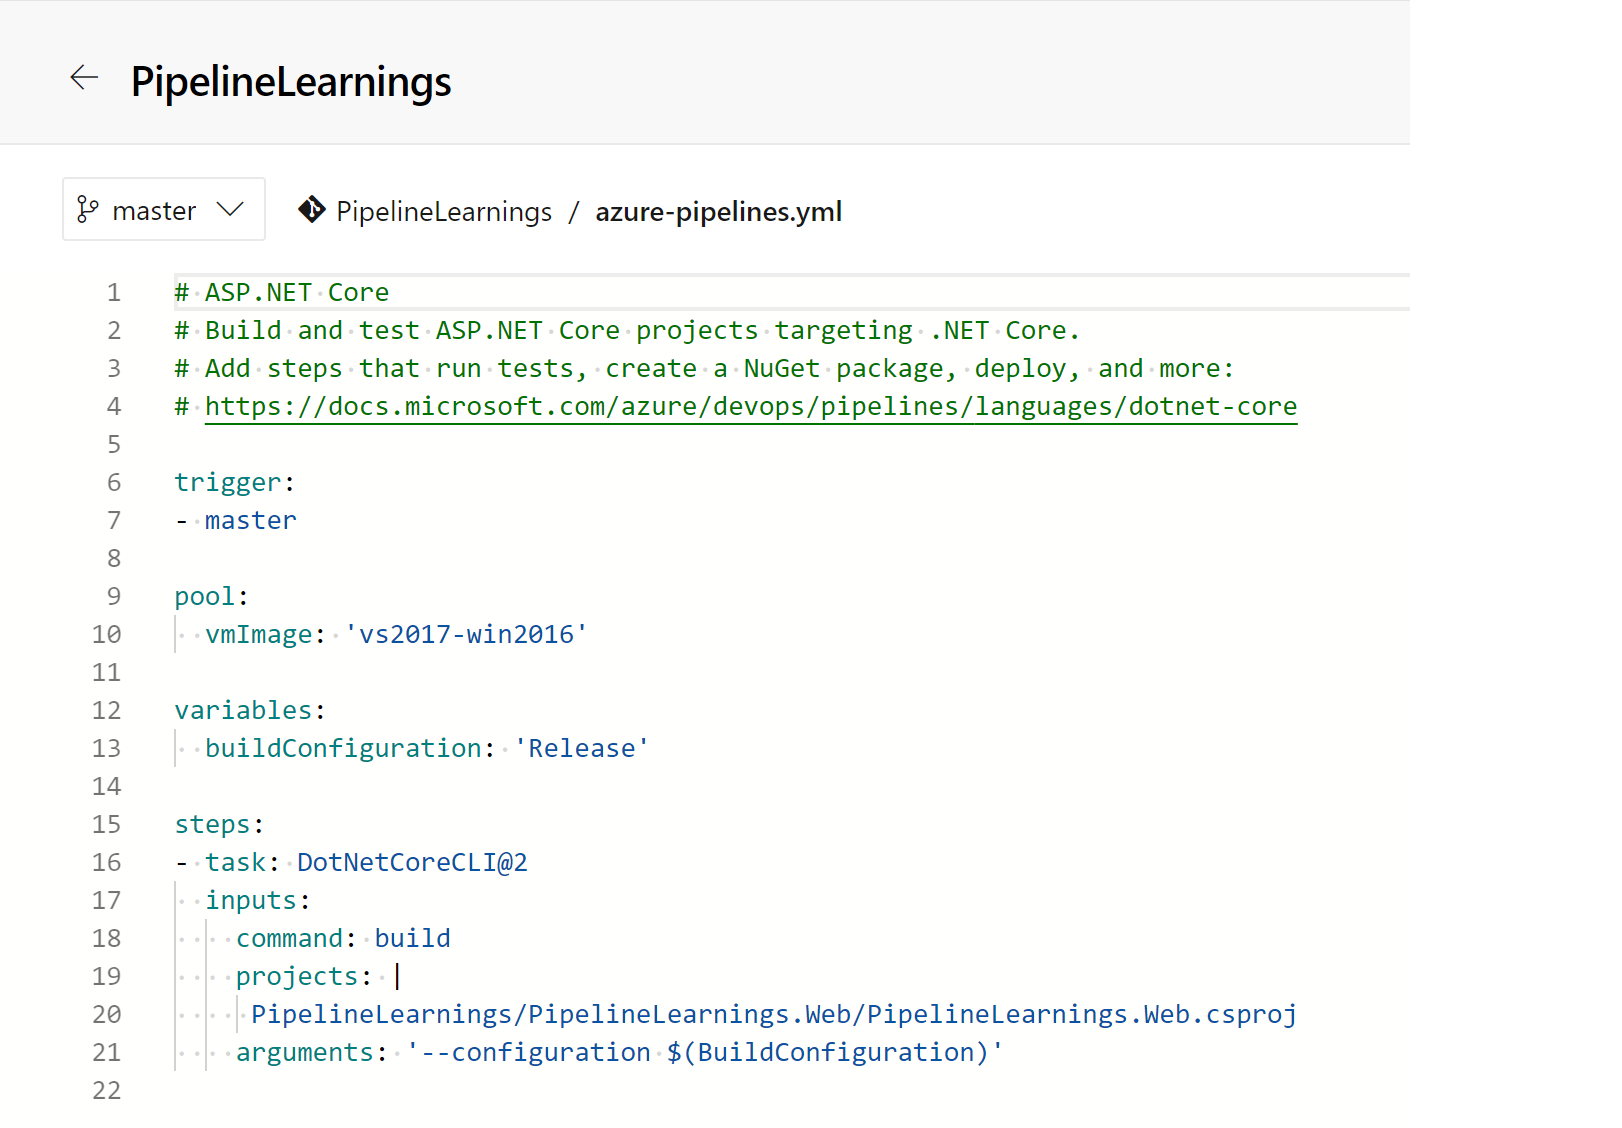
We want to learn the new YAML commands, but before we do, we think it’s a good idea to start with a really simple pipeline POC, before applying what we have learned to our main SamLearnsAzure pipeline. We create a new repo “PipelineLearning”, and add a new ASP.NET Core website to this, committing our changes. We also create a new pipeline, which creates this YAML. This will build our ASP.NET Core website on an Ubuntu build server, with the release build configuration.
Interestingly, the first time we queue the pipeline, it fails, as it can’t find the solution file. This is curious, as we had started with a new repo, and added the new ASP.NET Core project and solution to the root of the repo. We edit the YAML a little so we can pass in the project name, as well as setting the build image on line 10 to the VS2017 build image. Now we can successfully build.
Next we are going to wrap our build in a new layer, adding “jobs“. A job is the smallest unit of work that can be scheduled to run, and runs 1 or more steps, or tasks. This is where the documentation starts to get a little disorganized – in our opinion – there just aren’t enough examples. We could only get this to work if we added the next level “jobs”, (the documentation states you can build a task with one job, but we couldn’t make it work). Let’s walk through what we have.
- We create a new variable for “vmImage”, on line 6
- We add a new ‘jobs:‘ top level item on line 8, and a sub item ‘– job: “PipelineLearningsBuild”‘ on line 9.
- We move the pool to be part of the job, using the vmImage variable we just added. Each job needs it’s own pool.
- We add an indent of two spaces to all of the steps – lines 13-34.

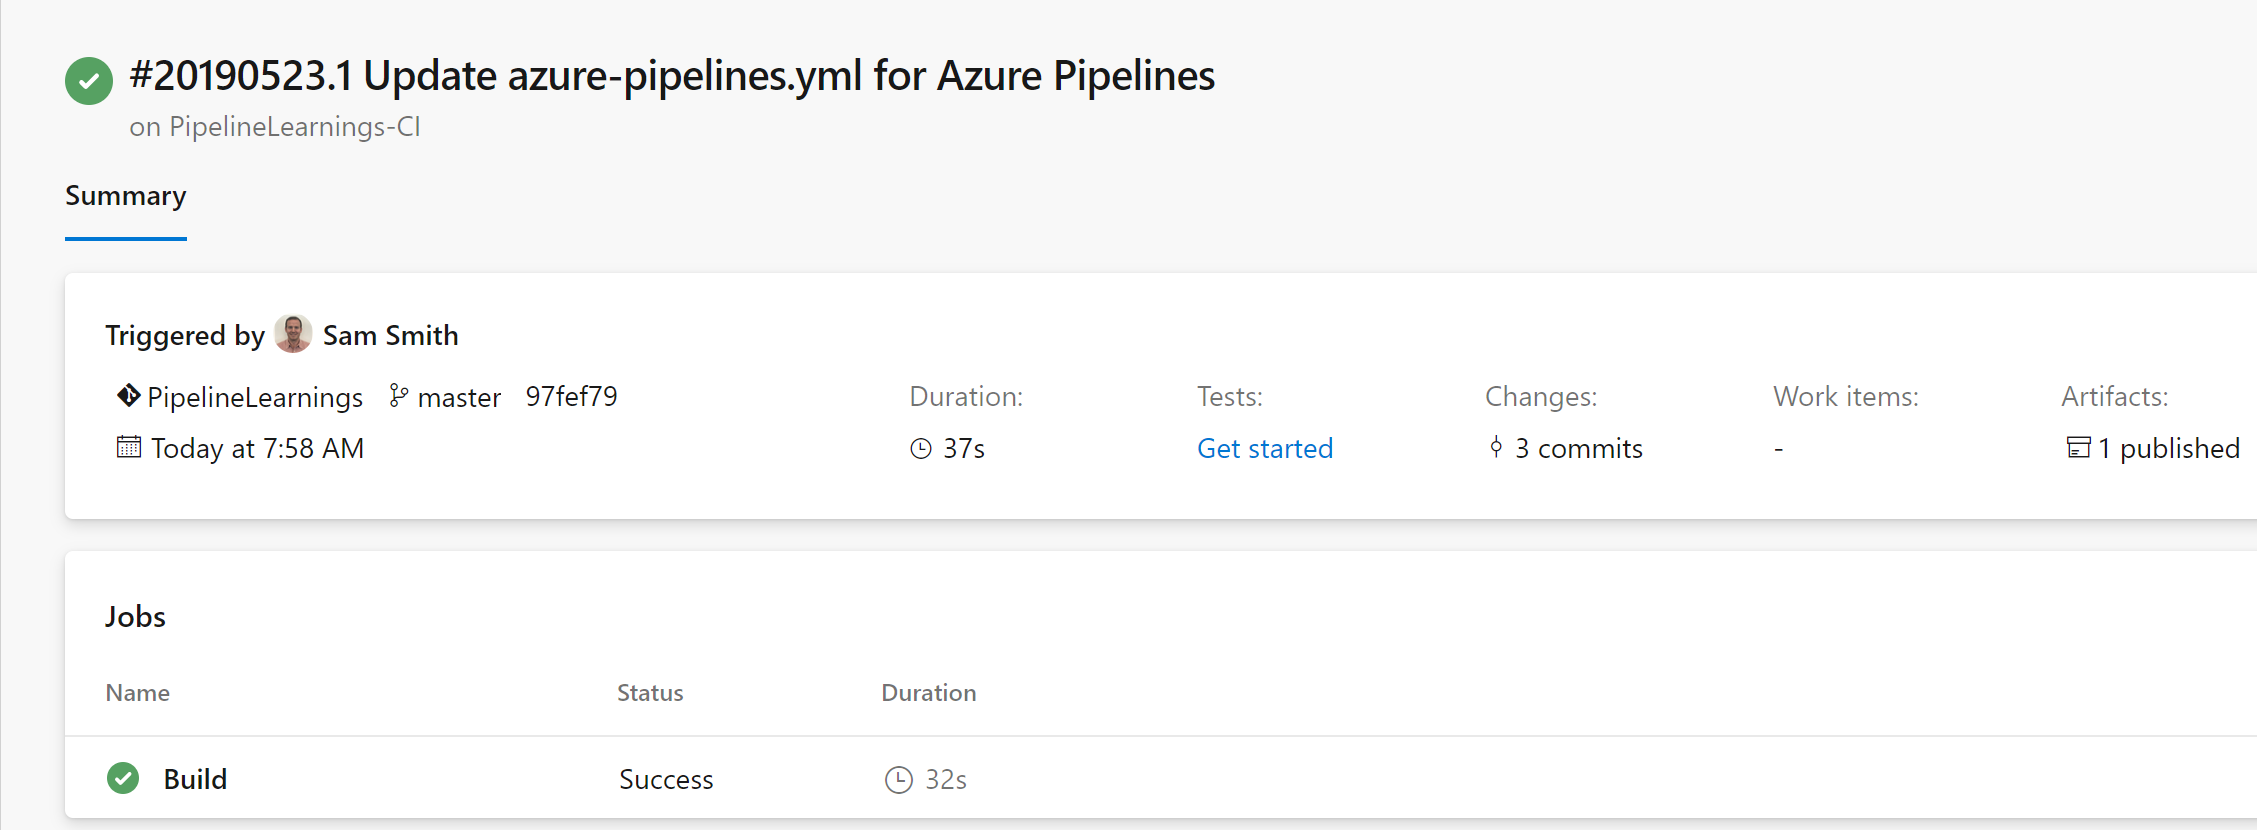
We run the pipeline and watch the build finish successfully and publish our artifact.
Now that jobs are setup, we are going to wrap our build in a new layer, adding “stages“. Stages are larger collections of jobs, for example “build this code”, and “deploy this project”. If stages aren’t defined, it’s assumed that everything is in just one stage. Let’s walk through how to complete this:
- On line 8, we add a new “stages” item, as well as the first new stage “Build”, on line 9. We name the first stage “Build stage”

- Next, we add a second stage, for our deployment, on lines 39 and 40, setting the name as “Deploy dev stage”. We also add a “dependsOn” item to specify that this stage can’t start until the previous (build) stage has successfully finished.
- On lines 48 and 49, we define a new variable for our web application
- On lines 51 to 56, we add a new task to “Download the build artifact”. This is a new, and important step, that was abstracted away in the visual releases. Many of the questions we found online about multi-stage pipelines were around configuring this step. This is pulling in the files from the build drop folder for the dev deployment.
- On lines 57 to 65, we have a simple Azure web app deployment, where we configure and deploy our code to an Azure web app.

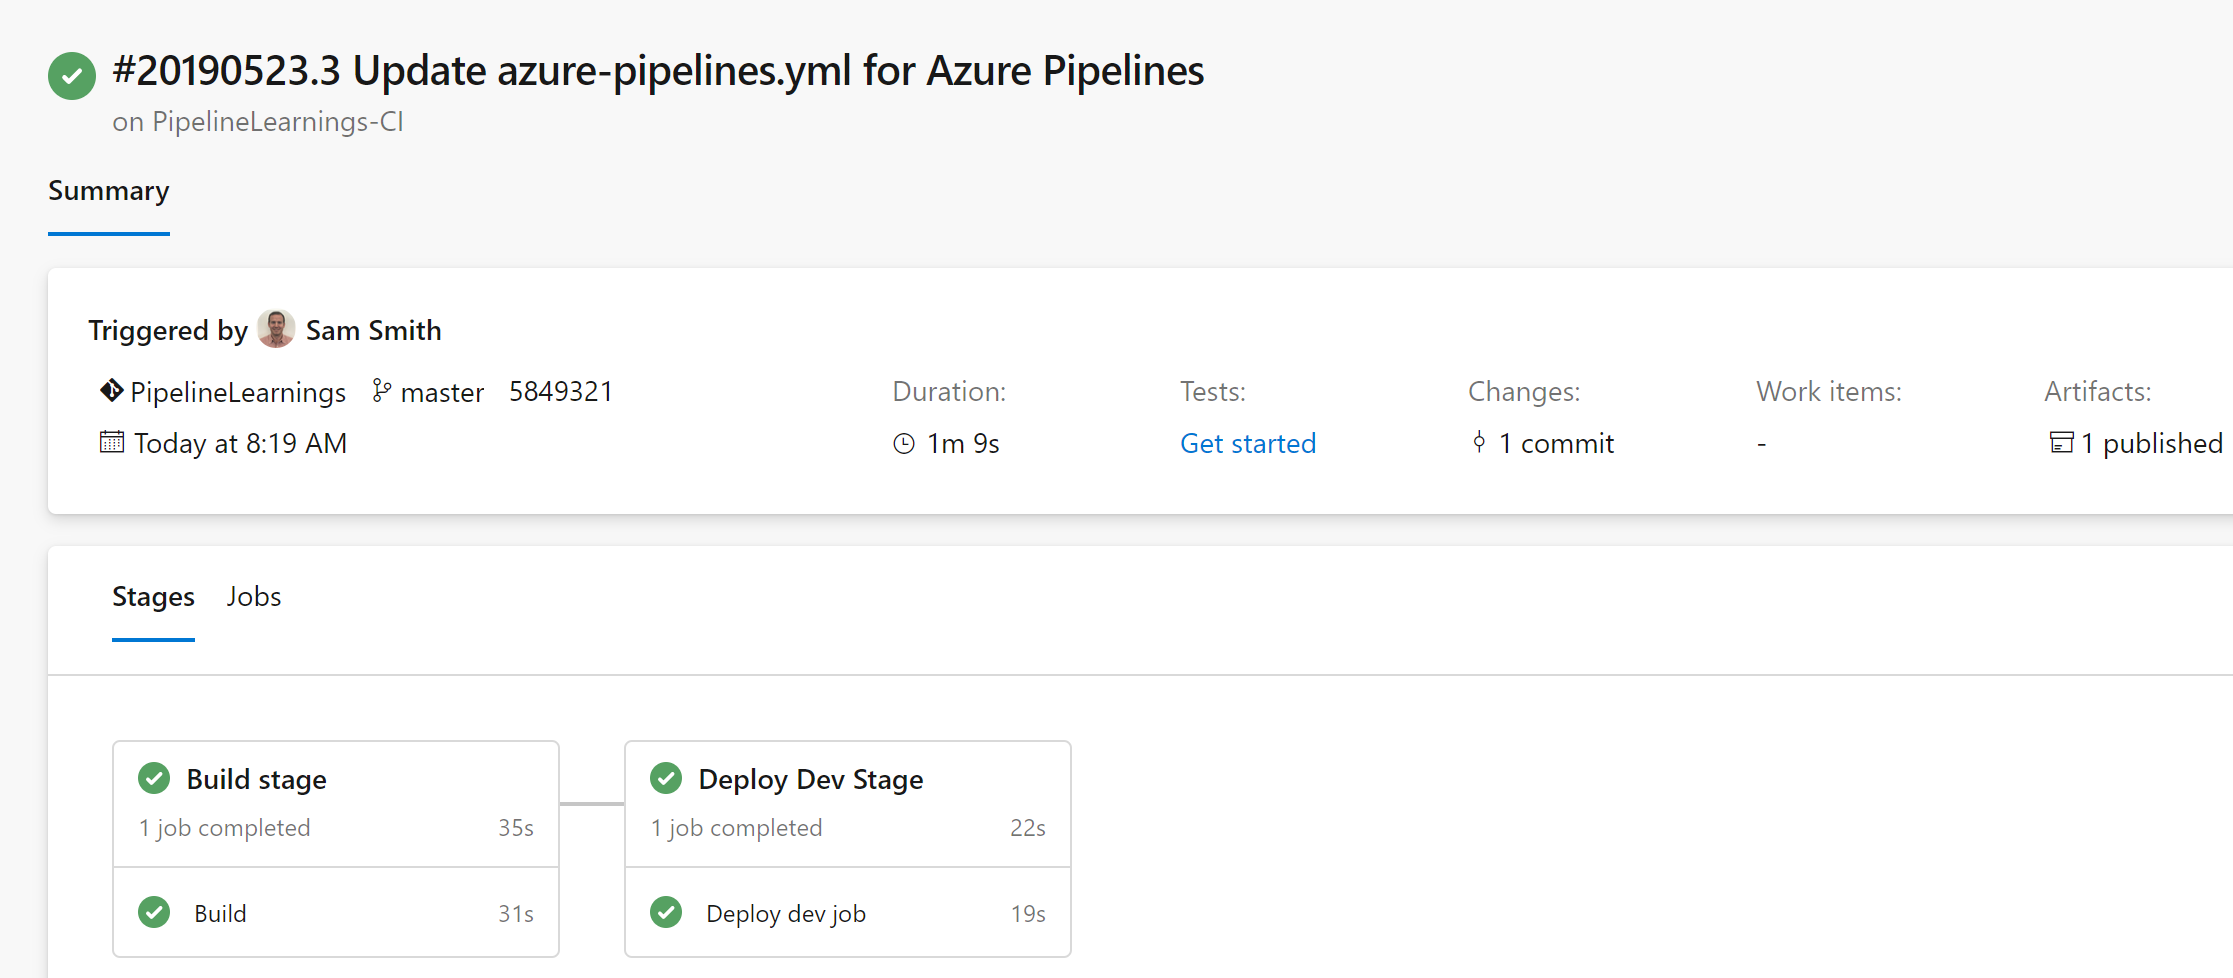
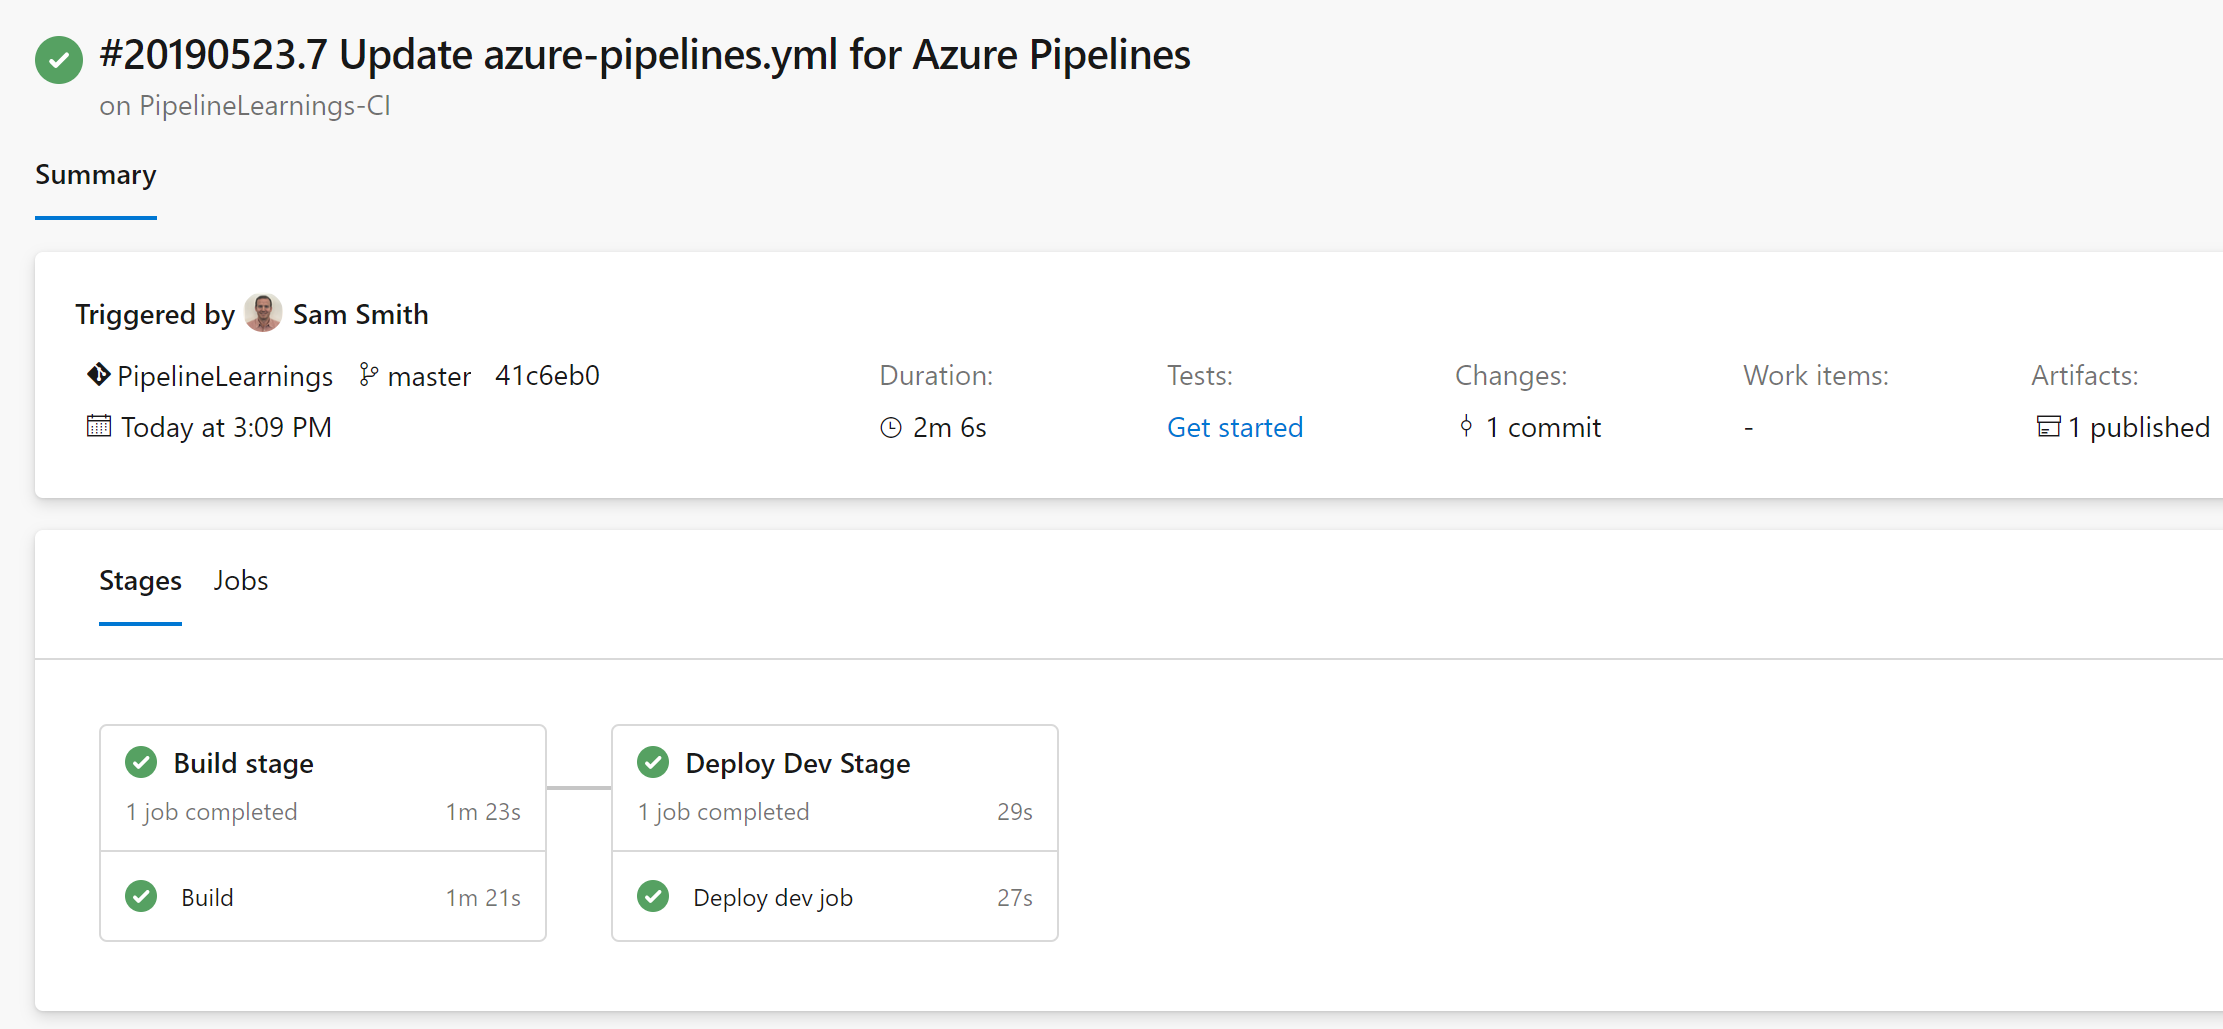
The result is pretty cool, we queue the pipeline and watch it build and deploy to dev. We verify that the build was successful and now we can move ahead.
Adding templates
As we scale out our YAML pipelines, we want to continue to practice object oriented programming. That is where templates come into the picture. Templates allow us to setup our jobs or steps in a generic template, and the pass inputs to them and reuse them, just like a class in C#. We will use templates for our deployment jobs.
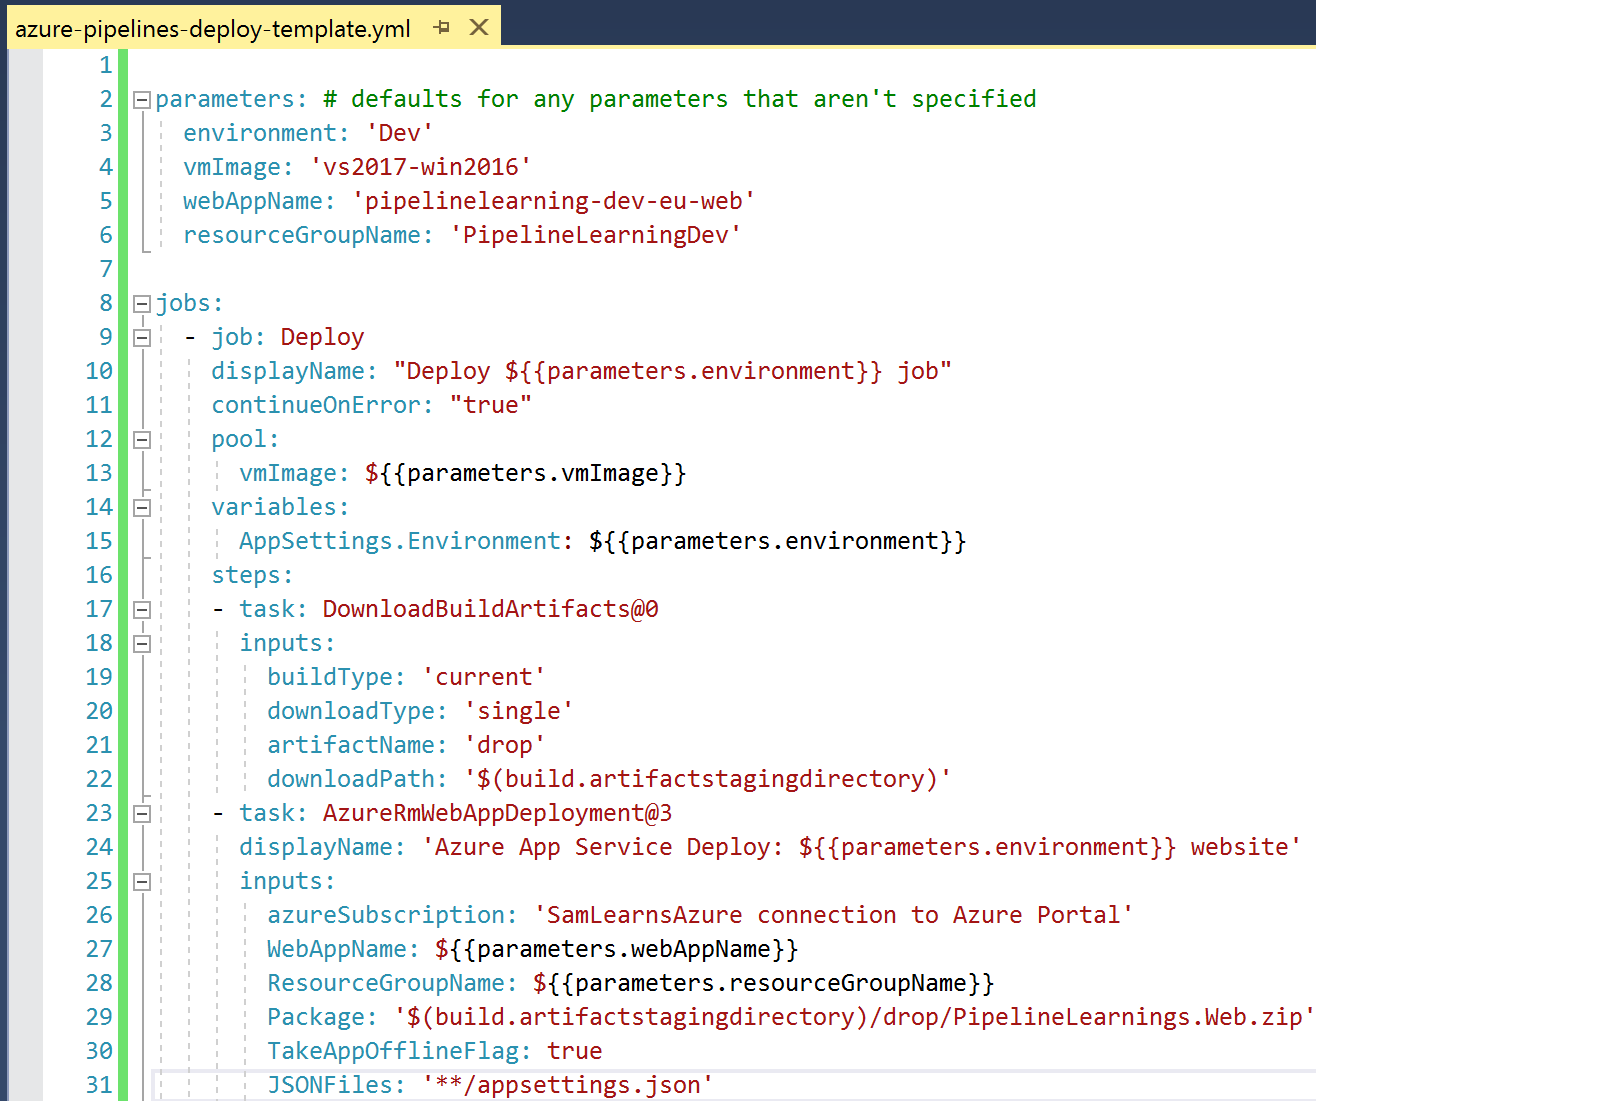
We create a new file for our template, “Azure-pipelines-deploy-template.yml”, in the same folder as our “azure-pipelines.yml” file, (the root of the repo), and define the parameters we will pass in. These settings also act as defaults – so if we don’t specify the parameter, it will use this value as the default value. Next we paste in the jobs from our deployment stage, and change a few values to use the format ${{parameters.[variable name]}} to substitute in our values from the parameters we defined
In our main azure-pipelines.yml file, we delete the jobs in our deploy stage, and use the “template” keyword, specifying the template name. Finally, we add in the parameters.

We can then then see that the result completed successfully!
Wrapup
At this stage we are going to pause – we have a tendency to write really long posts, and think it’s a good idea to have shorter posts that are delivered on time. This week we learned about the new YAML syntax with stages and jobs, and the new “download build artifact” task. We created our first multi-stage pipeline, and then used templates to make our pipelines more object oriented.
Next week, we will apply what we have learned to our “SamLearnsAzure” pipeline
References
- Multi-stage pipeline announcement:
https://devblogs.microsoft.com/devops/whats-new-with-azure-pipelines/ - Jobs: https://docs.microsoft.com/en-us/azure/devops/pipelines/process/phases?view=azure-devops&tabs=yaml
- Stages: https://docs.microsoft.com/en-us/azure/devops/pipelines/process/stages?view=azure-devops&tabs=yaml
- Templates: https://docs.microsoft.com/en-us/azure/devops/pipelines/process/templates?view=azure-devops
- Featured image credit: https://biteable.com/content/uploads/2018/05/Launch-Videos-SM2-1200×630-c-center.jpg

In the classic release pipeline when you rerun a release build the same variables that were used when the release was initially created were used. In multi-stage pipeline, I am seeing the value is picked freshly/newly when even when we rerun the existing deployed stage.
Expected: Use the same variable value which was used in the initial run rather than using the new one. The pipeline variable is coming through Keyvault secrets. In the classic release pipeline it maintains the snapshot when we redeploy it picks the old value.
https://github.com/MicrosoftDocs/azure-devops-docs/issues/7663
Any help on it will be much appreciated.
LikeLike