

Today we are going to create a webhook and integrate it with Azure DevOps to capture pull request events. When the pull request is completed, the webhook will trigger a clean up resources in Azure we no longer need. This continues our series from last week, where we walked through how to create a dynamic pull request environment.
Creating the app
We created a new ASP.NET Core WEB API, similar to our other implementations, but could have used an Azure Function.
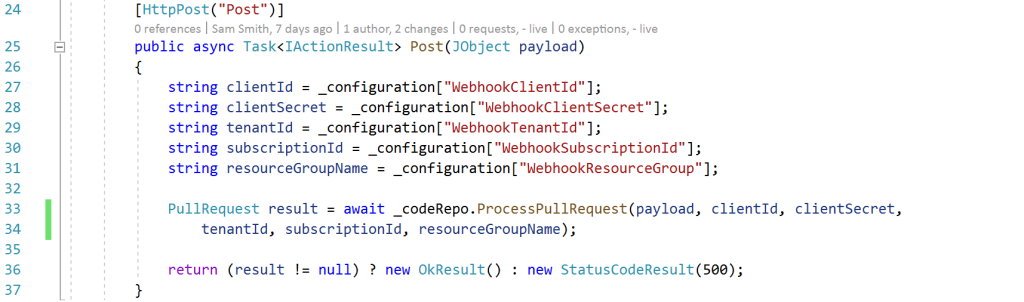
- On line 25, we can see our entry point in the controller is an HTTP post, taking in a JSON payload as a parameter.
- On lines 27 to 31 we connect to our Azure Key Vault to bring in secrets to connect to our Azure environment. This information includes the service principal information that will be used to log into Azure, a tenant id, subscription id, and the resource group name template.
- Finally, on line 33, we call our code repo class to process the pull request payload with all of the above parameters
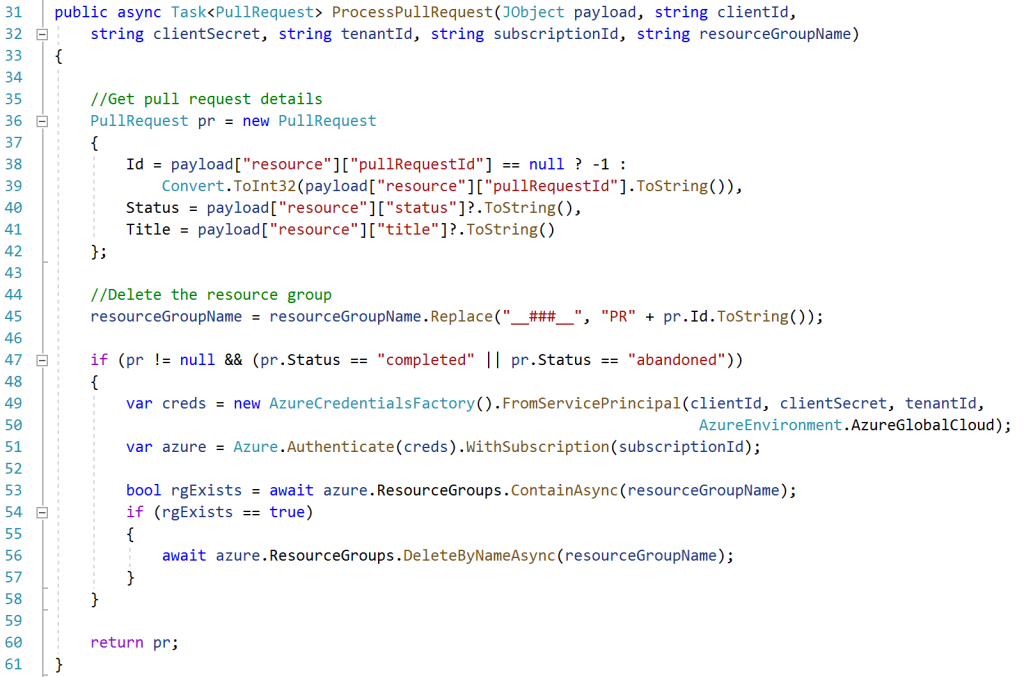
The code repo class is reliant on the “Microsoft.Azure.Management.Fluent” NuGet package.
- Lines 36-42 start by processing the JSON payload to get the Id, Status, and Title. Note that a bit more error handling was added after the screenshot, to ensure the document is in a valid format and what we expect.
- Lines 44-45 then build the resource group name to delete, for example, our template is “SamLearnsAzure__###__”, after substitutions, becomes “SamLearnsAzurePR439”
- The if statement on line 47 checks if the status is “completed” or “abandoned”. If true, the pull request is done, and we can delete the resource group
- Lines 49-51 create the credentials to connect to Azure with the service principal (client id + secret), and connect to the target subscription
- Line 53 checks that the resource group exists, (because the delete throws an exception if you try to delete a non-existent resource group)
- Line 56 deletes the resource group from Azure. This takes some time, about 8-9 minutes, but is not a task we need to wait for.
With the app created, we publish it to a web app resource in Azure.
Setting up the service principal
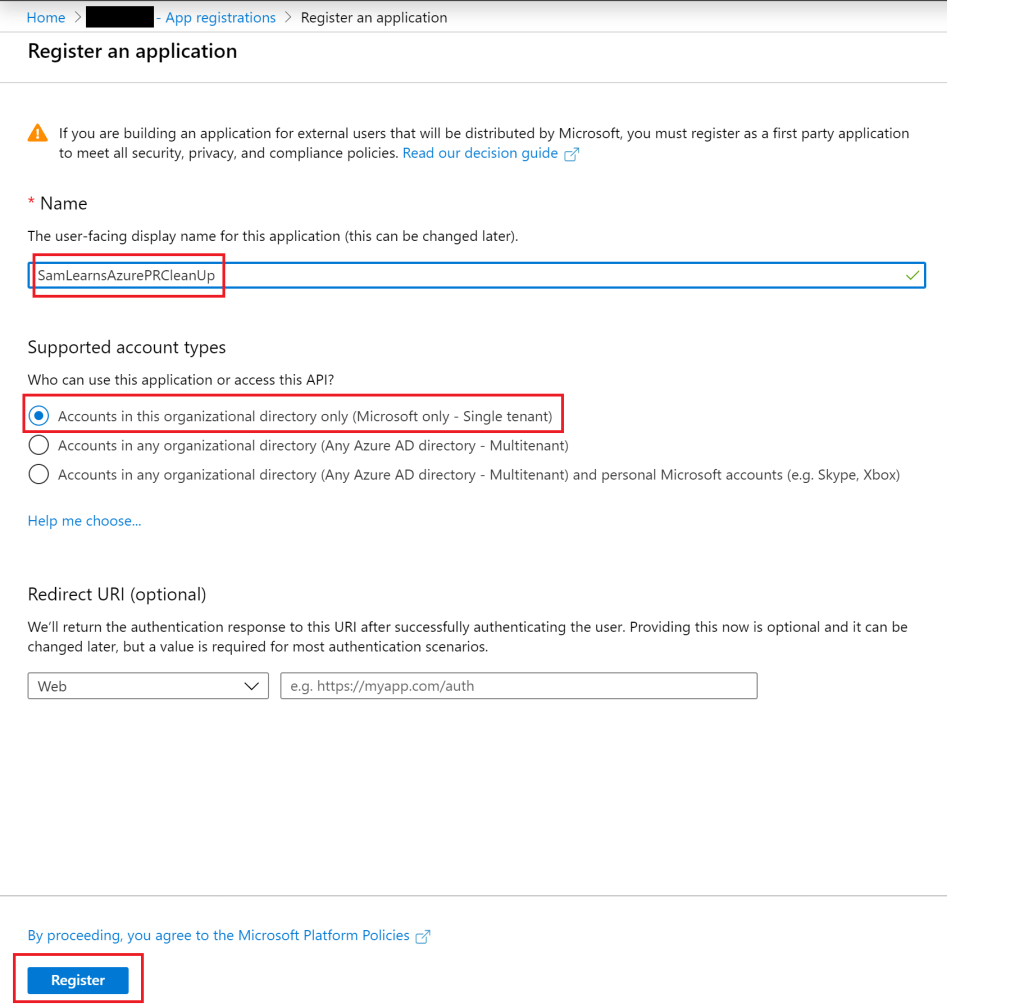
We need to setup permission for our webhook application to delete the resource groups: we need to create a service principal with contributor access on the subscription. We’ve created service principals a few times in our journey, but let’s start this again, perhaps this is your first time. We start by browsing to Active Directory and creating a new “App Registration”, naming it “SamLearnsAzurePRCleanUp” and clicking the “register” button.
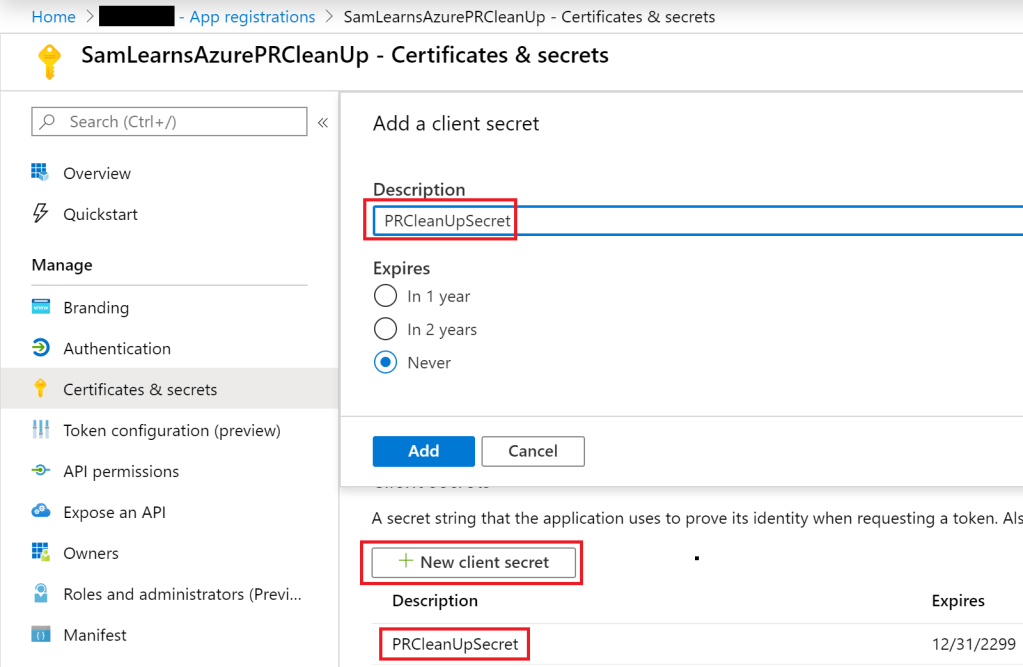
Next we create a secret for the service principal, and save it into our key vault, with the client id, and the other details we need, including tenant id and subscription id – both of which we find on the subscriptions page.
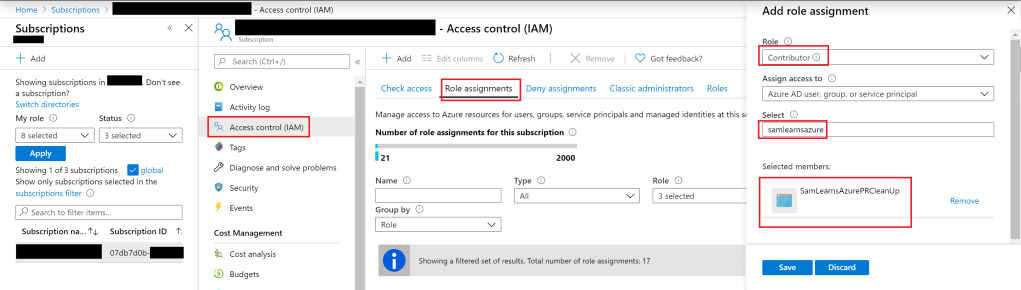
With the service principal created, we need to assign it to the contributor role in the subscription. We browse to the subscription, select “Access Control (IAM)”, and then click the “add” button, to create a new role assignment. In the “Add role assignment” blade, we select the “contributor” role, and select the service principal we created in the last step, “SamLearnsAzurePRCleanUp”.
Configuring the service hook
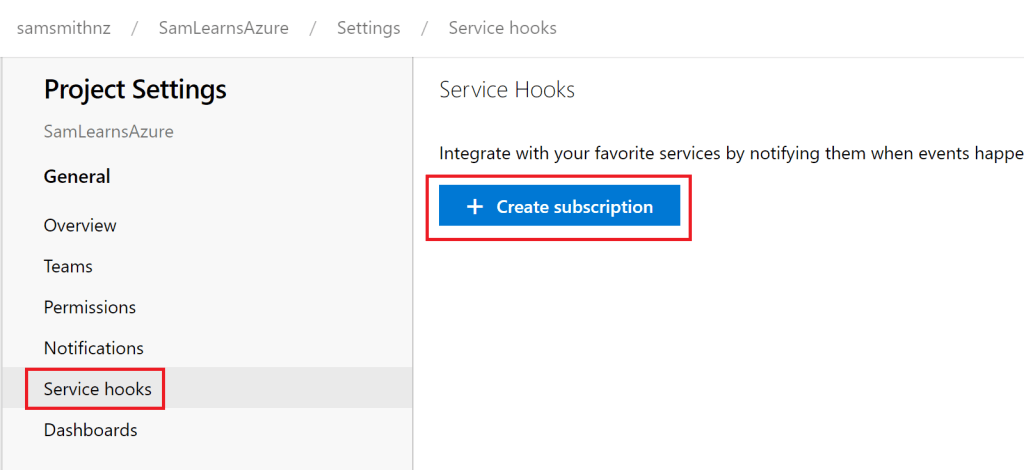
Now it’s time to put all of the pieces together and setup the webhook in Azure DevOps. In Azure DevOps, we browse to our project settings, select “Service hooks”, and then “Create subscription”.
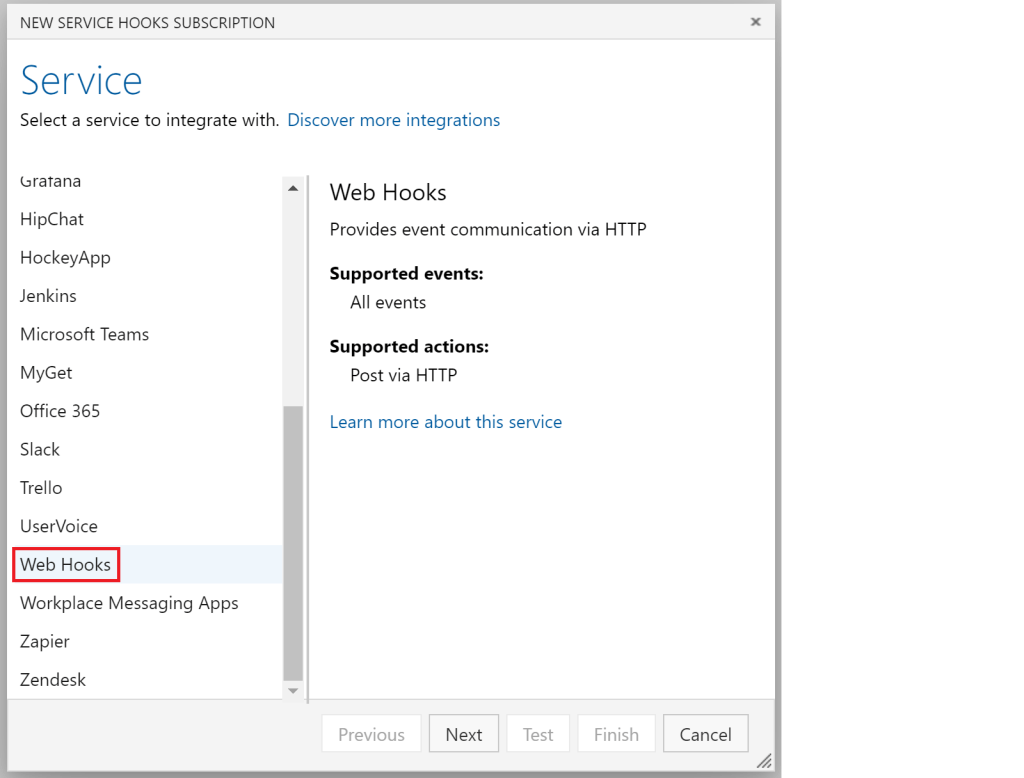
In the popup that appears, we select the service, finding “Web Hooks” within the left list.
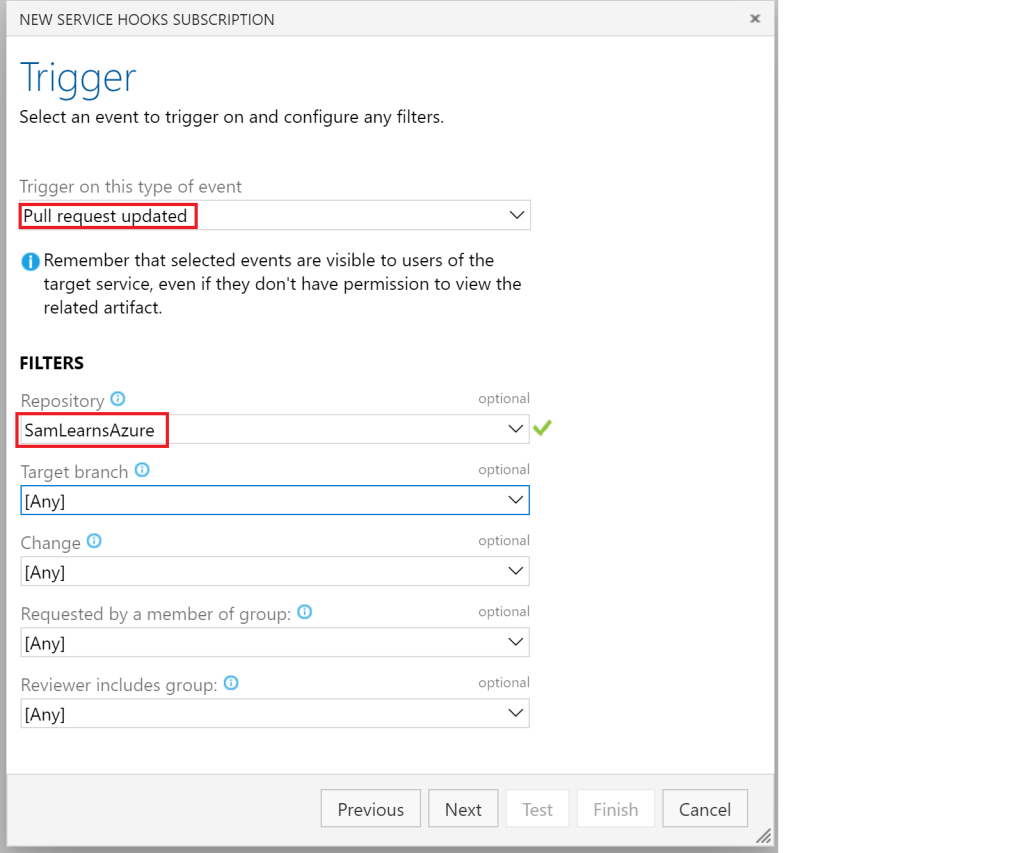
We then select the trigger, “Pull request updated”. There are a number of different events that can be leveraged here. We also select the repository, “SamLearnsAzure”, and leave all of the other options to their defaults.
On the next page, we select the action. This is where we add the url of the web app we created earlier. We don’t need to add authentication or http headers for this example. However, the sample we leveraged as a base to build our webhook, does use authentication to pass the PAT token as a password. Additional details can also be added to the HTTP Headers. See the sample for more examples.
The “test” button is also useful as it generates a sample payload for testing. For more advanced scenarios, we recommend using request.bin for prototyping new actions, as it can capture the payload and expose what needs to be processed to continue.

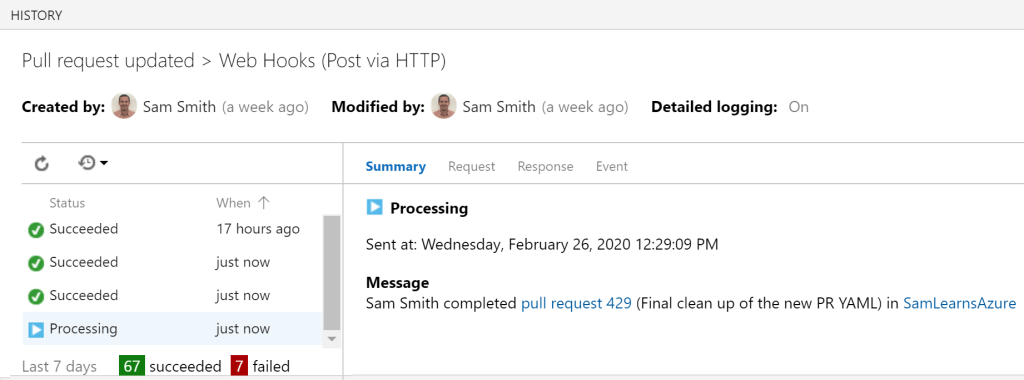
That is all we need, our webhook is now setup in Azure DevOps. In the screen below we can see it running. There are a few errors here. This is related to the timeout of the service hooks in Azure DevOps. As our resource group takes around 8-9 minutes to delete, this does cause some issues as it looks like the task failed. The task does complete successfully, and we’ve logged a bug to see if there is something we can do to control the timeout.
Wrap-up
We created a webhook to process events outside of Azure DevOps, which increases our productivity and saves us month when we are finished with an environment. The possibilities here are endless. There are other events to process completed builds, releases, code changes, and work item changes. Any extra pieces you require to add to your DevOps workflow can be extended here.
Be careful with adding customizations to Azure DevOps, as you want to ensure your overall process is not over complicated. Remember to focus on adding features and value to your end user, and not maintaining infrastructure.
References
- To create an app registration (for our web hook): https://docs.microsoft.com/en-us/azure/active-directory/develop/howto-create-service-principal-portal
- Webhooks in Azure DevOps: https://docs.microsoft.com/en-us/azure/devops/service-hooks/services/webhooks?view=azure-devops
- Service hooks event reference: https://docs.microsoft.com/en-us/azure/devops/service-hooks/events?view=azure-devops#git.pullrequest.updated
- Service hooks in Azure DevOps consumers (Webhooks): https://docs.microsoft.com/en-us/azure/devops/service-hooks/consumers?view=azure-devops#web-hooks

2 comments