

Today we will learn how to use (free) Azure web app managed certificates. While we have been using the free Let’s Encrypt certificates for a few years, and they work most of the time, we have had our fair share of certificate pain. Bottom line, it has been way too hard to difficult and involved to setup, renew, and maintain a certificate. Luckily these new managed web app certificates are significantly easier to setup and manage.
“Almost everything involving a certificate will eventually incur pain and cost. Usually immediately, but sometimes later.”
Nick Craver, Twitter
Let’s start by creating a managed certificate in the portal, and then we will use the CLI to automate the creation of it as part of our DevOps pipelines. There are two pre-requisites to use the managed certificates:
- Requires App Service Plan of Basic and above (free and shared tiers are not supported)
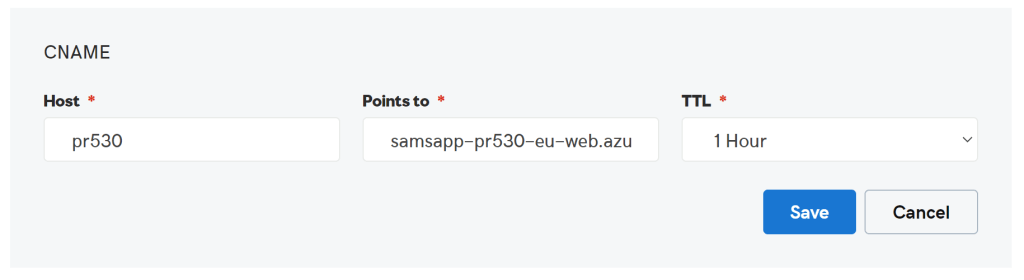
- A CNAME needs to be setup, (for us, it’s in GoDaddy), to redirect the DNS to the web app. In this example we are going to setup pr530.samlearnsazure.com to redirect to samsapp-pr530-eu-web.azurewebsites.net.
Managing certs from the Azure Portal
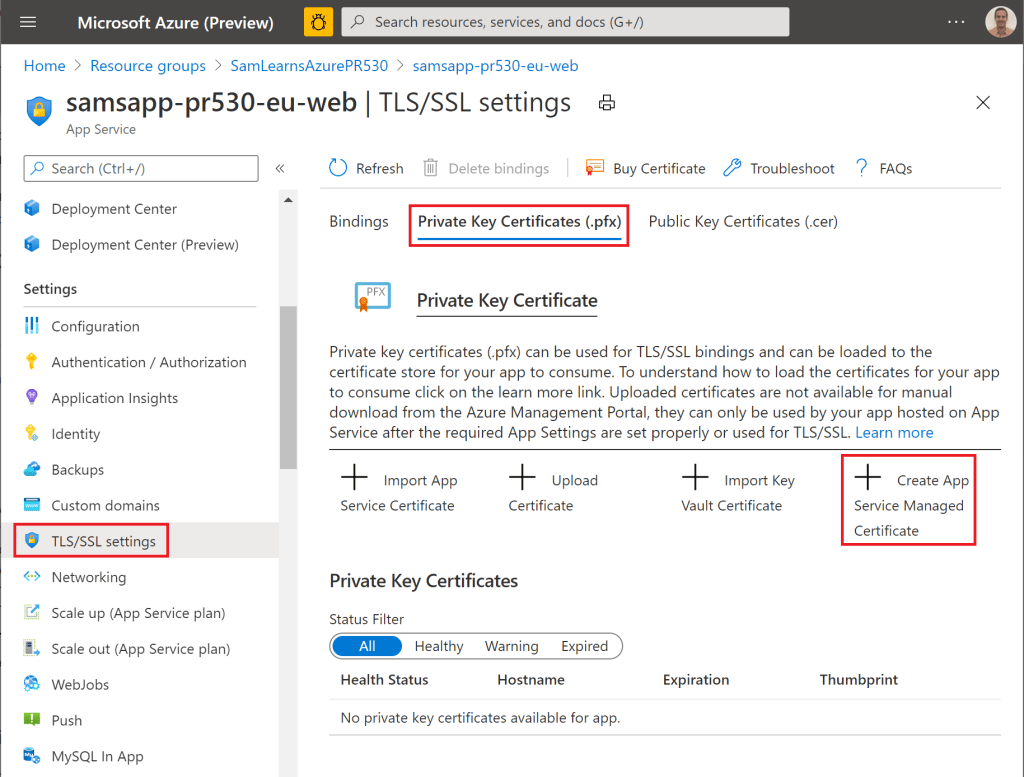
Step 1: Generate the certificate.
In the Azure Portal, we browse to our web app, and click on the “TLS/SSL settings” section. We select the “Private Key Certificates (.pfx)” tab, and then “Create App Service Managed Certificate”.
In the popup that appears, we select the DNS address we want to generate a certificate for, that we previously configured in GoDaddy.

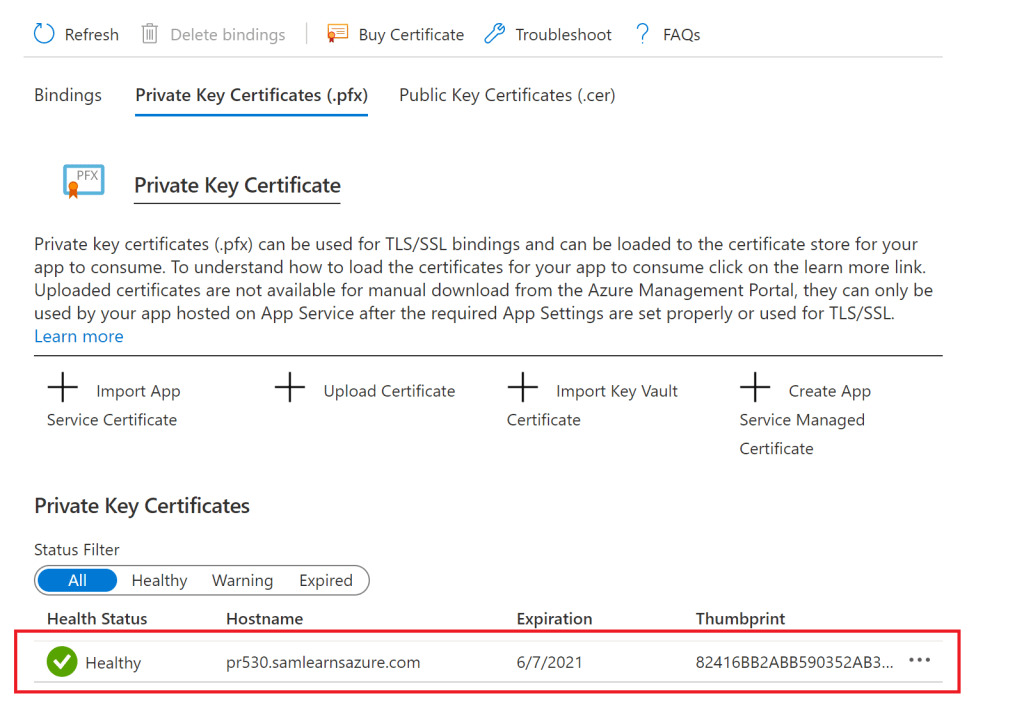
We can see our new certificate in the list below. You can also view the newly created certificate in the resource group, after you click the “show hidden items” checkbox. It will have a type of “cert”, and be named after the DNS (e.g. pr530.samlearnsazure.com).
Step 2: Bind the certificate to the web app. Now we associate the certificate to the web app SSL settings. On the “Bindings” tab of the TLS/SSL settings section, we click the “Add TLS/SSL Binding” link.

We now select the custom domain to bind to, the certificate we just generated. Note that the thumbprint Id matches the Id we generated above. We also select “SNI SSL” for the type.

With the binding created, our certificate is now attached the web app.

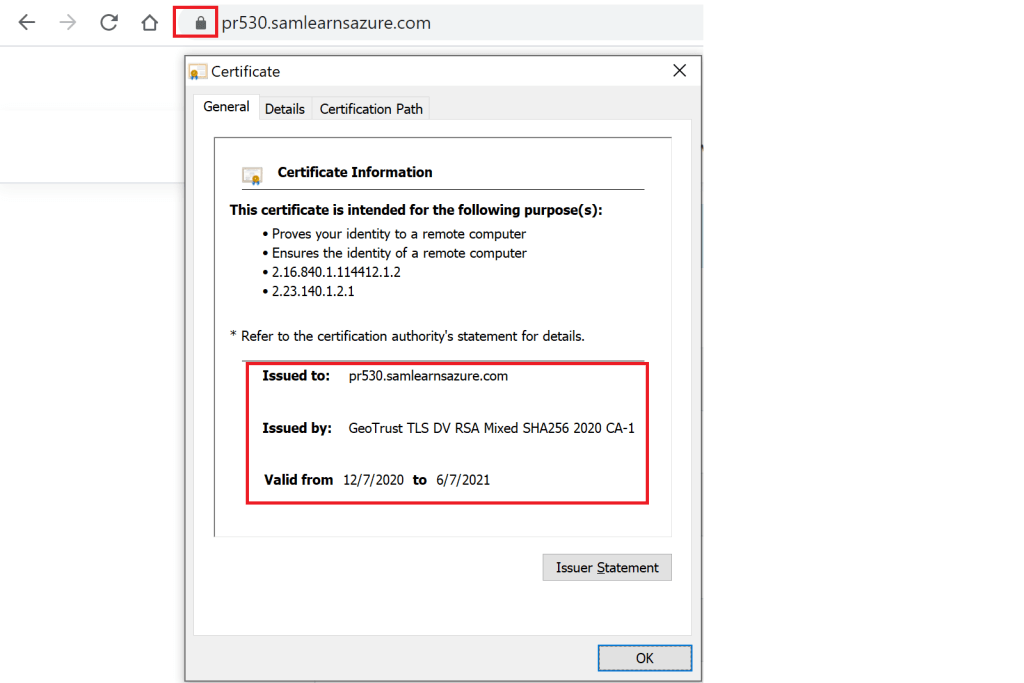
Now when we browse to the URL, we can view the certificate and see our website is secure with HTTPS.
Using the certs with Azure CLI
Now we’ve walked through the steps in the portal, let’s look at what we need to do to automate this with Azure CLI. Similar to the portal, there are two steps, first to generate the certificate, and then to bind the certificate to the web app. The complete script is below:

Step 1: Generate the certificate
#Generate the certificate
$newCert = az webapp config ssl create --hostname $websiteDomainName --name $webSiteName --resource-group $resourceGroupName --only-show-errors

$thumbprint = ($newCert | ConvertFrom-Json).thumbprint
The command we use is az webapp config ssl create, and the parameters are:
- hostname: We need to pass in the domain we are generating the certificate for (remember it can’t be a naked url, (samlearnsazure.com) it needs to have a subdomain, so for example “dev.samlearnsazure.com”)
- name: the web app name, e.g. samsapp-dev-eu-web
- resource group: the resource group name. eg. SamLearnsAzureDev
- only-show-errors: as managed certificates are still in preview, this suppresses the preview error that is generated when you use this command
- The json result is assigned in the $newCert variable, which we parse to extract and assign the thumbprint property to a $thumbprint variable
- certificate-thumbprint. This the thumbprint from the certificate, it typically looks a bit like a guid, e.g. “4F0AA77D85419AC7B66333EA8D69D6FB661272A9”
- ssl-type: We always choose SNI
Step 2: Bind the certificate to the web app. Now we associate the certificate to the web app SSL settings. We use the az webapp config ssl bind command for this.
#Bind the certificate to the web app
az webapp config ssl bind --certificate-thumbprint $thumbprint --ssl-type SNI --name $webSiteName --resource-group $resourceGroupName
Disadvantages
There are a few disadvantages to the free managed certificates, but depending on your situation, they likely don’t affect you. The most common blockers are no support for naked domains or wild cards – typically you have to pay for these as premium features. For us, that just means we need to keep using Let’s Encrypt for naked domains such as samlearnsazure.com. If this was a website for a business, we would likely purchase an Azure wildcard certification (currently $299US a year), and we’d be done, but we are still trying to run this blog as lean and cheaply as possible.
Wrap up
Today we learned a significantly easier way to manage our app service certificates. While managed web app certificates are still in preview, this binding process is much easier to manage and maintain.
References
- Blog announcement for app service managed certificates: Secure your Custom Domains at no cost with App Service Managed Certificates (preview) | Azure updates | Microsoft Azure
- Microsoft docs to manage certificates in web apps: Add and manage TLS/SSL certificates – Azure App Service | Microsoft Docs
- Microsoft docs for Azure CLI commands: az webapp config ssl | Microsoft Docs
- Featured image credit: https://zdnet4.cbsistatic.com/hub/i/2018/05/22/469ace7c-d7e7-47ad-8e12-845744c64542/istock-689019766-1.jpg

One comment