

Today we are going to create an ASP.Net Core WebAPI service, with an automated continuous integration build using YAML, and
continuous deployment release to Dev, QA, and Production.
We will use this API service to connect to a database and create a transportation layer to manage data between the website and the database. We aren’t going to worry about the data or website today, our focus is on the steps to set it up and deploy to Azure.
We will talk about continuous integration (or “CI”), and continuous deployment (or “CD”), quite a bit, so let’s define what it means.
- Continuous Integration: The process of constantly merging our changes with the master branch. This also includes testing, and is designed to ensure we have a consistent and continual process to confirm our changes aren’t breaking the build and find bugs as early as possible in our development process.
- Continuous Deployment: the process of ongoing automatic releases to all of our environments – in this case dev, QA and production, to reduce the challenges of large releases. The idea is that a small feature release is less likely to break large parts of the website, is easier to test and troubleshoot (if something goes wrong), and helps to provide continuous value to the end user. CD is enabled through automatic testing – after all, can we deploy something to production with confidence if we haven’t tested it?
Organizing our work
We have created many features, and prioritized them at a high level on the backlog. We move work item 769 to in progress on the board and assign it to “Sam Smith”, who will be the developer in this instance. Now we create a branch off one of the product back log items, as we aren’t expecting to complete all the product back log children of the feature today.
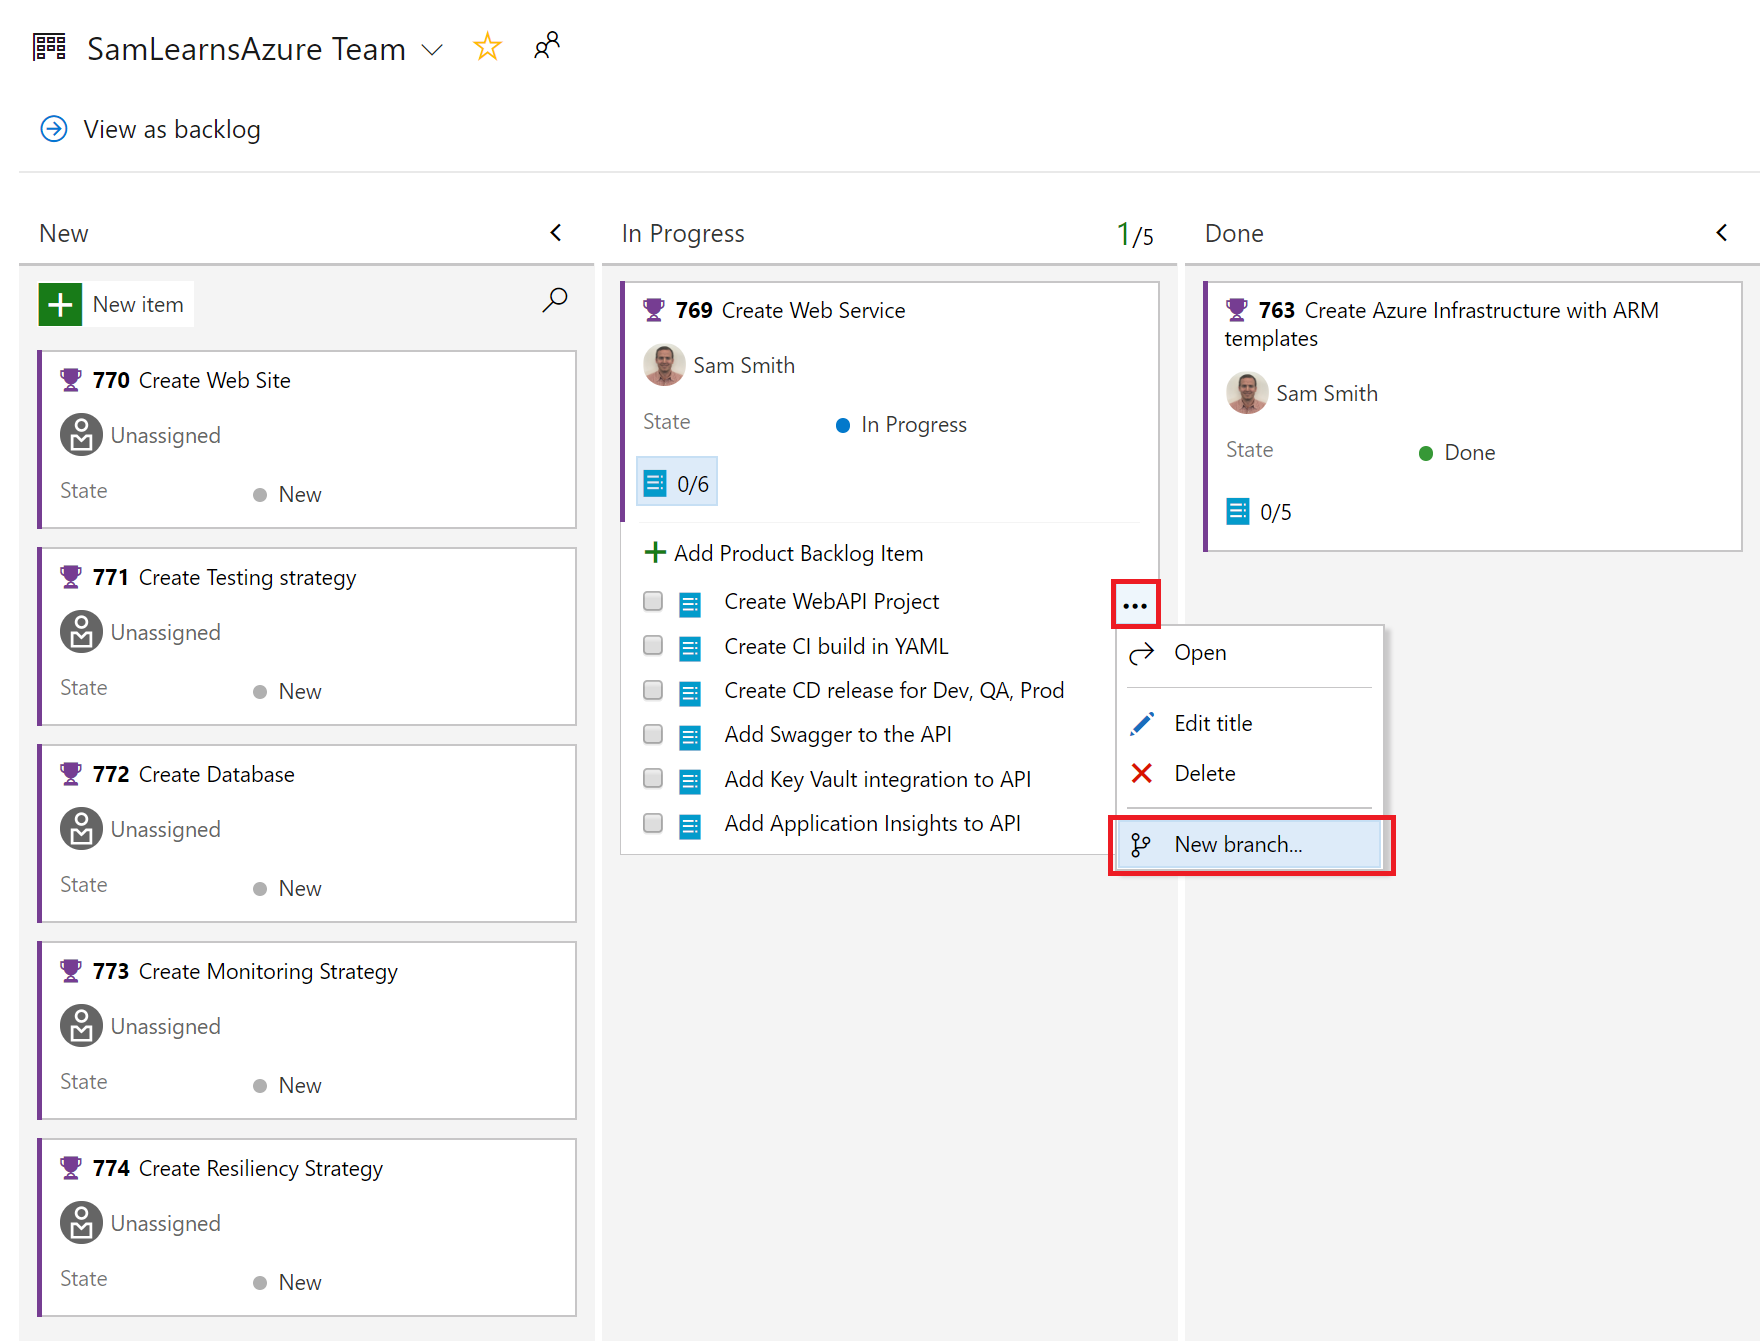
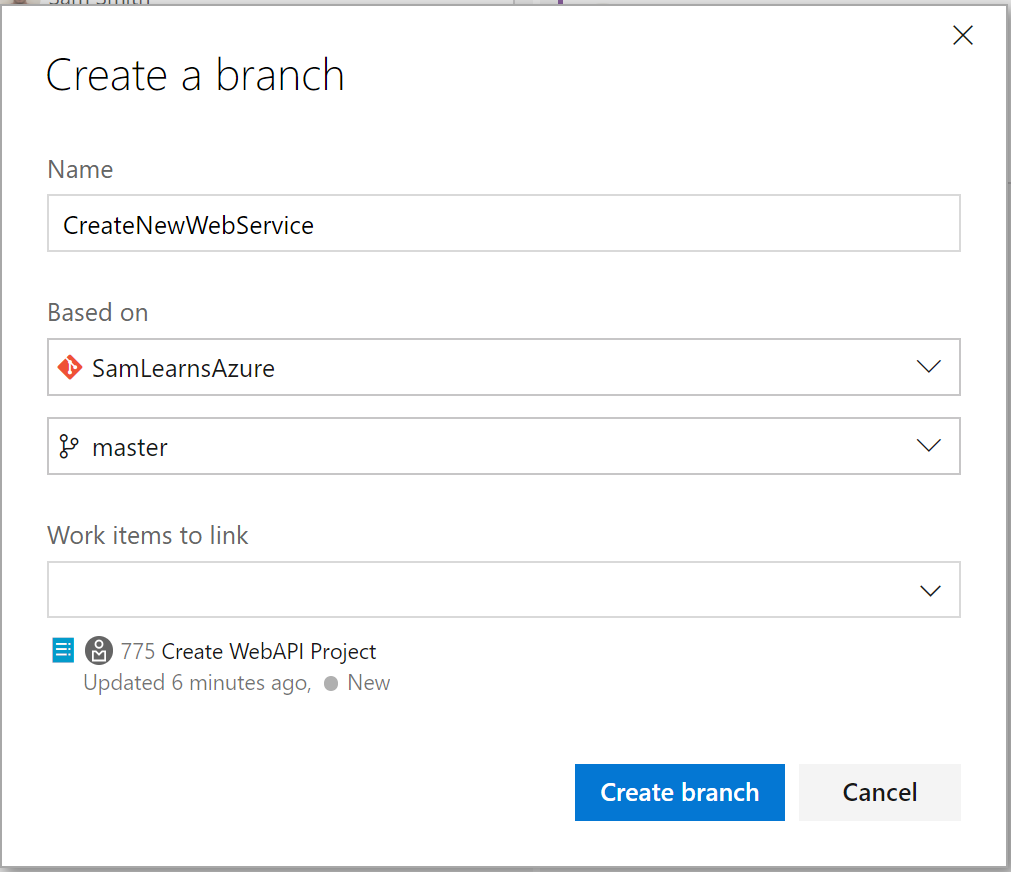
We name the branch “CreateNewWebService”. Work item 775 is already attached, so we only need to press the “Create branch” button
Creating the web service in Visual Studio
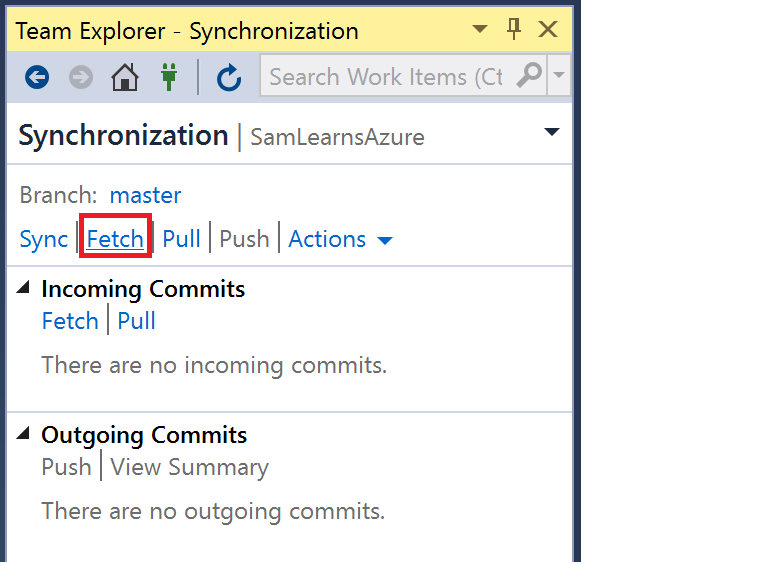
Opening Visual Studio, the first task we need to complete is opening the Team Explorer, and clicking the “Fetch” link. This brings all of the latest information from the server – including our new branch.
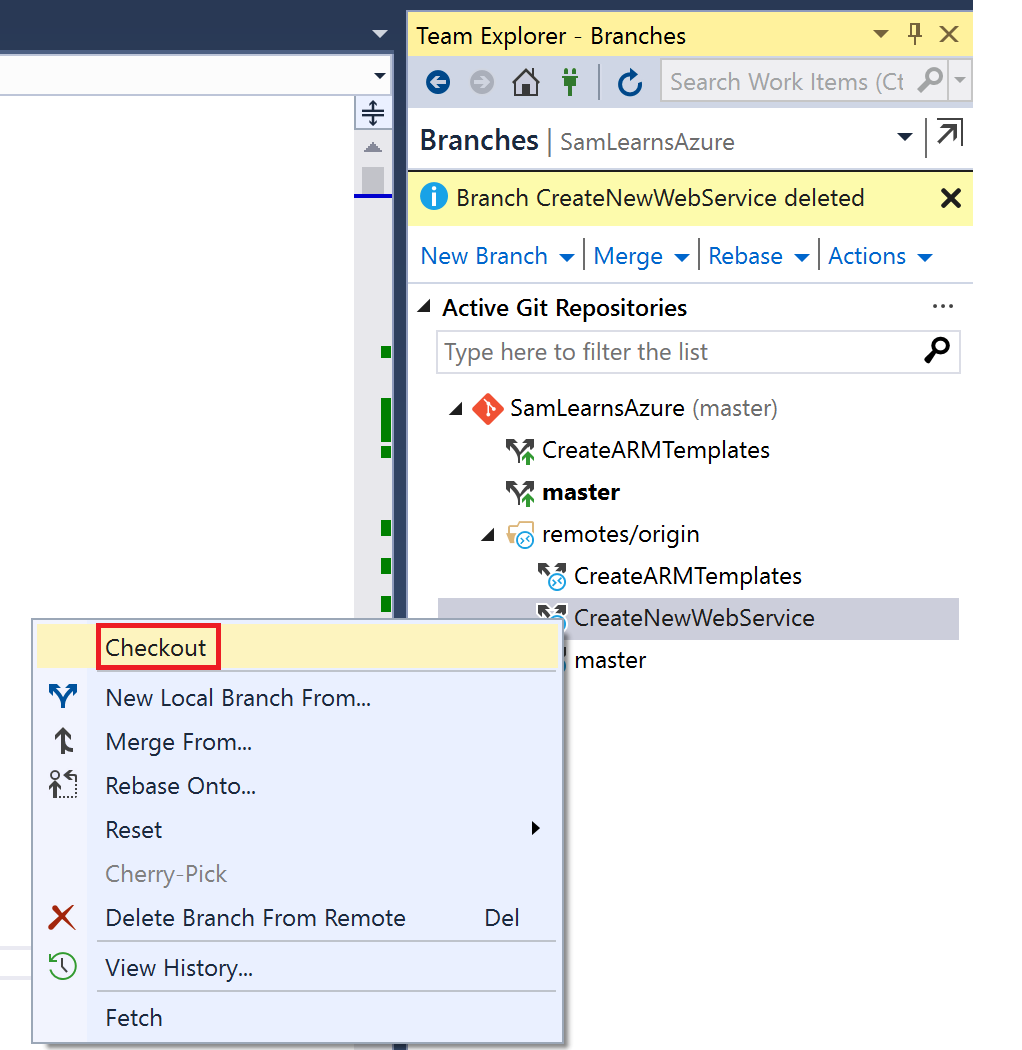
Now on the branches tab in Team Explorer, we can now open the remotes/origin folder, right click on “CreateNewWebService”, and select “Checkout” to download the branch locally and switch to the branch
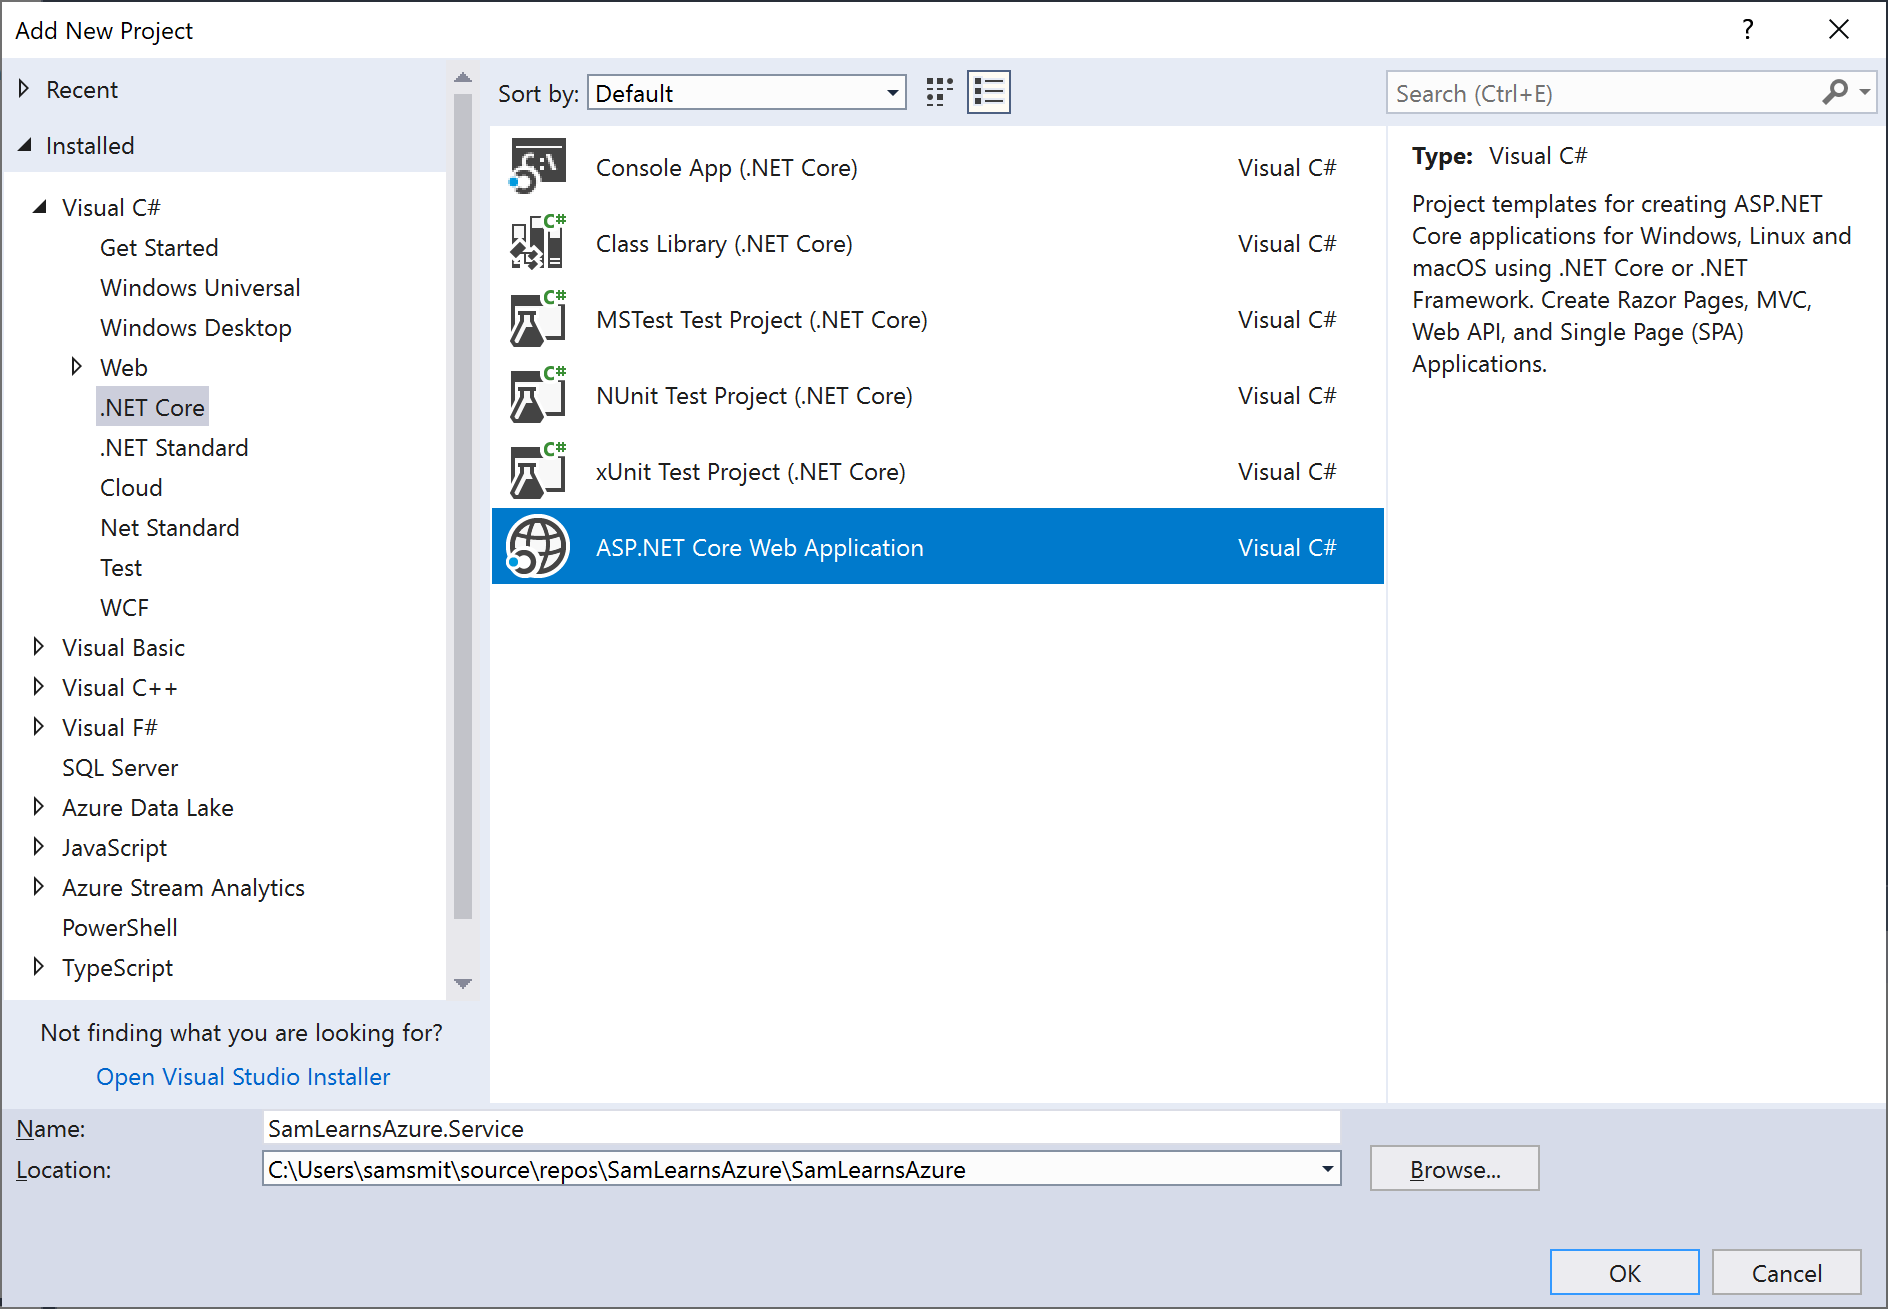
In our solution, we right click on it and “add a new project”, selecting “ASP .Net Core Web Application”, and name the new project “SamLearnsAzure.Service”
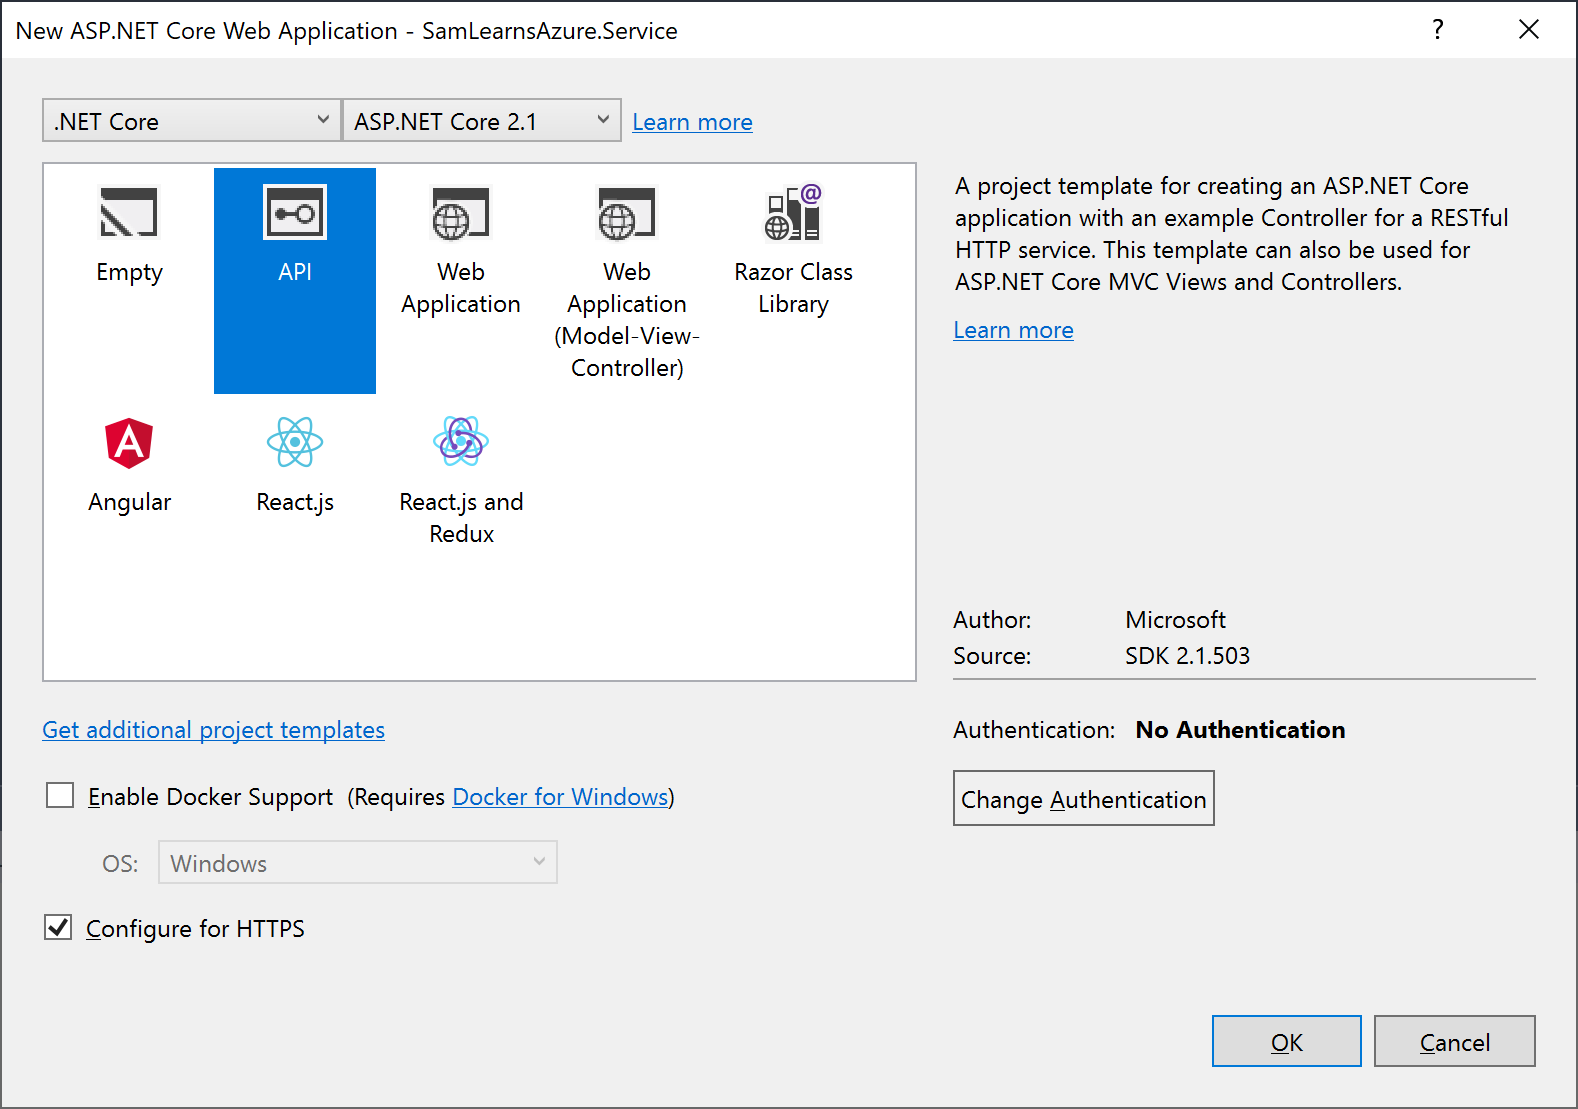
In the next dialog we select version 2.1 of .NET Core, select the “API” template, enable the checkbox “Configure for HTTPS”, and leave the authentication on “no authentication”. We definitely want to revisit this and use Azure Active Directory later, which we will do in another part. We also have Docker/Containers on our longer term road map to revisit, but we will also leave this blank for now too.
Now we have working web service. It doesn’t do much. We right click on the “SamLearnsAzure.Service” project and select “Set as startup project” so that we can run it, and press F5 to run a debugging session. This runs a default “values” action, returning an string array. Not rocket science, but we now know the service works, and can continue to the next step to commit and push our changes to Azure DevOps, and create and complete a new pull request.

Creating a build with YAML
It’s time to create a new build, separate from the ARM Template build. We think it’s a good idea to keep these separate as we are expecting to make a lot of little changes to the web sites, but not as many changes to the ARM Templates/infrastructure. Keeping the builds separate will help to make the DevOps process more flexible.
When creating the build in Azure DevOps, we have the option of using YAML. YAML isn’t the easiest language to use or understand, but having the build in code for the build, like an infrastructure, creates a lot of opportunity – particularly if the team is large.
Take this scenario as an example. The team is large, with many pull requests completed every minute. What happens when someone changes the build definition? It likely breaks someones work flow – and if the change to the build definition doesn’t work, it definitely breaks a lot of builds, causing blockages for the team.
Let’s look at the same scenario with YAML. If a developer needs to change the build definition, it’s in code and hence part of the pull request. The pull request runs the build with the YAML changes and verifies that the build works as expect, essentially in isolation – pretty much what a pull request has been designed for, before merging with the master branch. This is a much smoother path, and most importantly, doesn’t affect other developers.
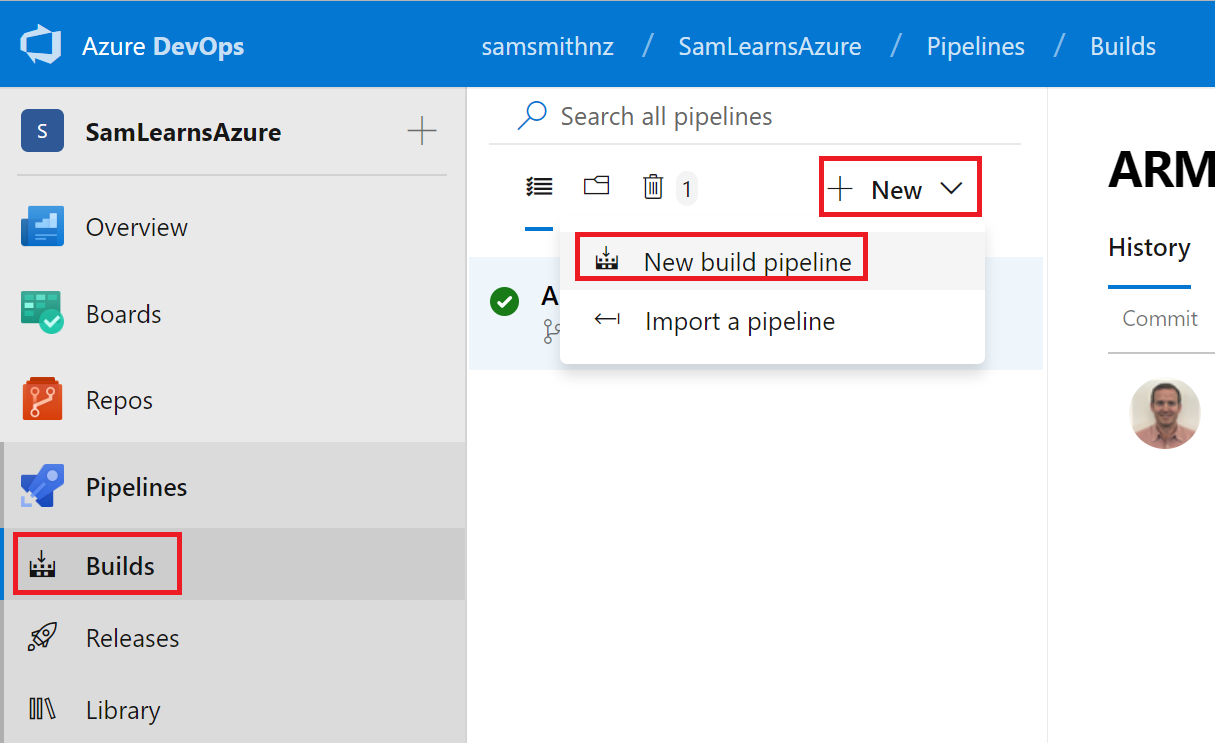
Given this, let’s create our YAML build. In Azure Pipelines, click on the “Build” menu item, then the “+New” button to open the context menu where we click on the menu item “New build pipeline”.
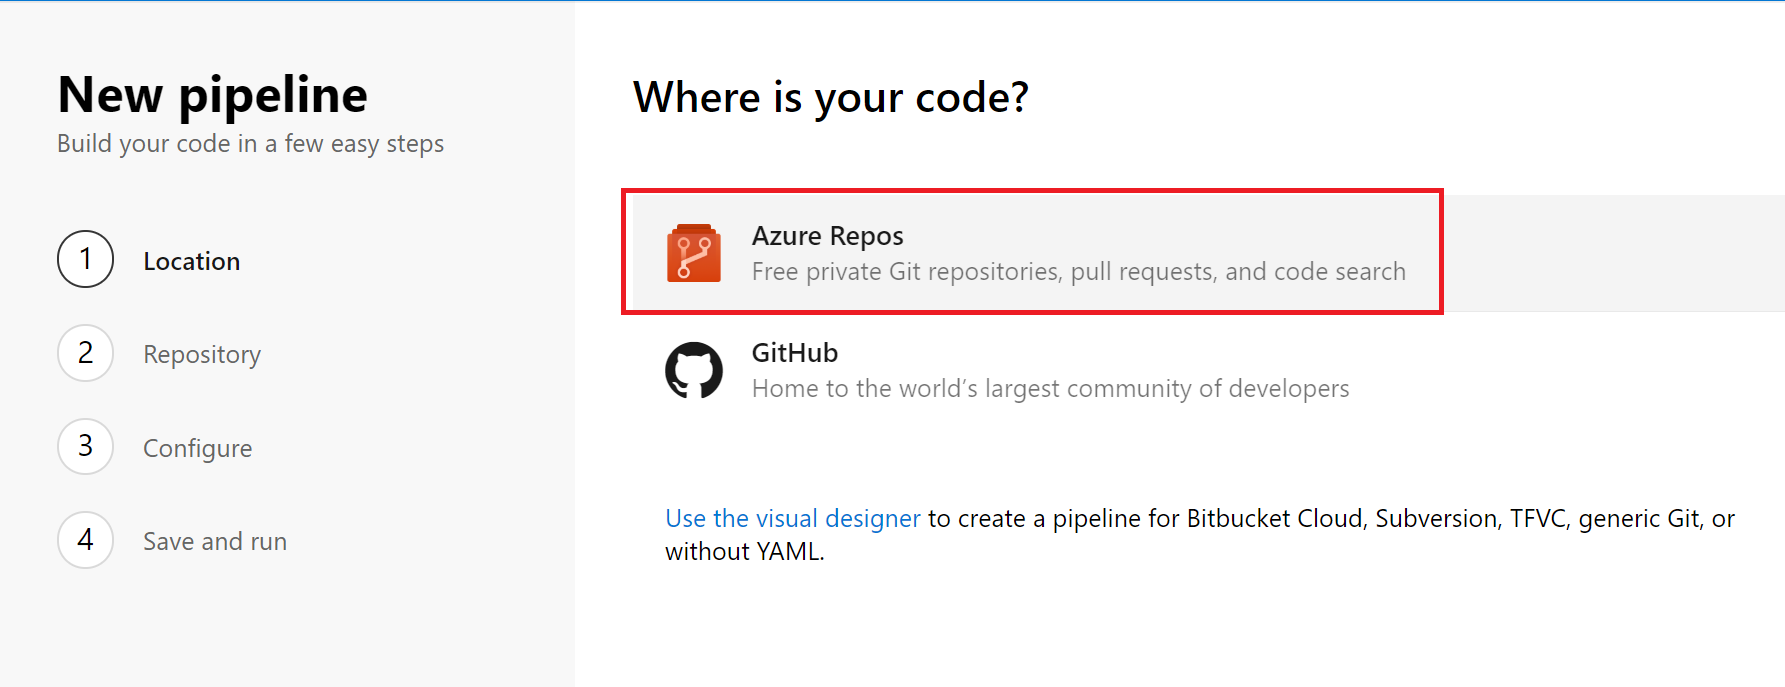
We are in a wizard now, where first we select “Azure Repos”.
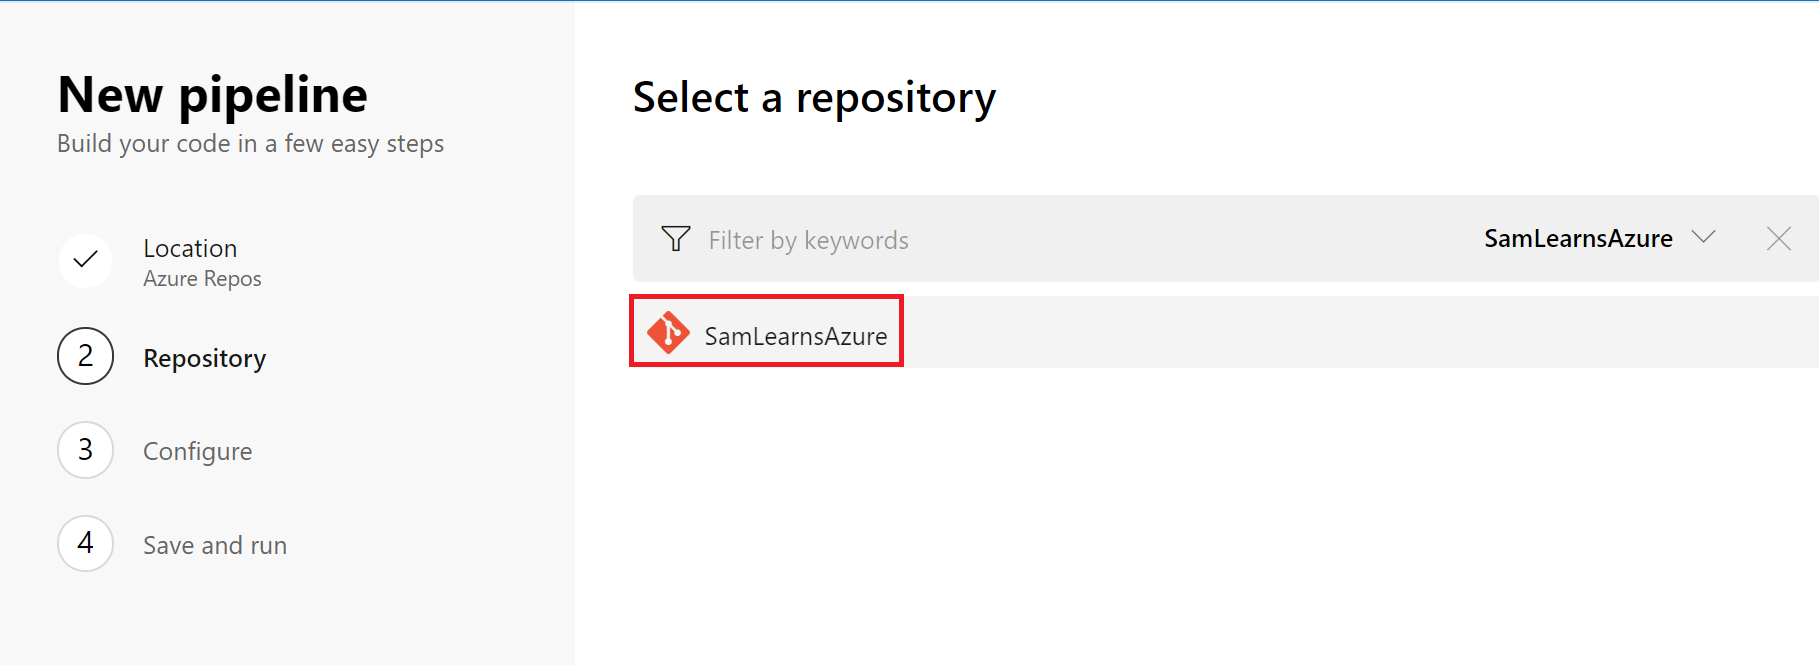
Next, we select the repository we are building from, “SamLearnsAzure”.
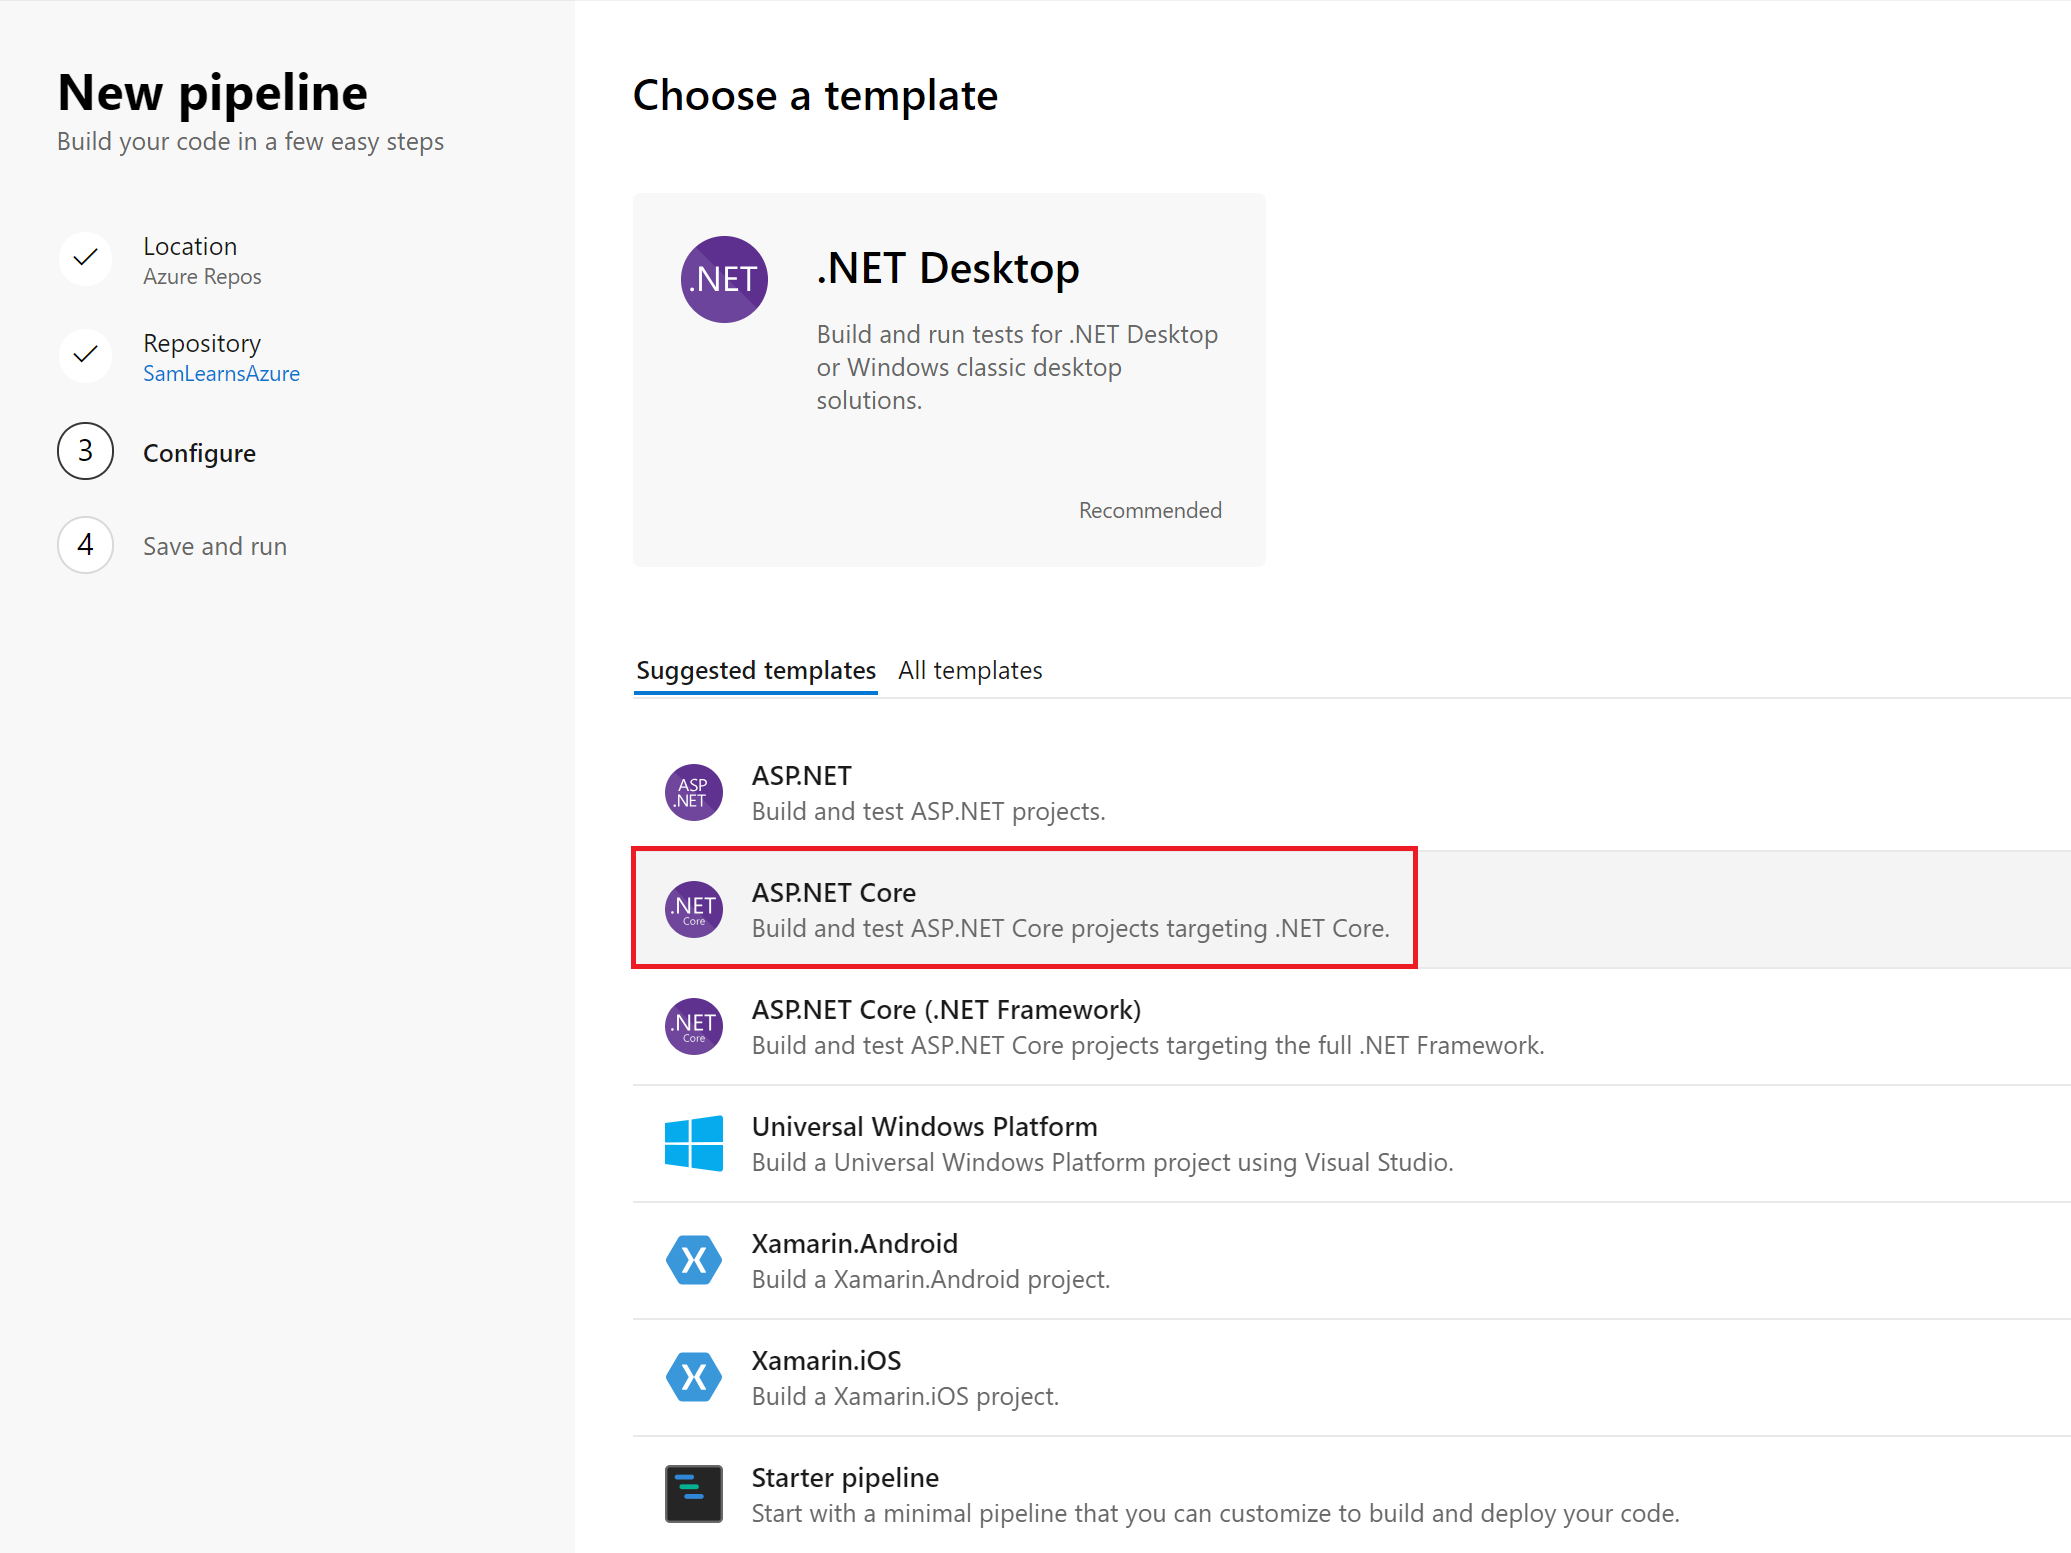
We select the template we are building – “ASP.NET Core”.
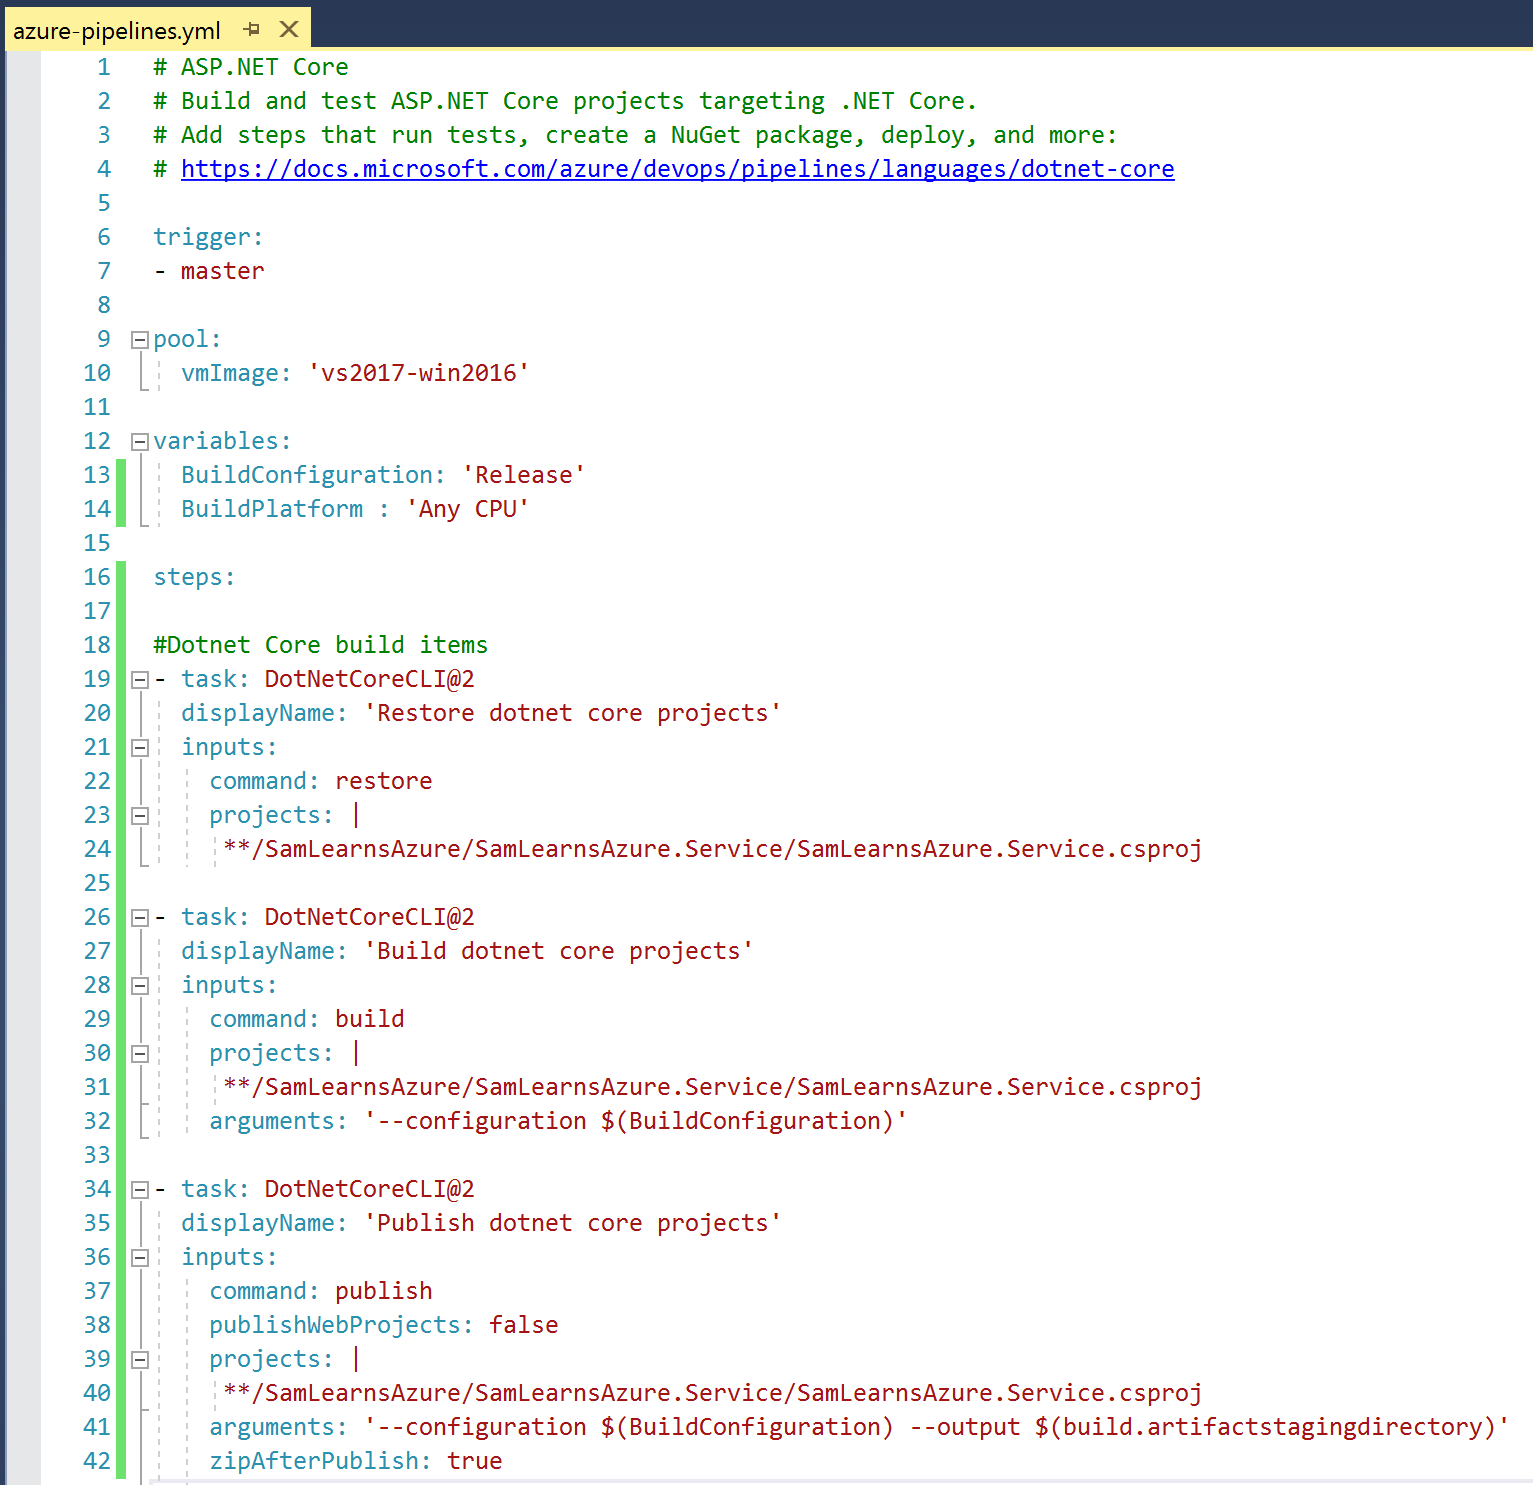
Finally, we are given a YAML file. Here we edit the vmImage property to use the ‘vs2017-win2016’ image, instead of the Linux image.
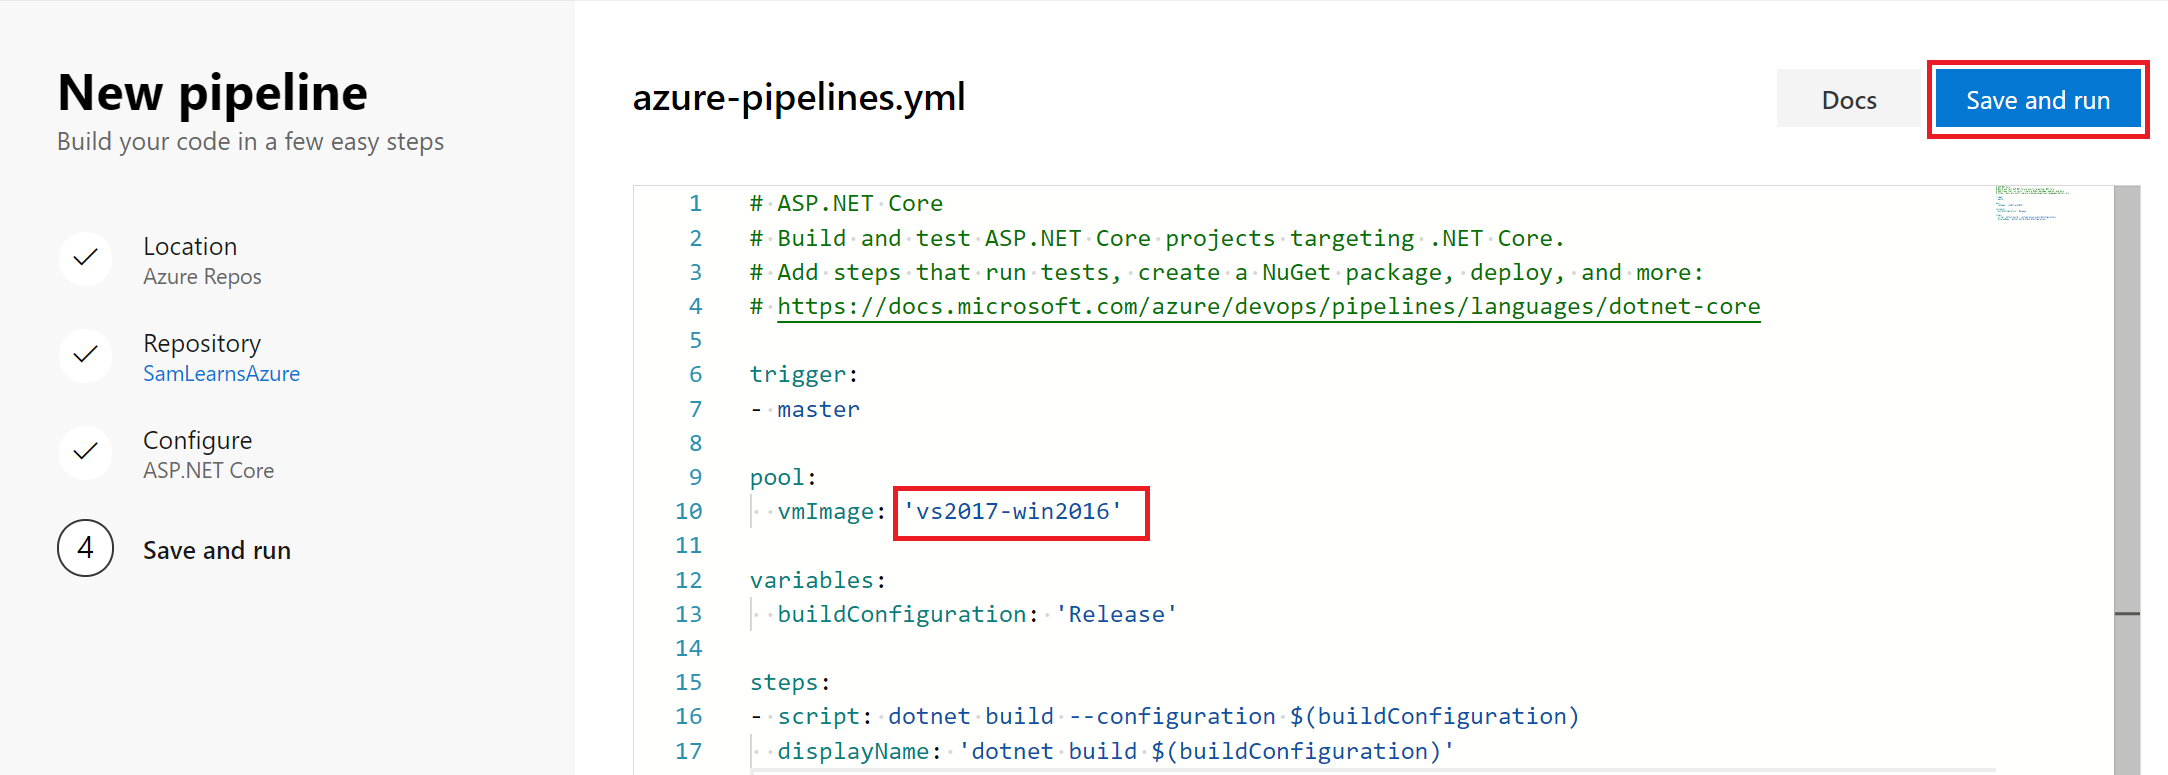
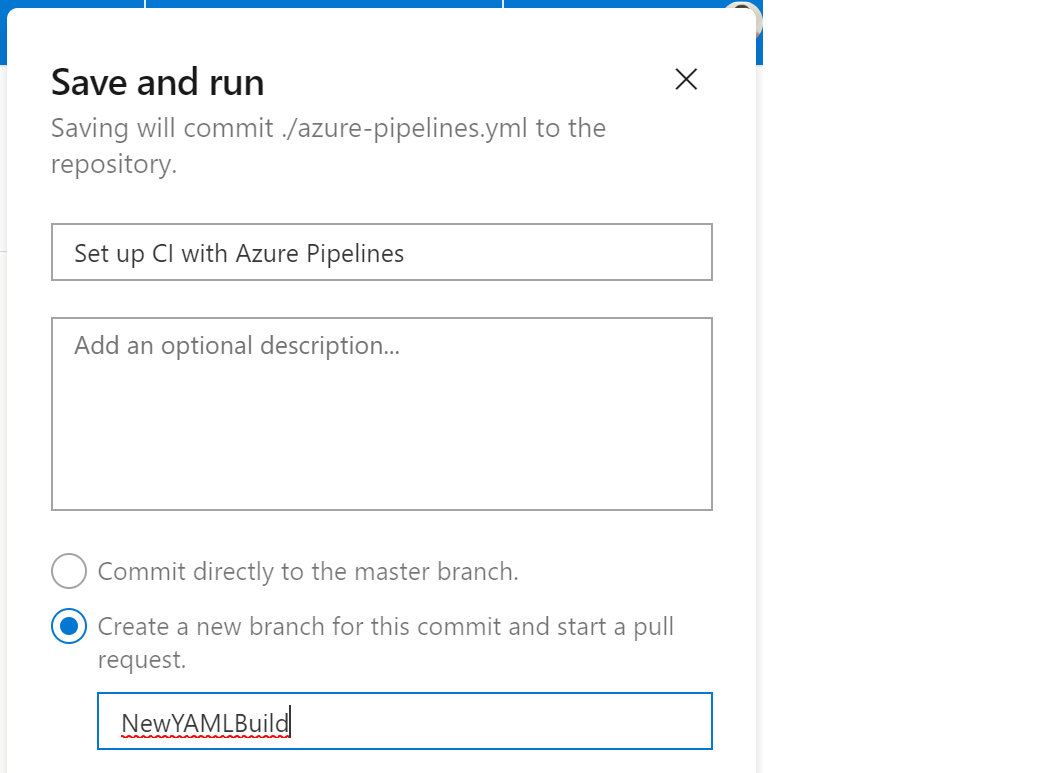
We then “save and run”, and create a new branch for the YAML build.
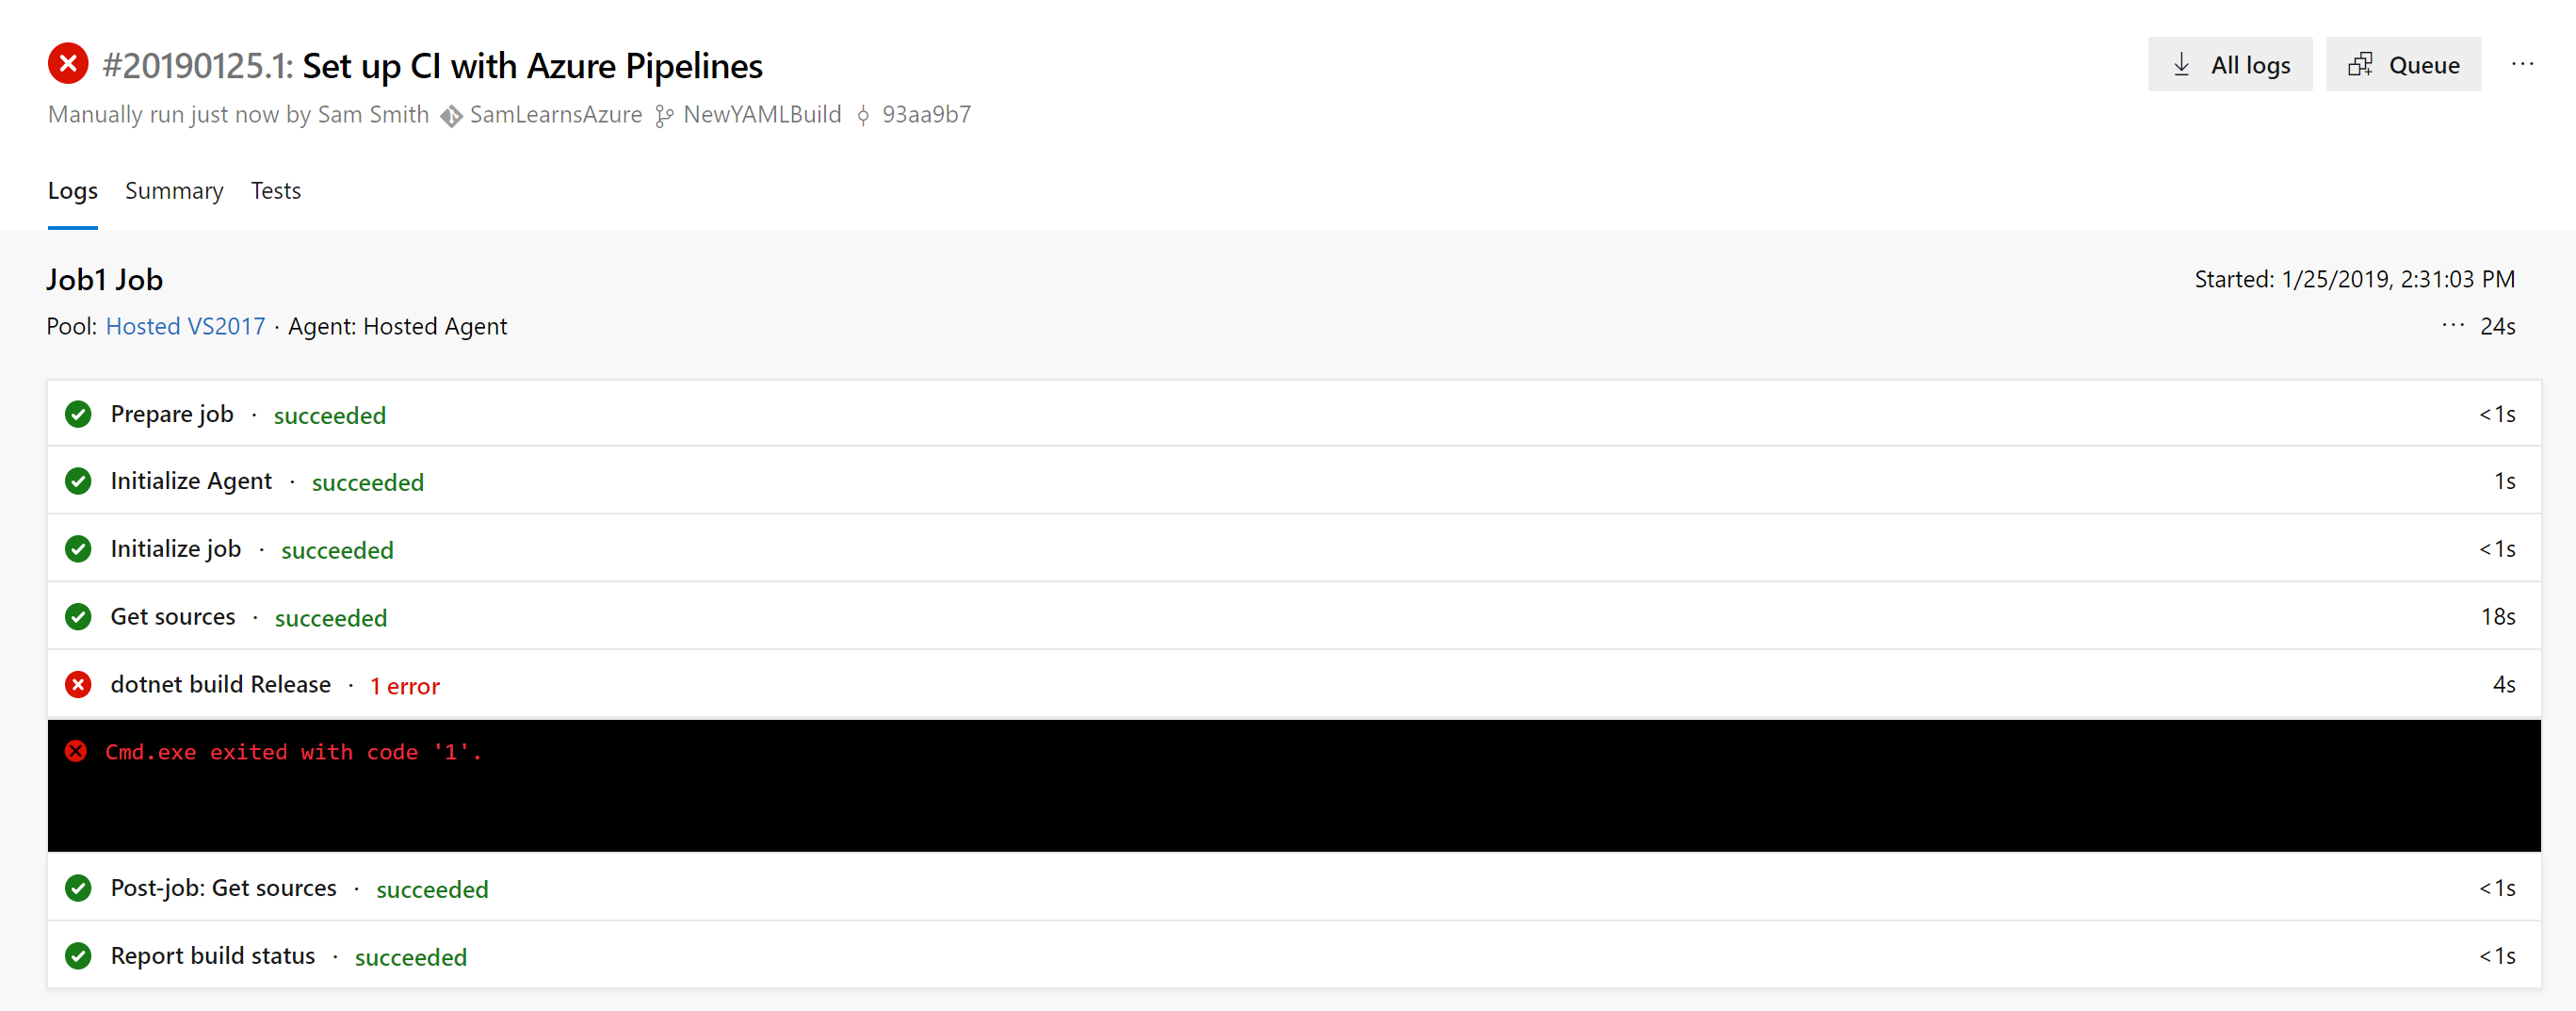
We received a little surprise here, the build failed – but instead of debugging this, we planned to edit the basic YAML anyway.
We open Visual Studio, checkout the “NewYAMLBuild” branch and update the YAML in Visual Studio. The easiest way to learn YAML, in our opinion, is to use the designer and then press the “View YAML” button for each task. We often go back to this when we need to add a feature, rather than scouring the documentation. In the YAML:
- We update the variables to include both the configuration and platform
- We add a step to “dotnet restore”, specifically targeting our service project.
- We add a step to “dotnet build”, specifically targeting our service project.
- We add a step to “dotnet publish”, specifically targeting our service project. This zip includes parameters to output to the artifact staging directory and to zip the result.
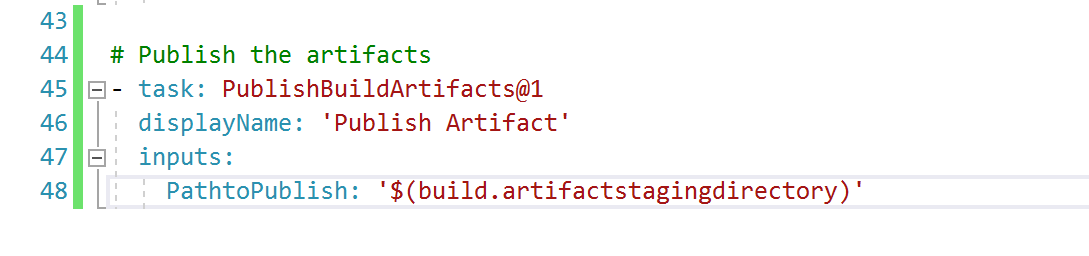
Finally we need to publish the build artifacts. This is an important step as it takes the build output and places it in a folder than can be saved and accessed by releases later.
Next, we jump back into our master branch policy, where we add the build as a requirement. This will add a policy to future pull requests – we can’t complete a pull request unless the build is successful.

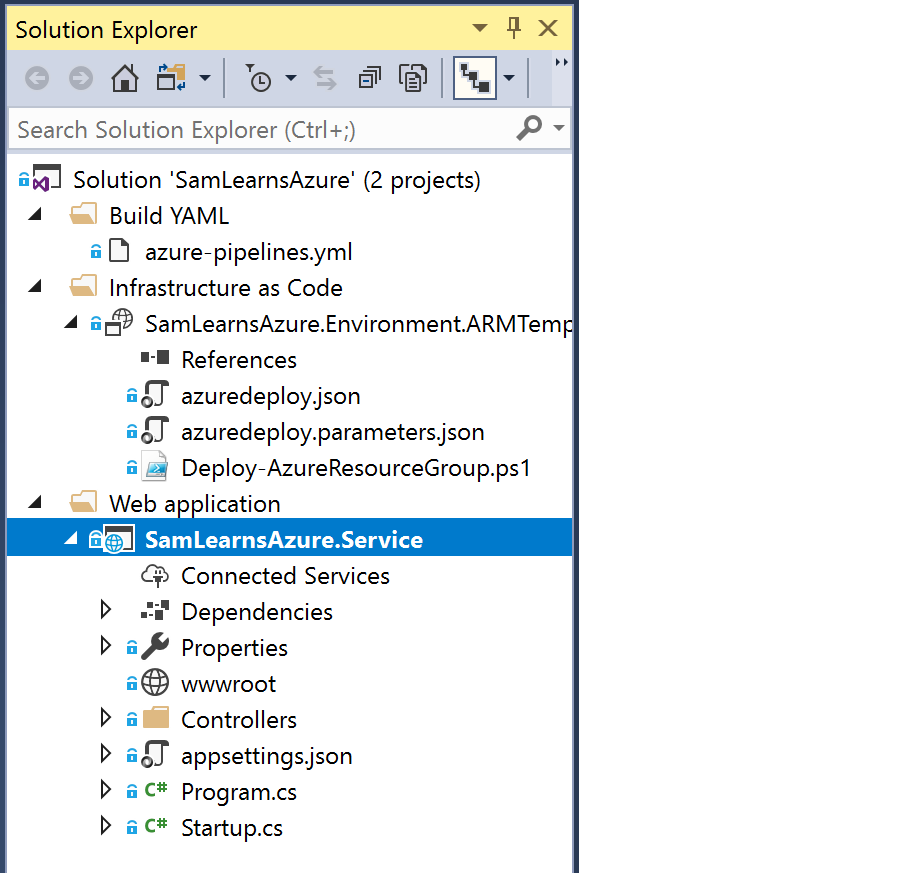
We are also going to take this opportunity to rework the solution a little with some solution folders – this will help with our organization later. This step is entirely optional, but we think it helps with larger solutions.
We push our code and start a pull request. On the right side we are now requiring a build, that we can see in our policies section.
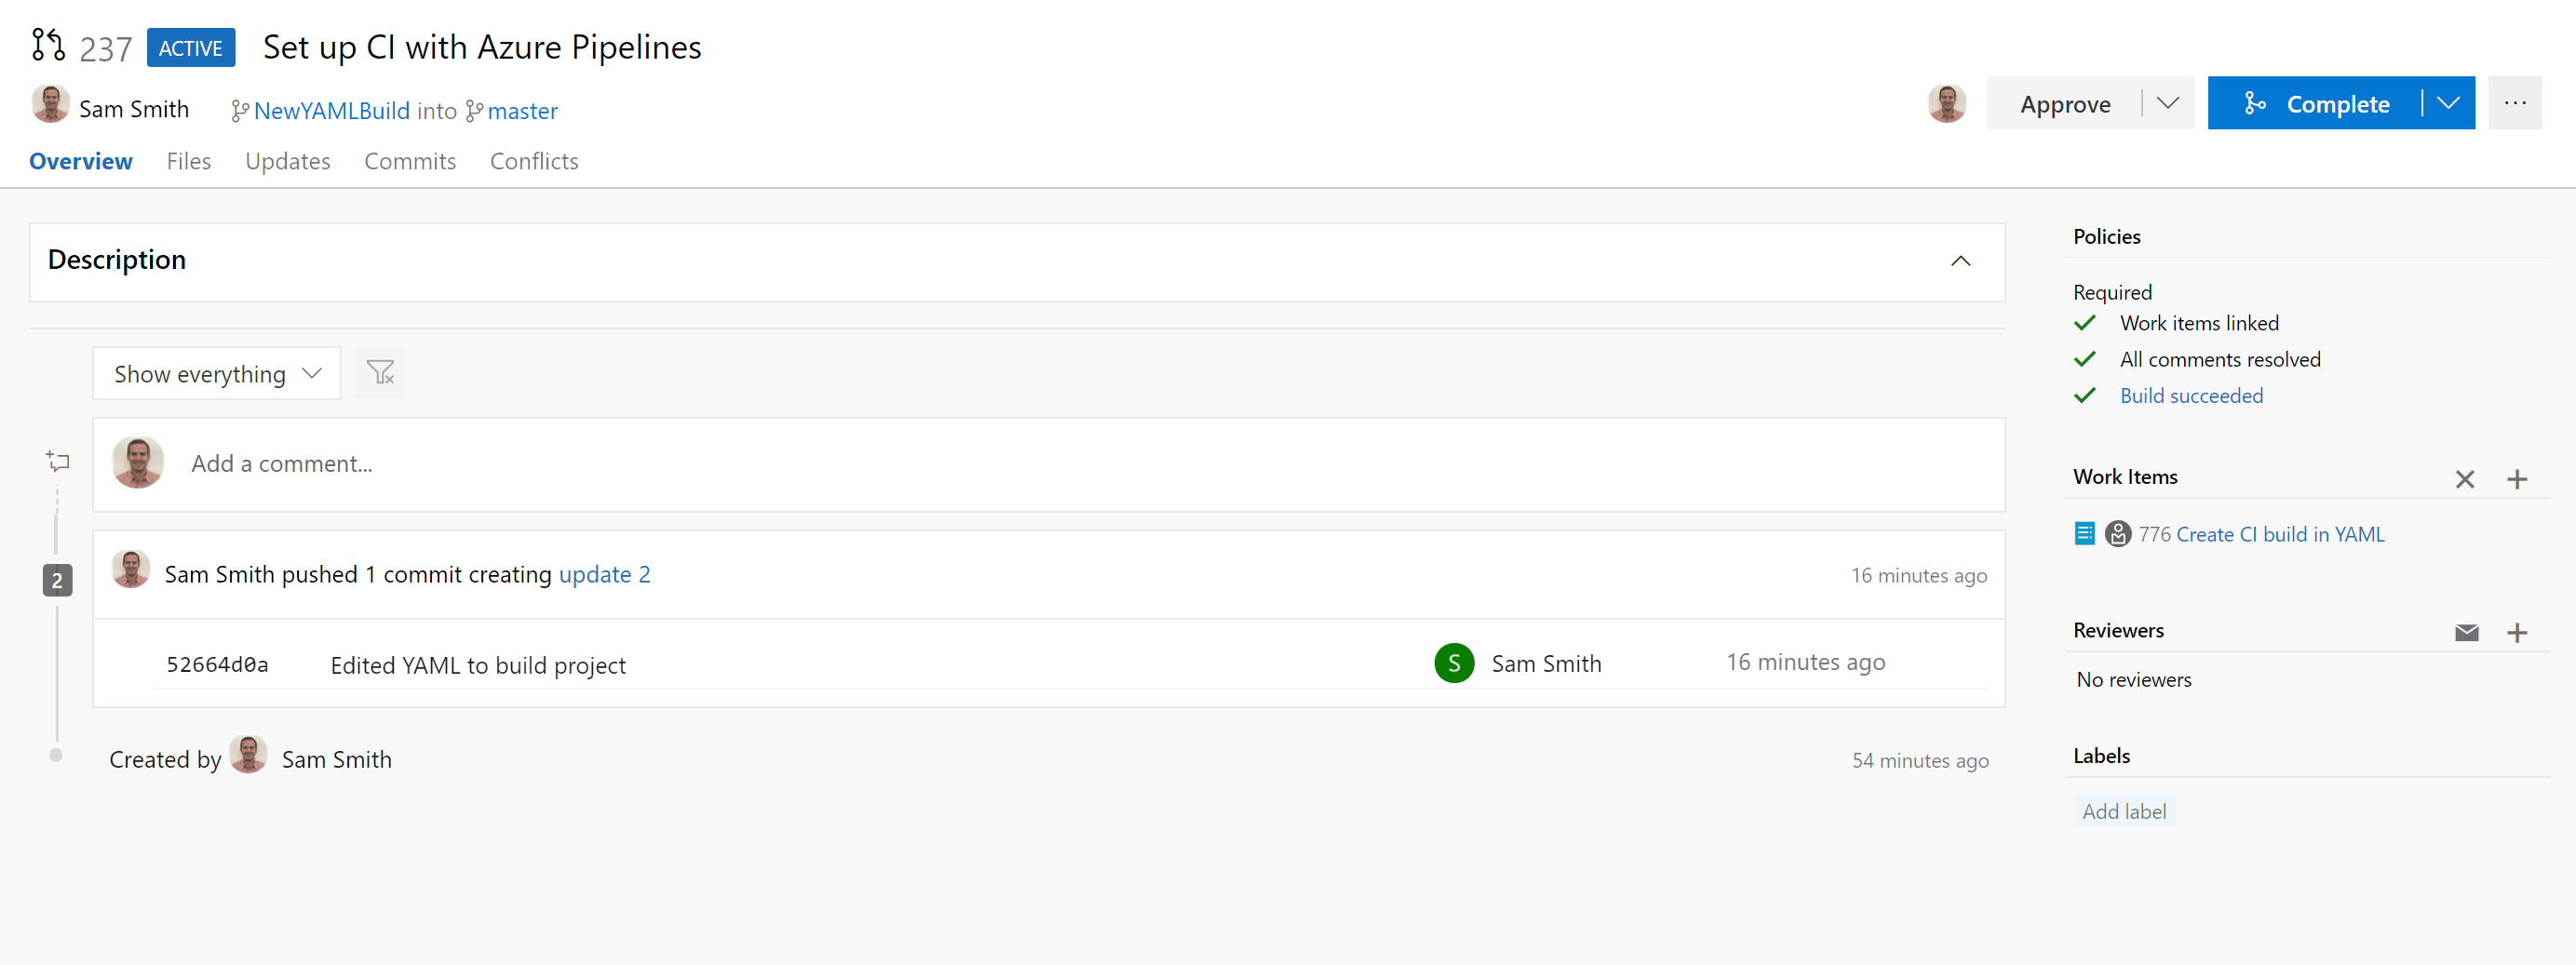
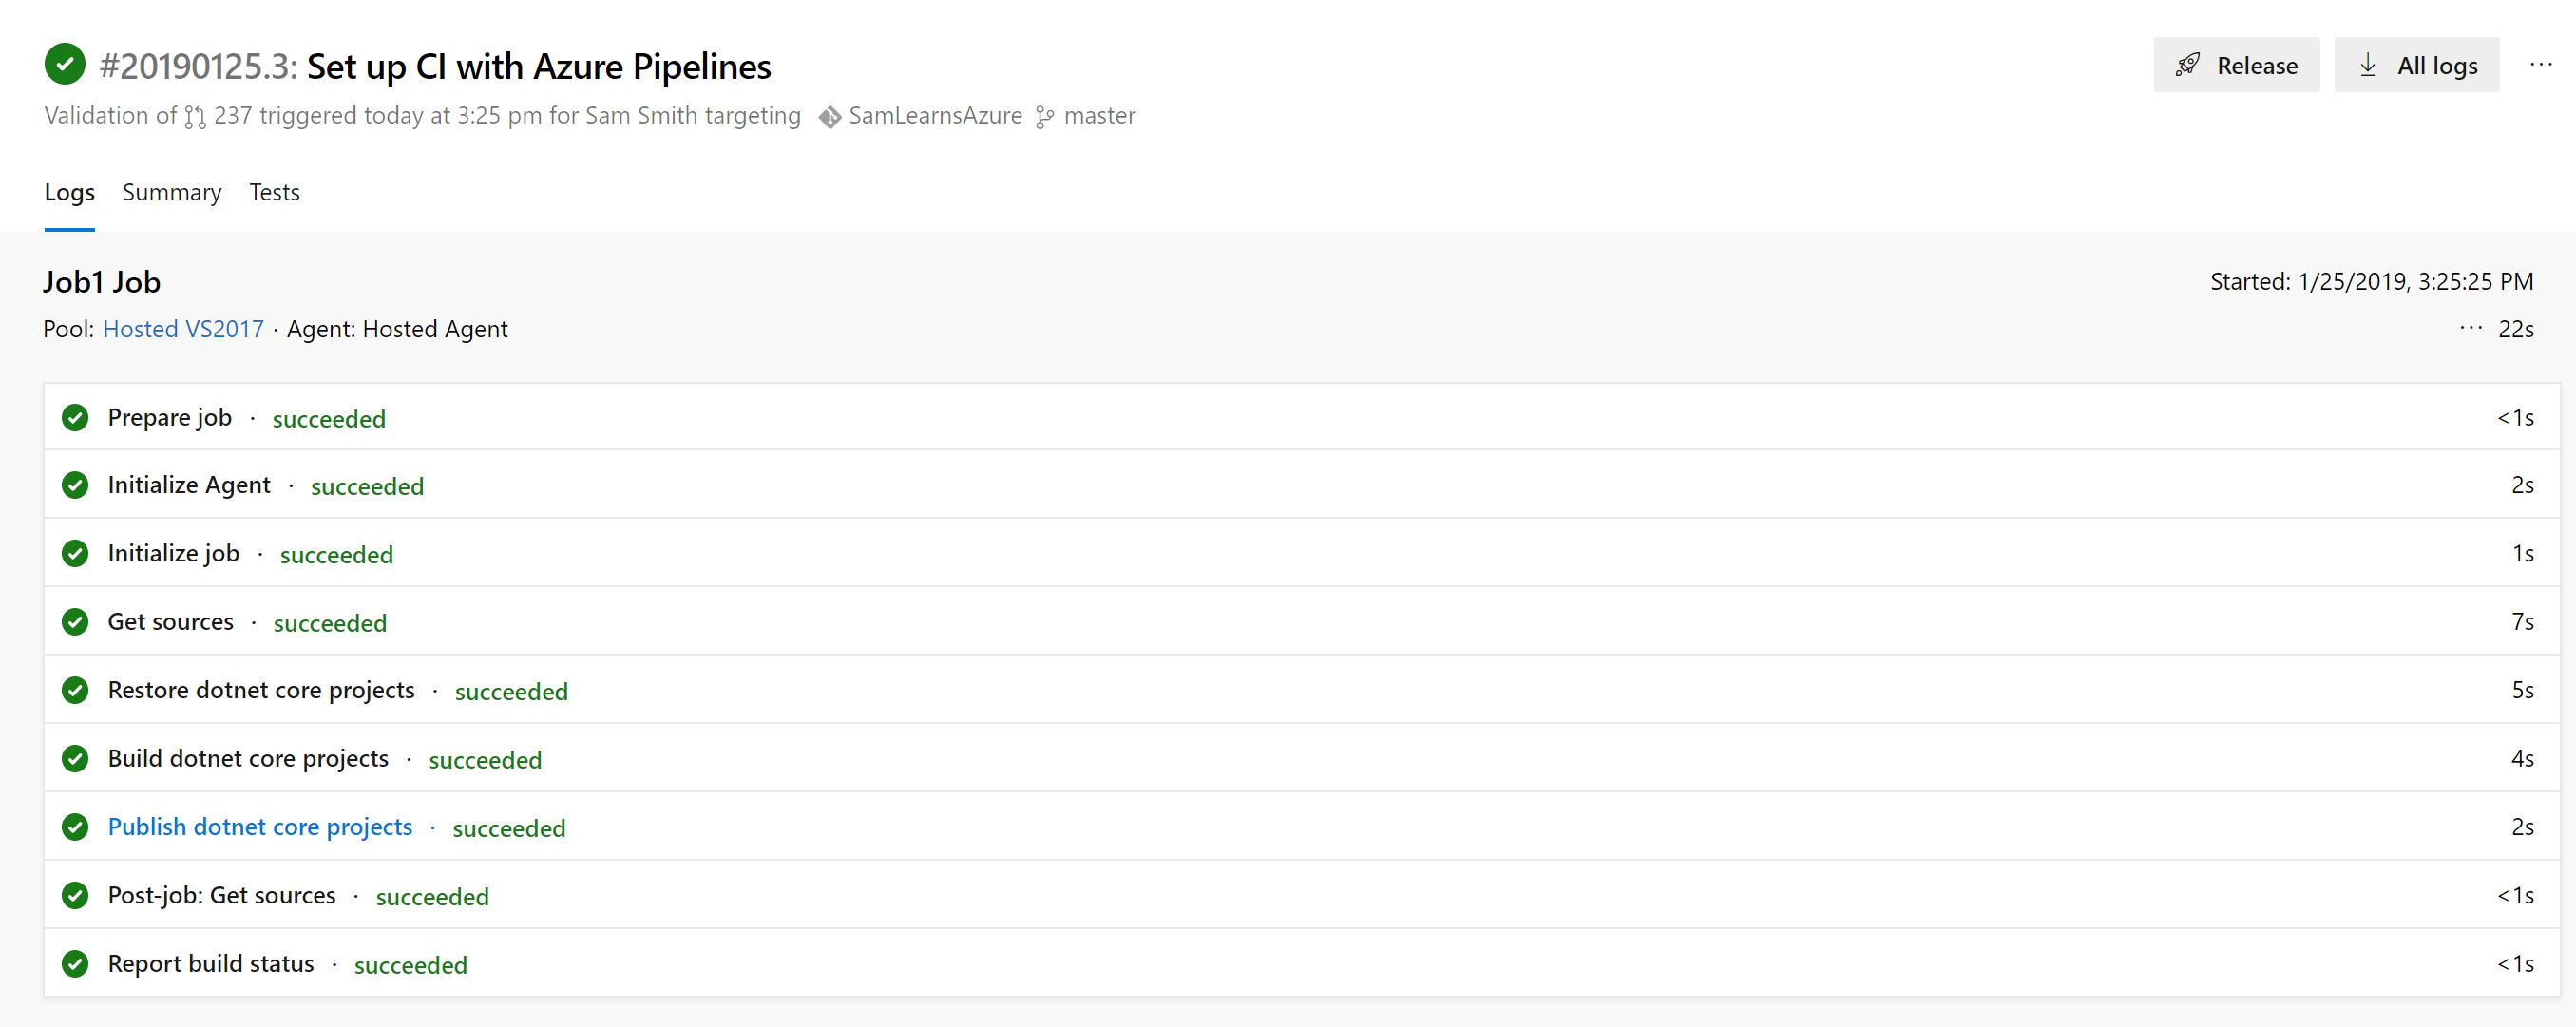
Clicking on the build link shows the details. Completing in 22 seconds is very good… We complete the Pull request.
With the Pull Request complete and the feature branch merged with master, a final master branch build begins. The build is done!

Release
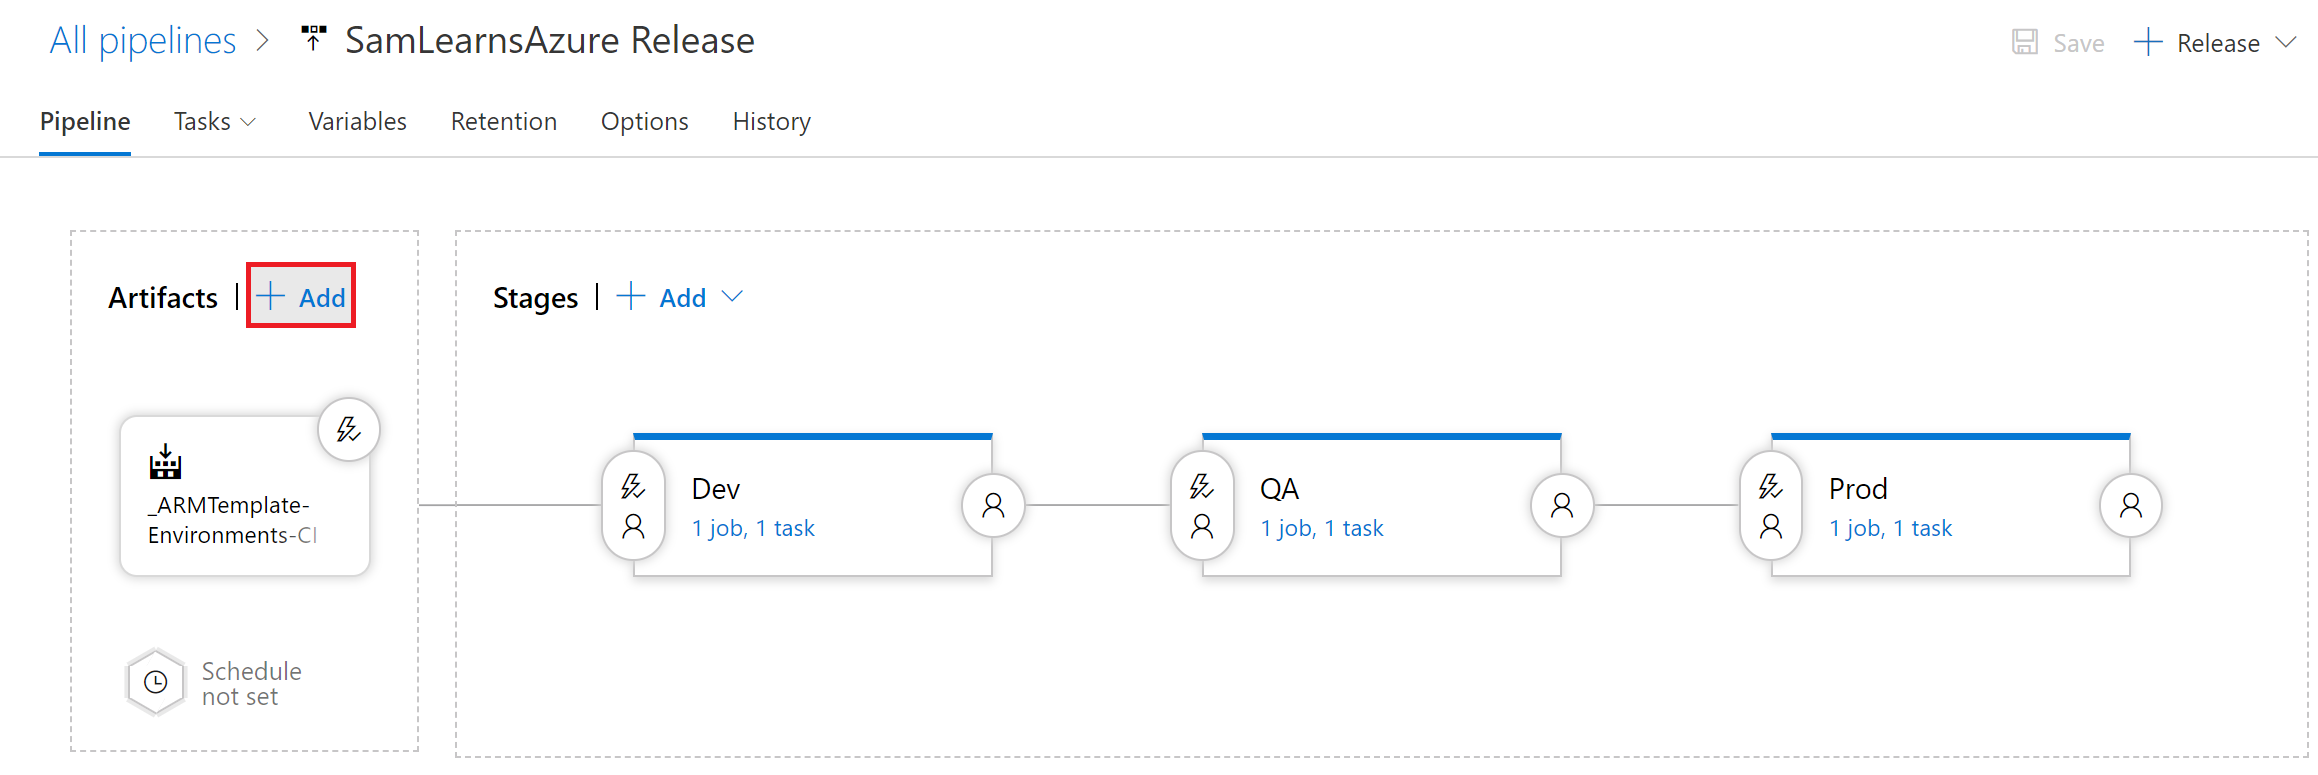
Now we need to deploy the build containing the web service to each of our environments. As we deploy to each environment, we will reconfigure the web service. Effectively the first Dev environment is a canary branch, allowing us to ensure our integration doesn’t cause issues in production. After all, if Dev breaks, it’s only our development team we have to answer too – if it’s production we break, we have to answer to end users, management, and in some cases, regulators and lawyers – let’s try to avoid that. First, we need to add the new build artifact.
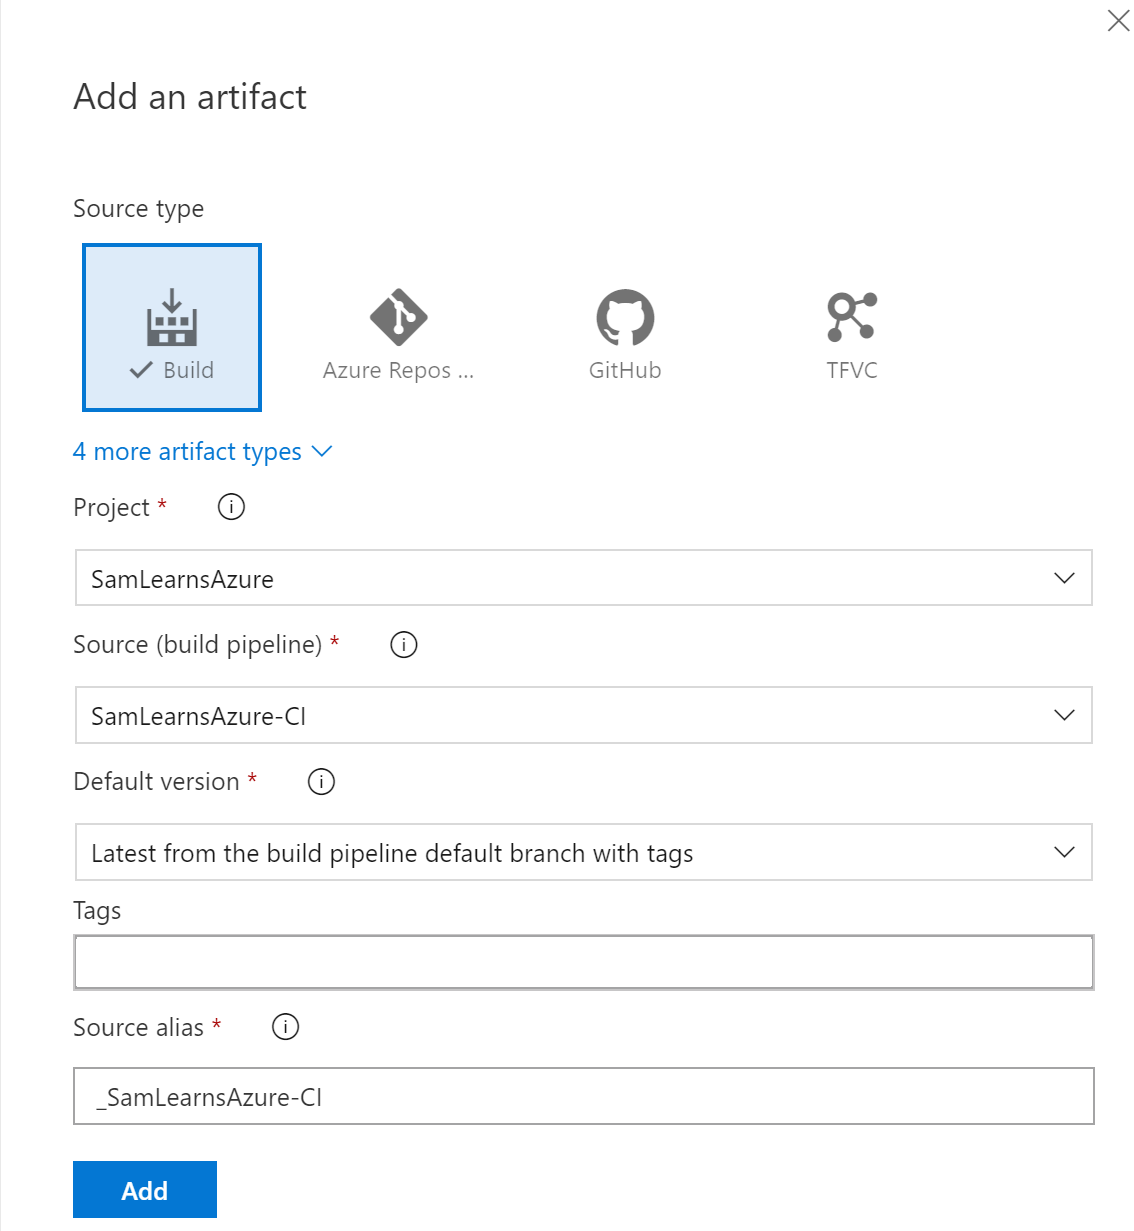
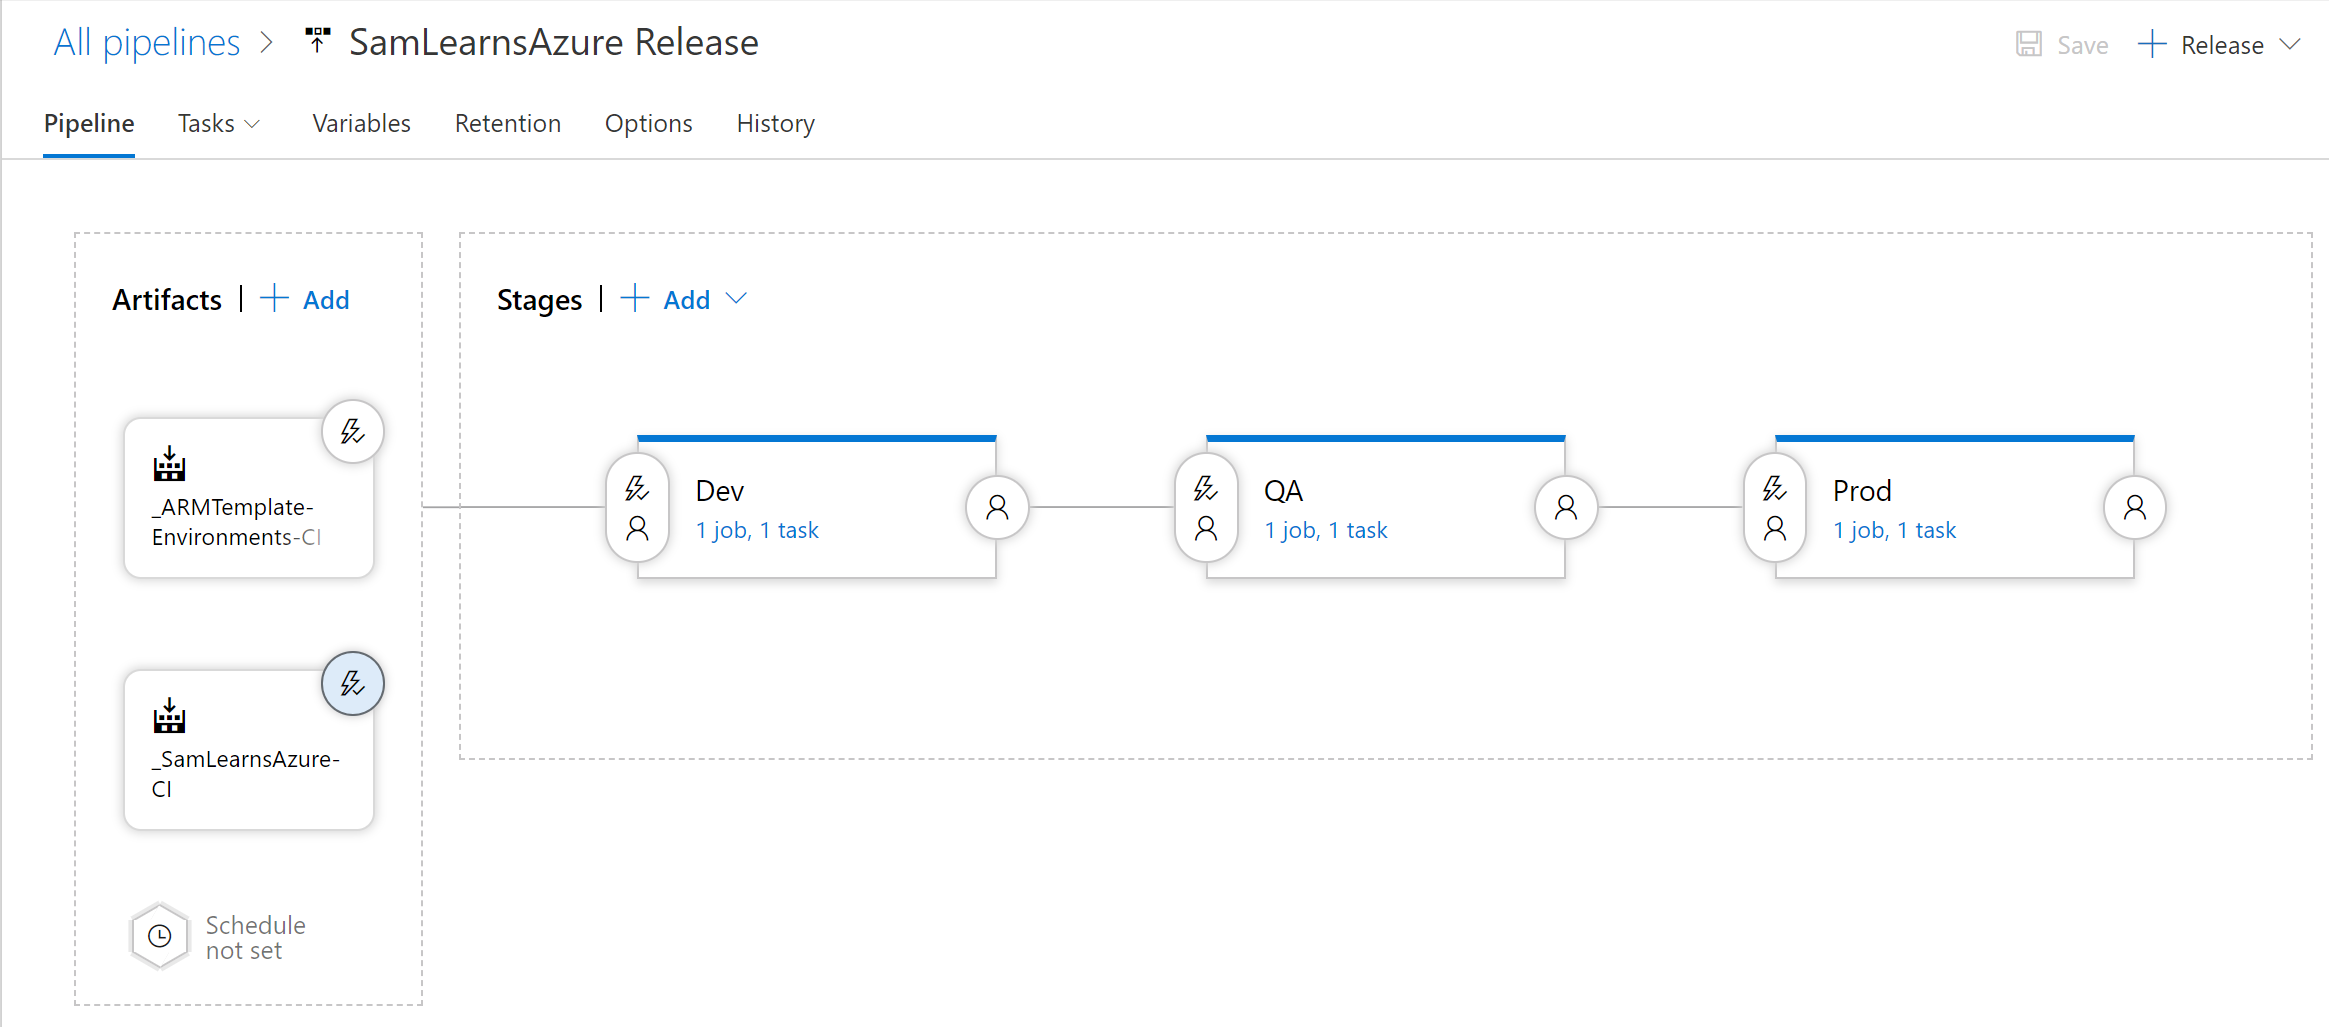
In the “Add an artifact” dialog, we select our “SamLearnsAzure-CI” build, pulling from the latest build from default/master branch.
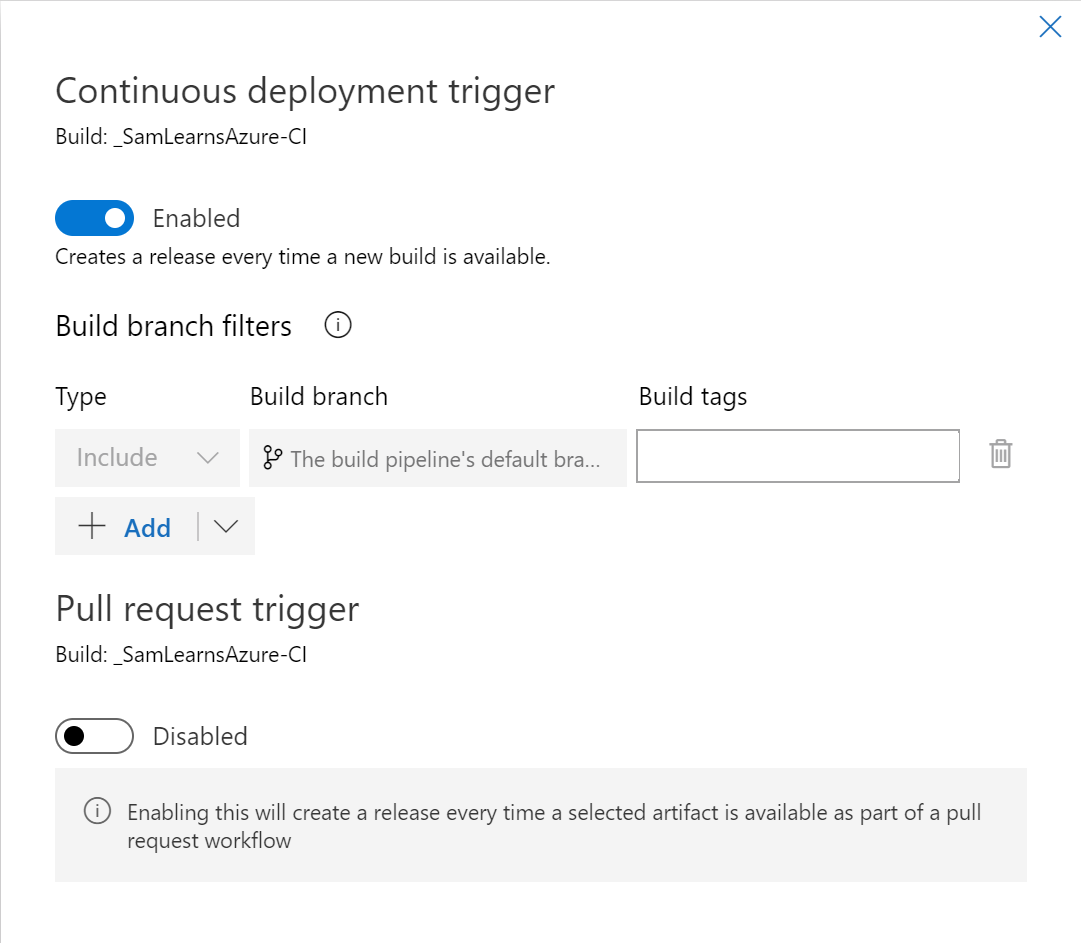
Then in the continuous deployment trigger, (the lightning bolt on the top right on the artifact in the build pipeline), enable the trigger, and specify the default branch. Remember, this is to ensure that any build completion (for example in a pull request) won’t trigger a release.
Now on the pipeline we can see the artifact setup and are ready to deploy whenever the build updates.
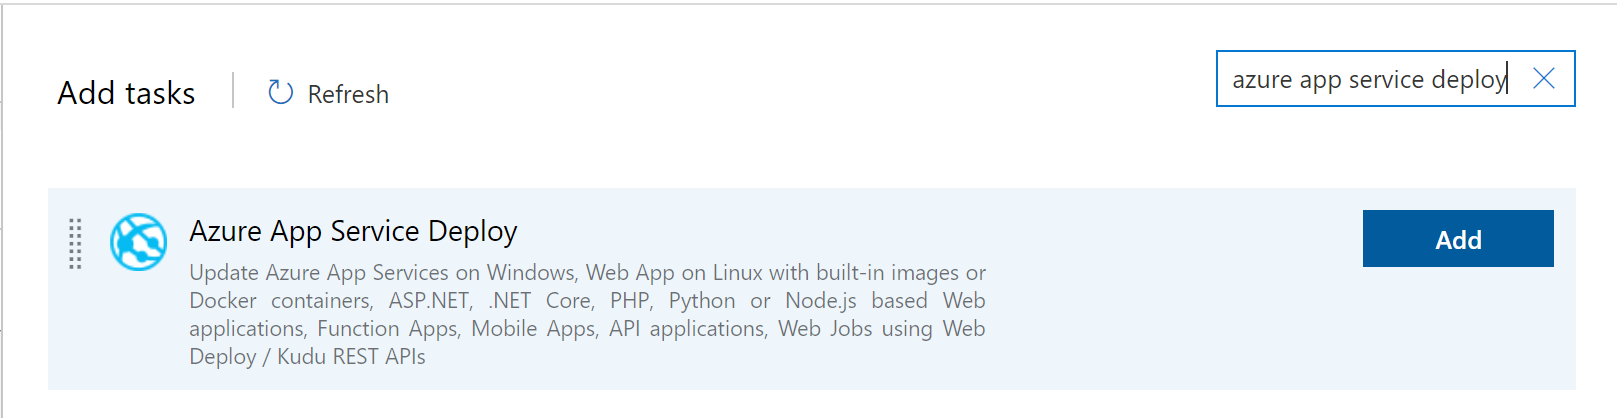
Jumping into the Dev pipeline, we add an “Azure App Service Deploy” task. This task will deploy our service to the app service we created in the ARM Template.
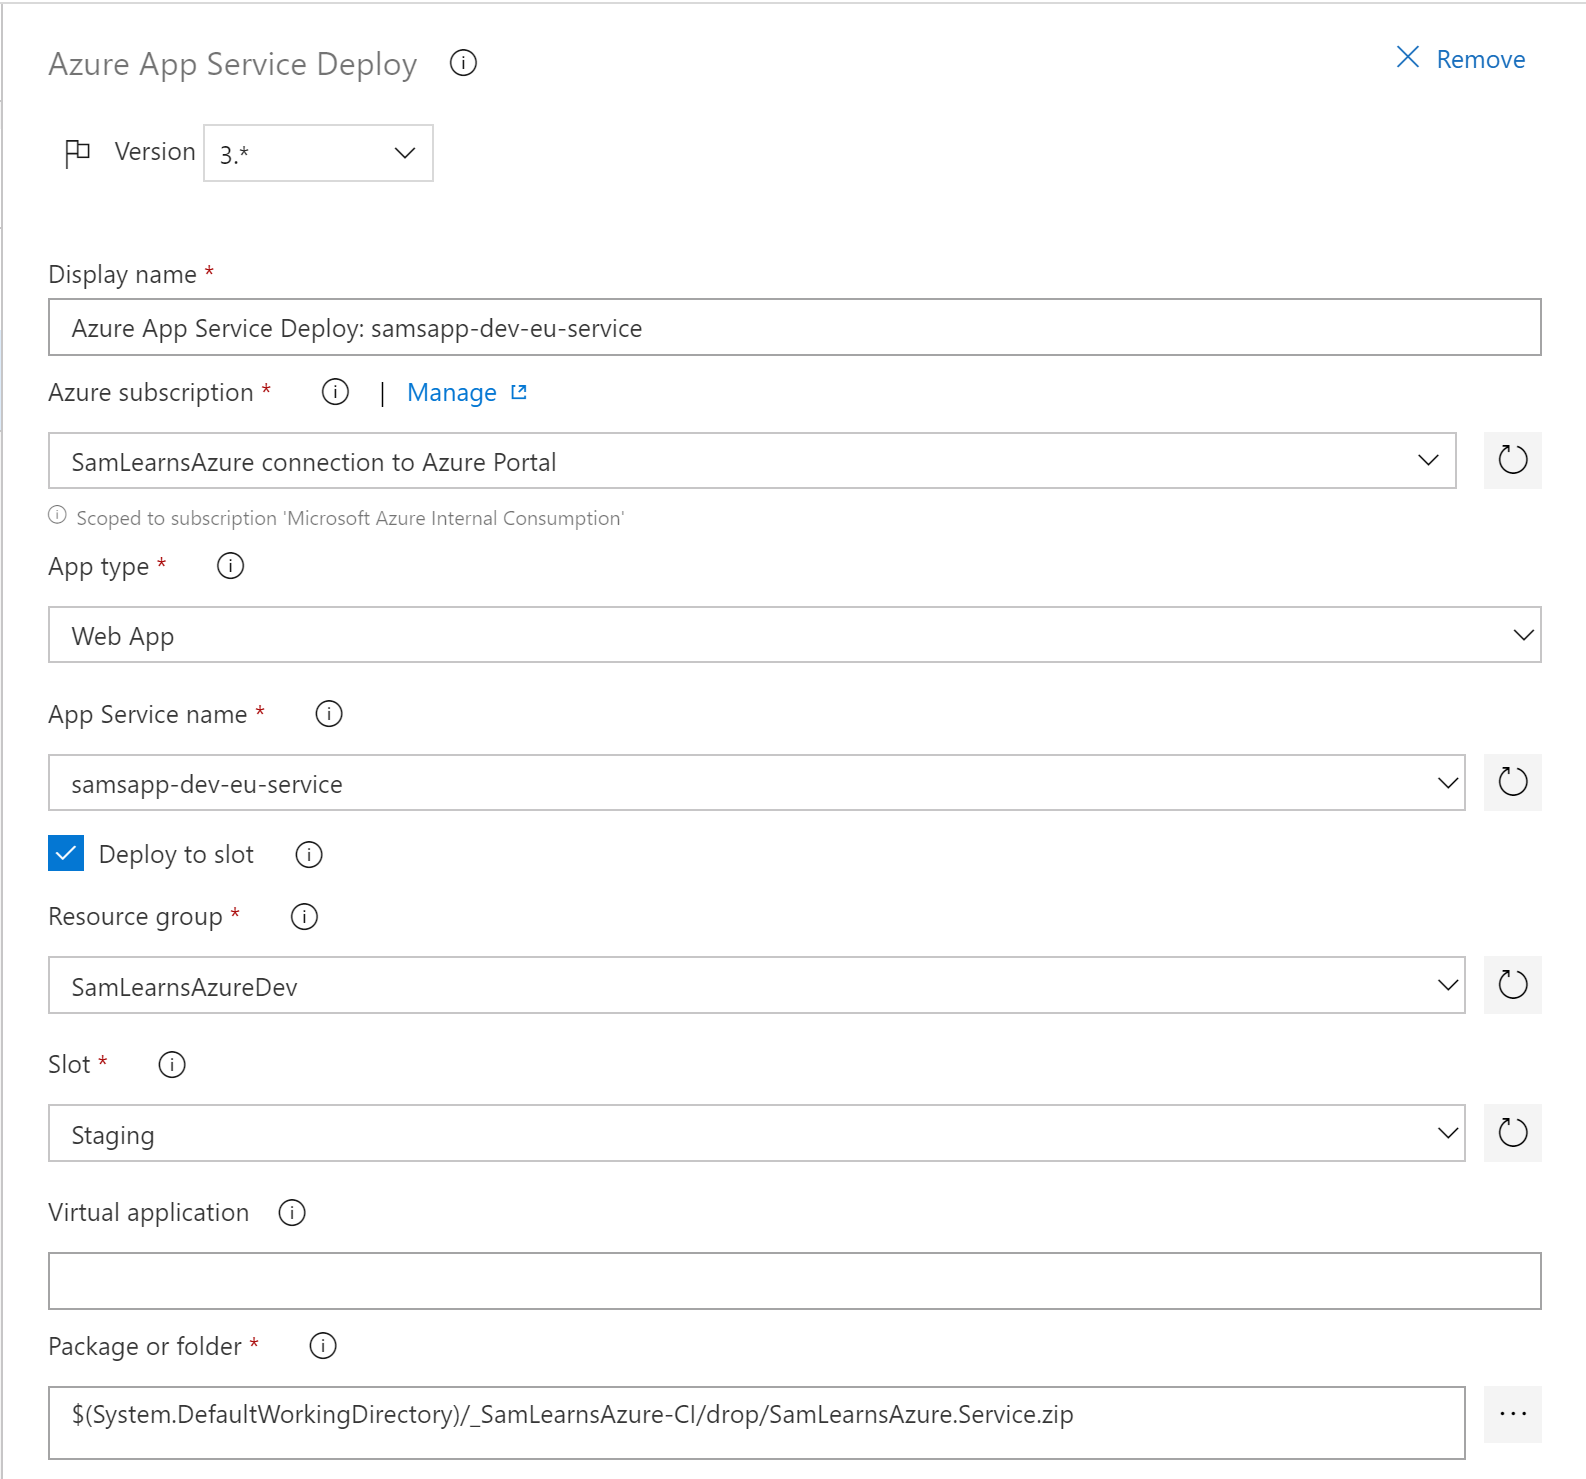
Configuring the “Azure App Service Deploy” task involves a number of settings. We need to set the subscription, select the “App service name”, selecting the “samsapp-dev-eu-service” web app we deployed to the ARM Template. We also check the “Deploy to slot” checkbox and deploy to the “Staging” slot. Deploying to the slot allows us to deploy the app and test it, (we will add the tests later), before swapping the staging slot with production. The last step on this page is to set the package, using the zipped service we deployed to the drop folder.
We also need to copy in “**/appsettings.json” into the “JSON variable substitution”. This allows the settings in the appsettings.json file in the web service to be applied to the web app in the Azure portal – it’s a mapping functionality to set the variables.

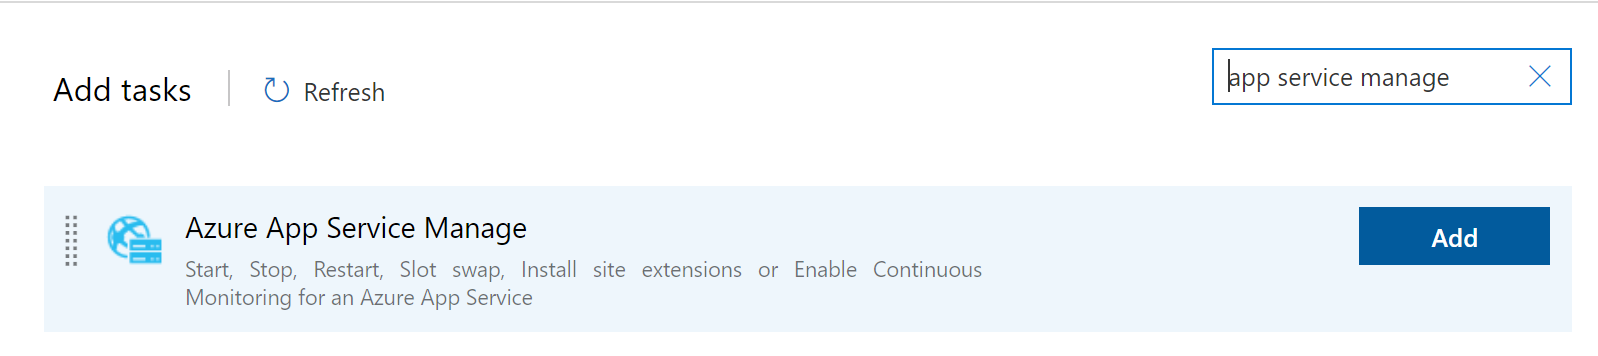
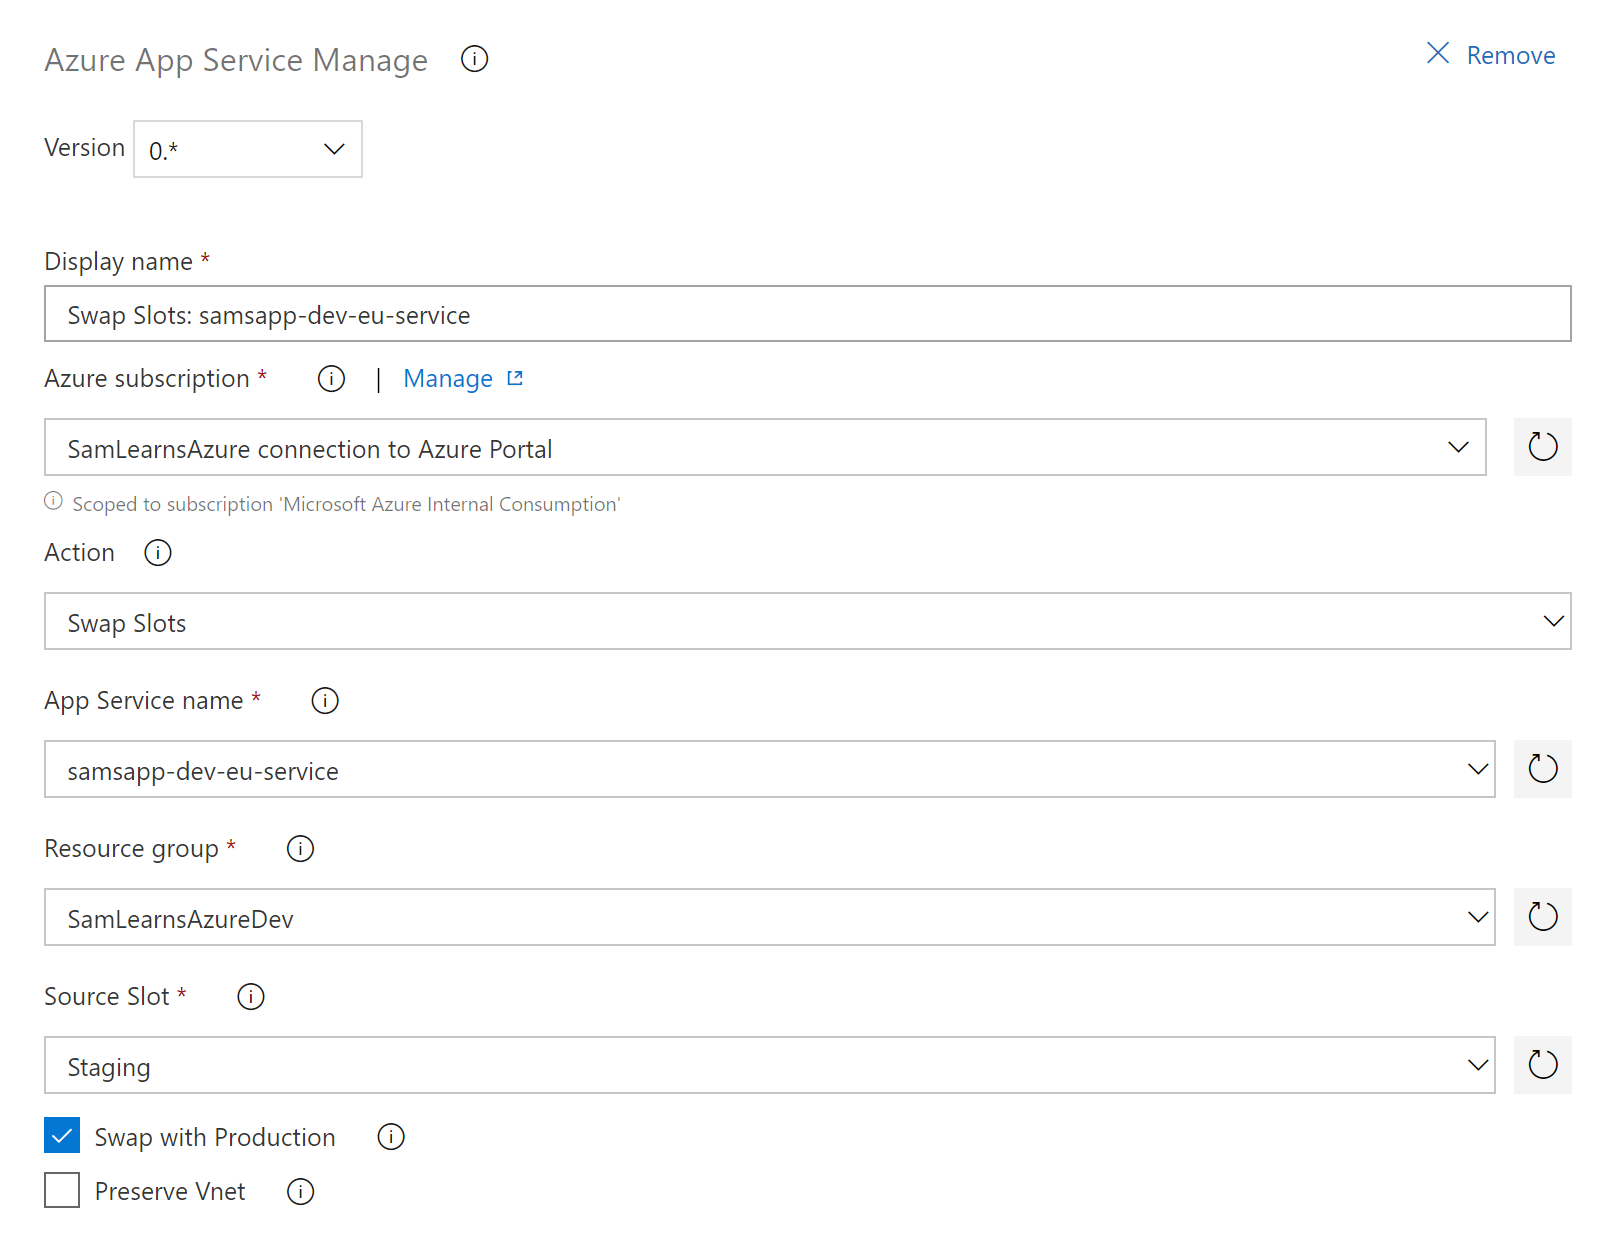
Next we need to add a “Azure App Service Manage” task, to swap the Staging and Production slots.
In the details of this task, we need to select the subscription, the action “Swap Slots”, the app service name, resource group, source slot (“Staging”), and then check the “Swap with Production” checkbox.
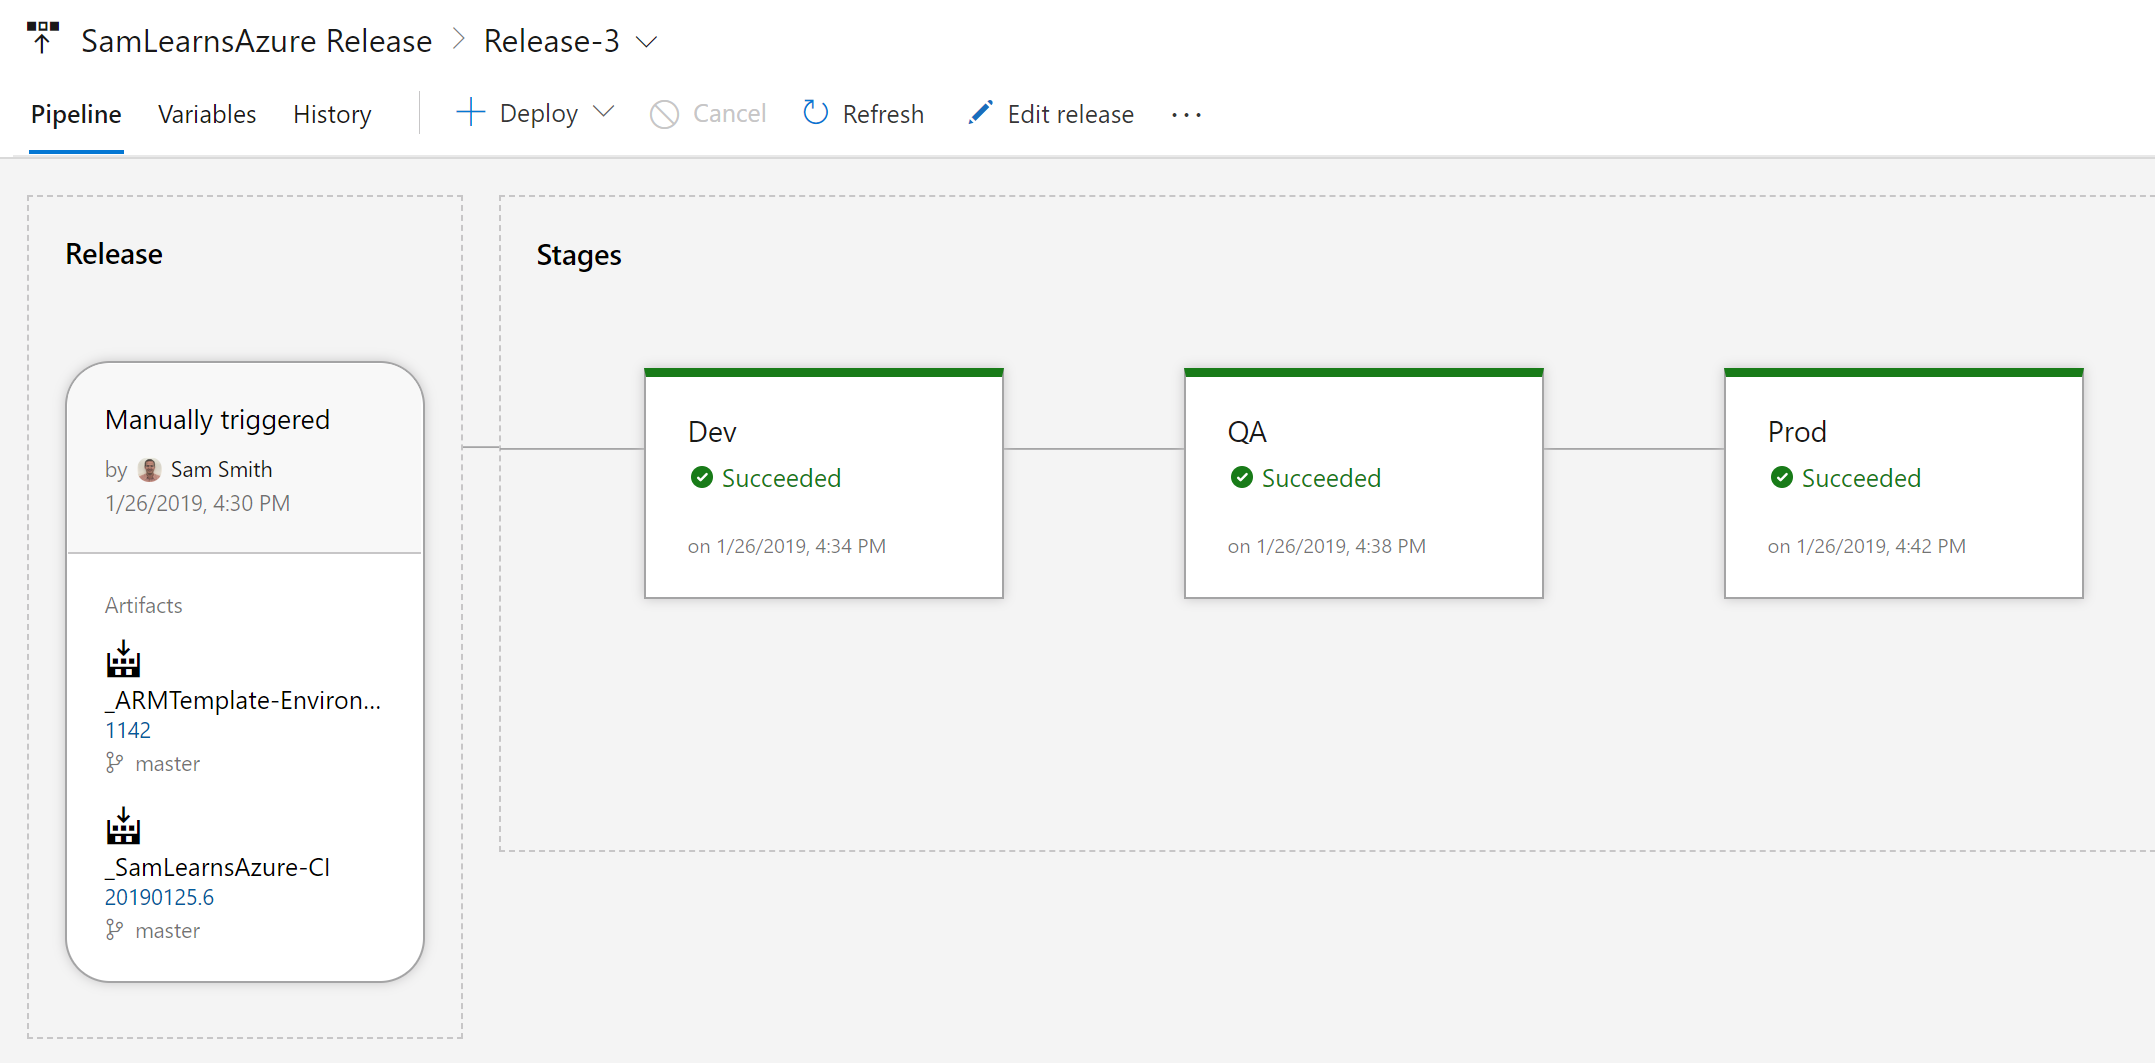
We queue the release, and watch the release deploy our service from dev, to QA, to production successfully.
Finally we test our services. Looking at the production service, we browse to the “api/values” action and confirm that the array of strings is returned successfully.

Wrapup
Today we added a web service project, setup a YAML build, and released the web service to Dev, QA and Production. It doesn’t look like much, but this is a major step for our DevOps goals. We can now make changes to our web service and have them automatically deploy to all of our environments. Next we need to ensure that we can be confident that these changes won’t break what we are working hard to build… yes, we need some automated testing.
