

Today we are going to finish the refactoring of our release so we can deploy to a new environment with just a few clicks. We will look at deploying to
a few new environments and deployment validation in a Pull Request. Finally, we will look at some of the challenges we had with PowerShell and the solutions.
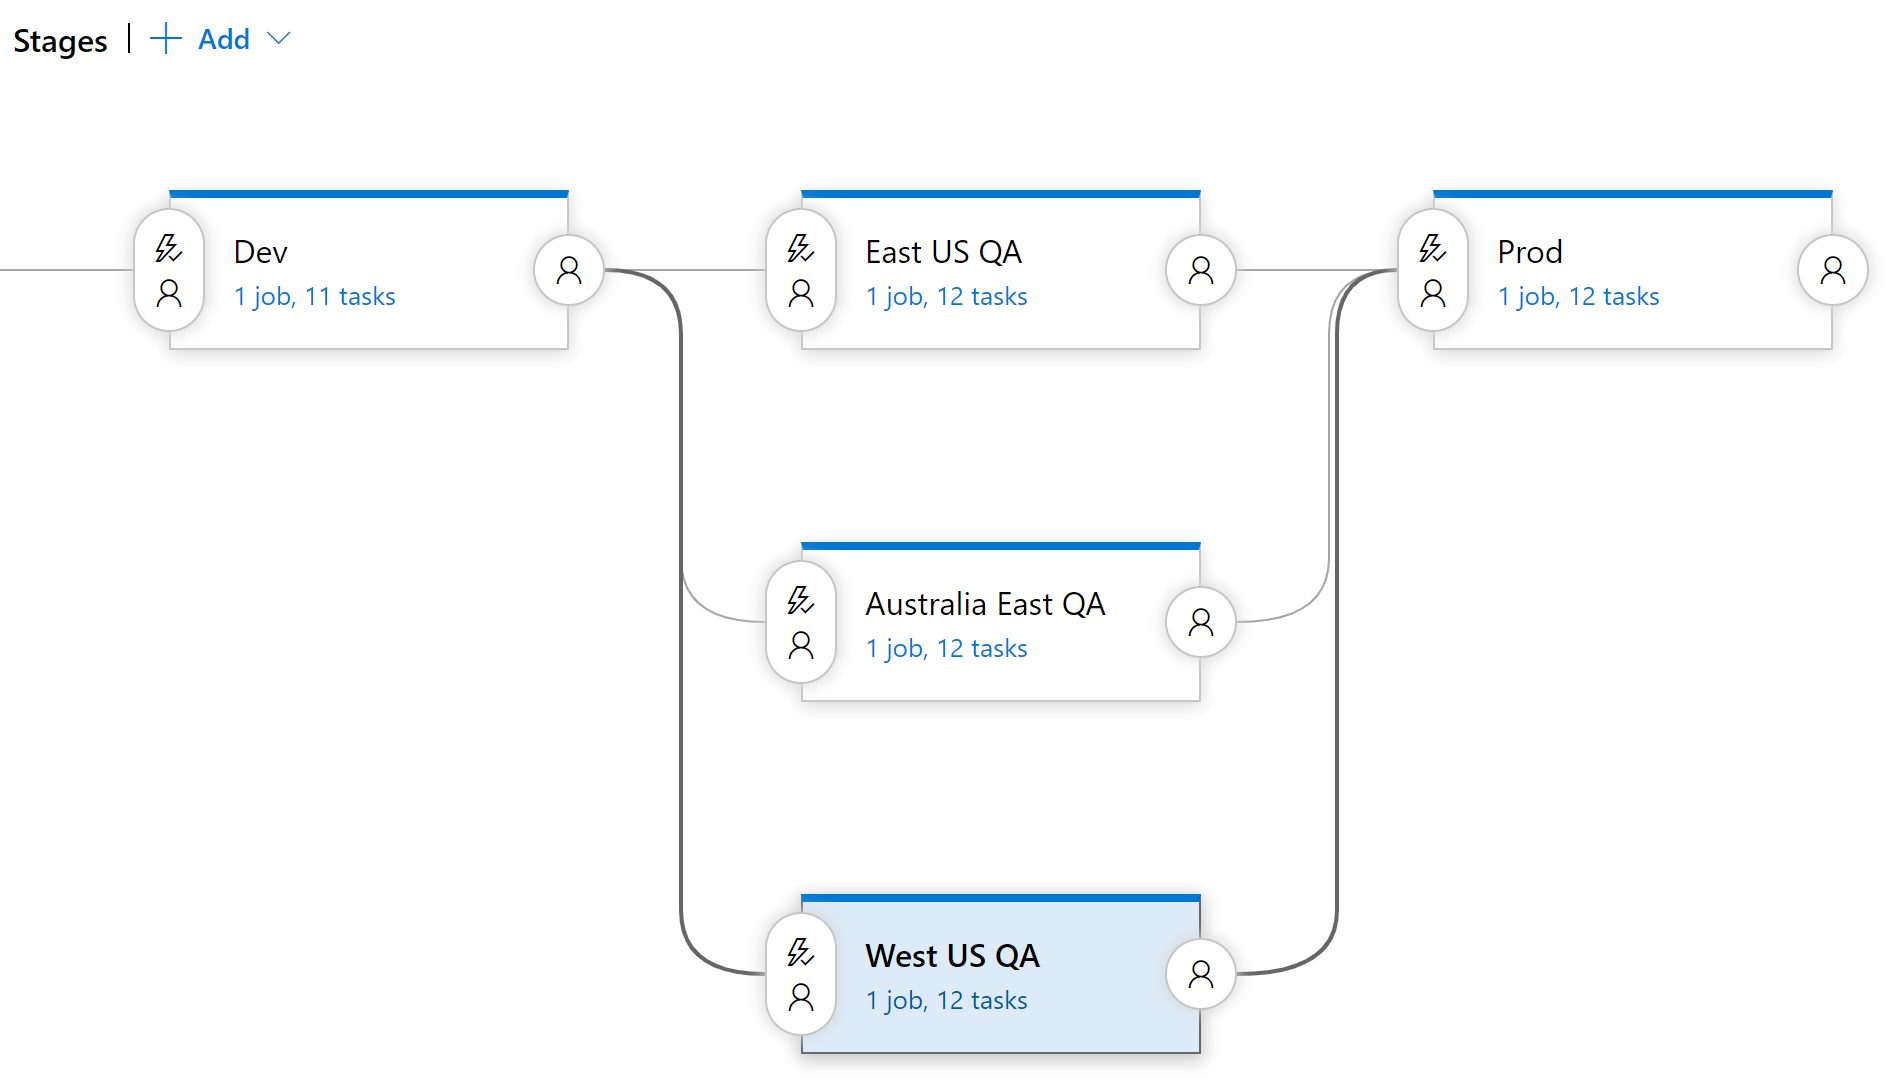
Adding new Australia East and West US regions to our release
With our new script created, we are finally ready to add some new environments. We add environments to deploy our solution to the Azure regions “Australia East” and “West US”.
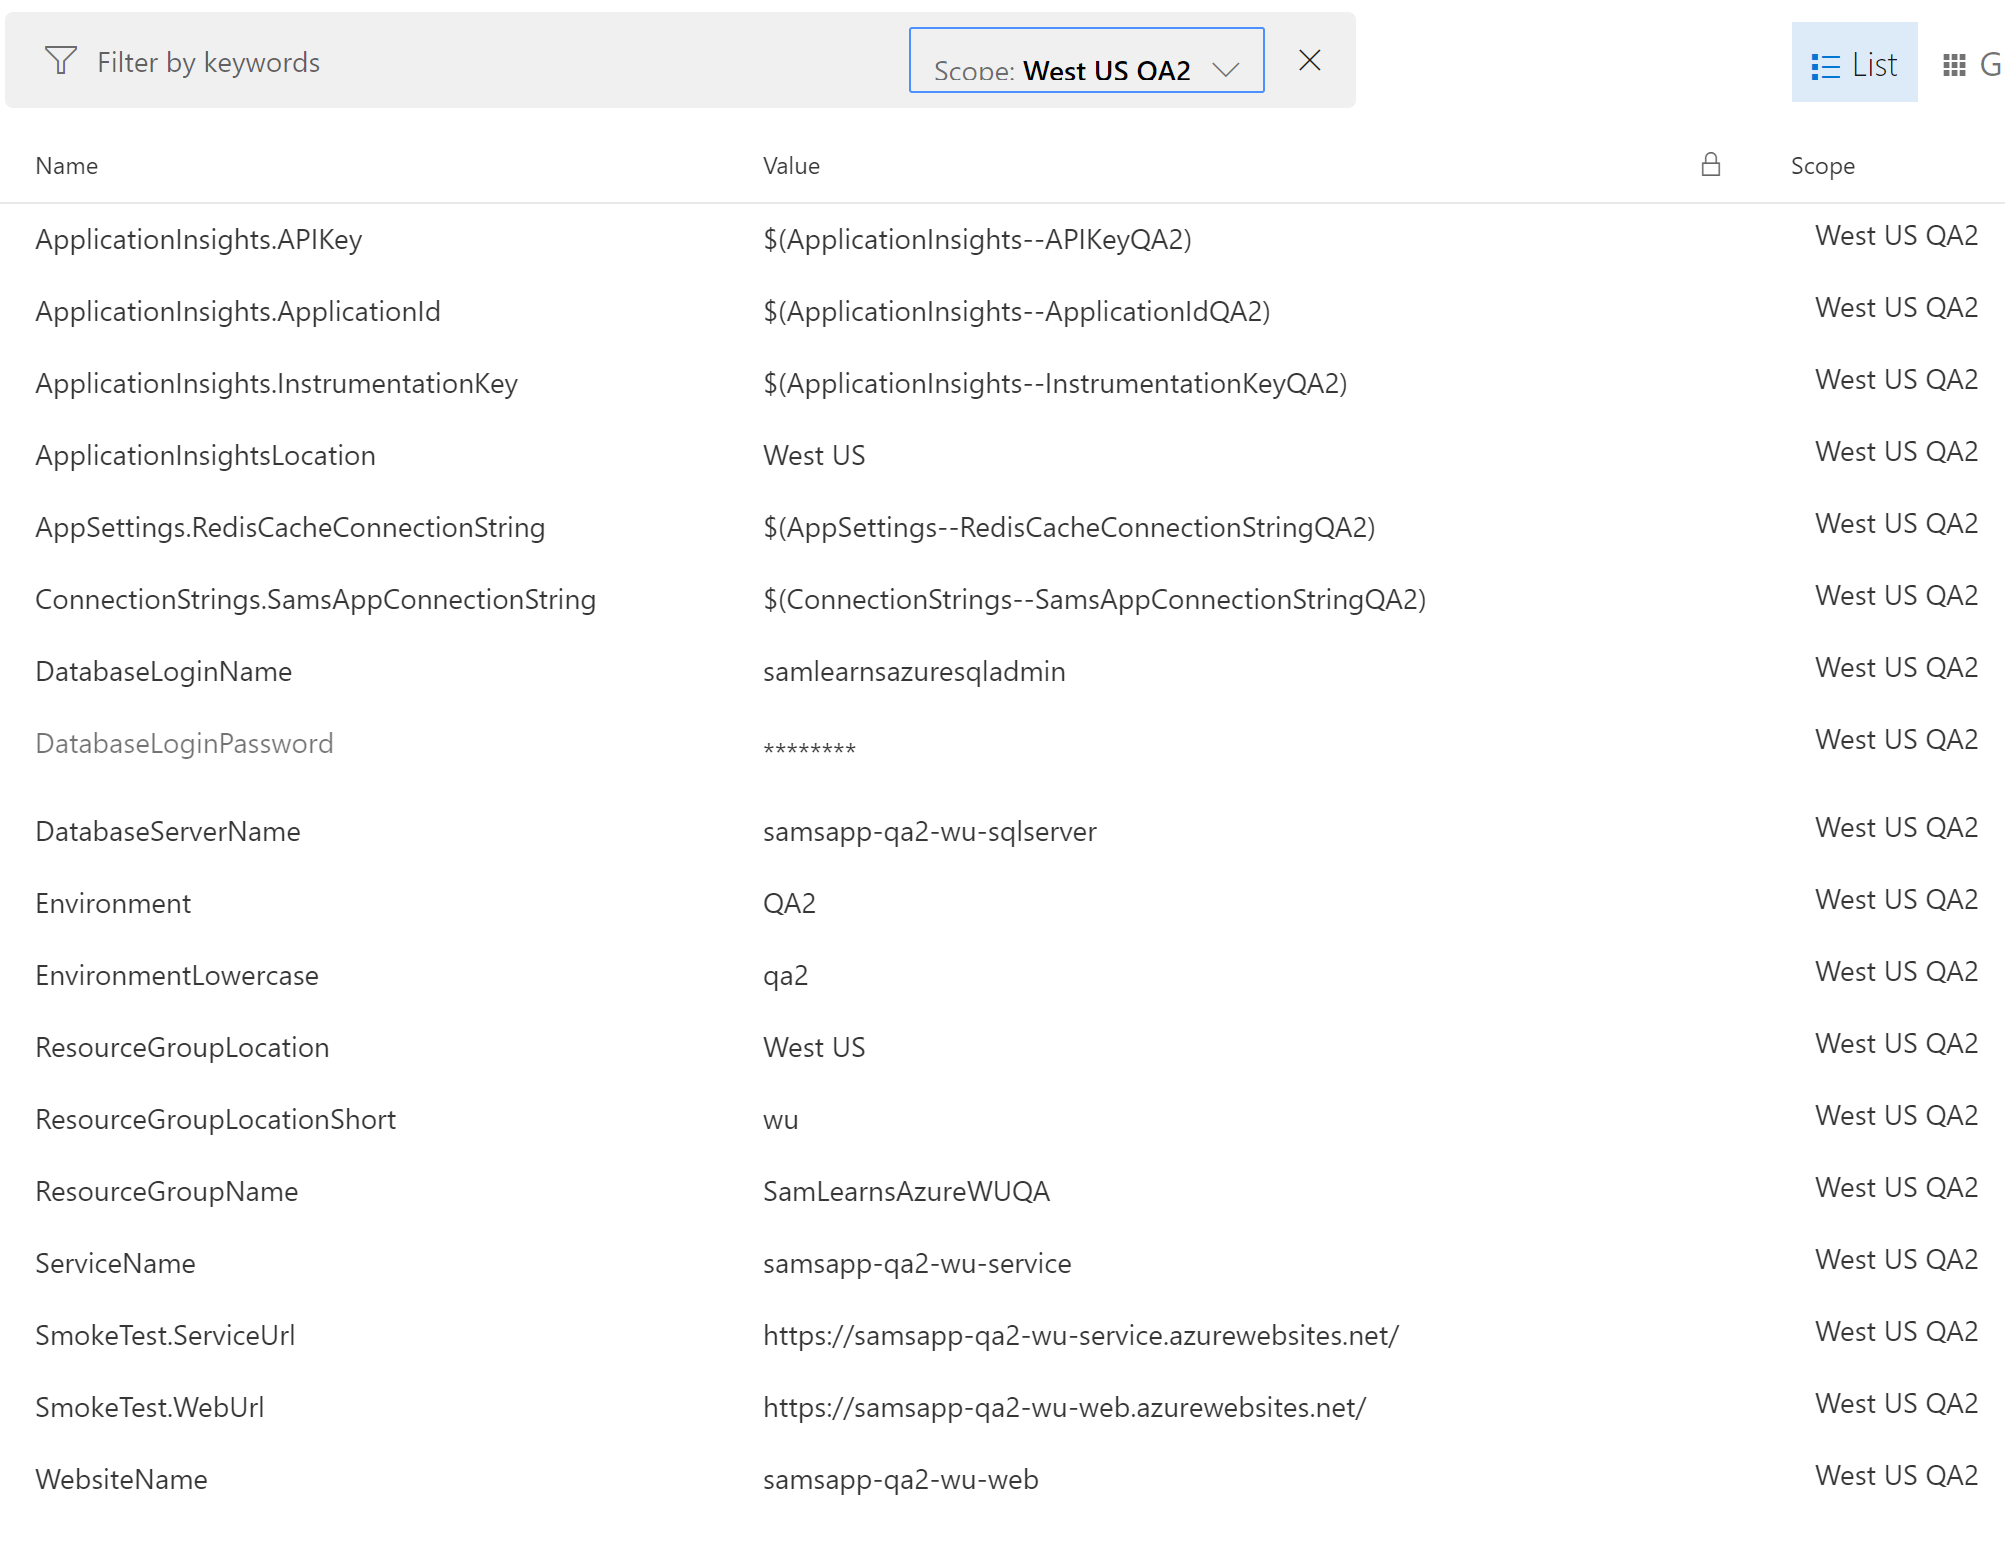
If we look closer at the variables required for West US, we still have a few variables coming from Key vault – but now our script populates key vault for us as we deploy – while they will not be available before the release, they will be generated after the deployment of the ARM template resources, just-in-time. Then we name some of our resources, using our format (“wu” for “West US”). We also set the resource group name, and a few functions need full resource group locations, where you can see “West US”.
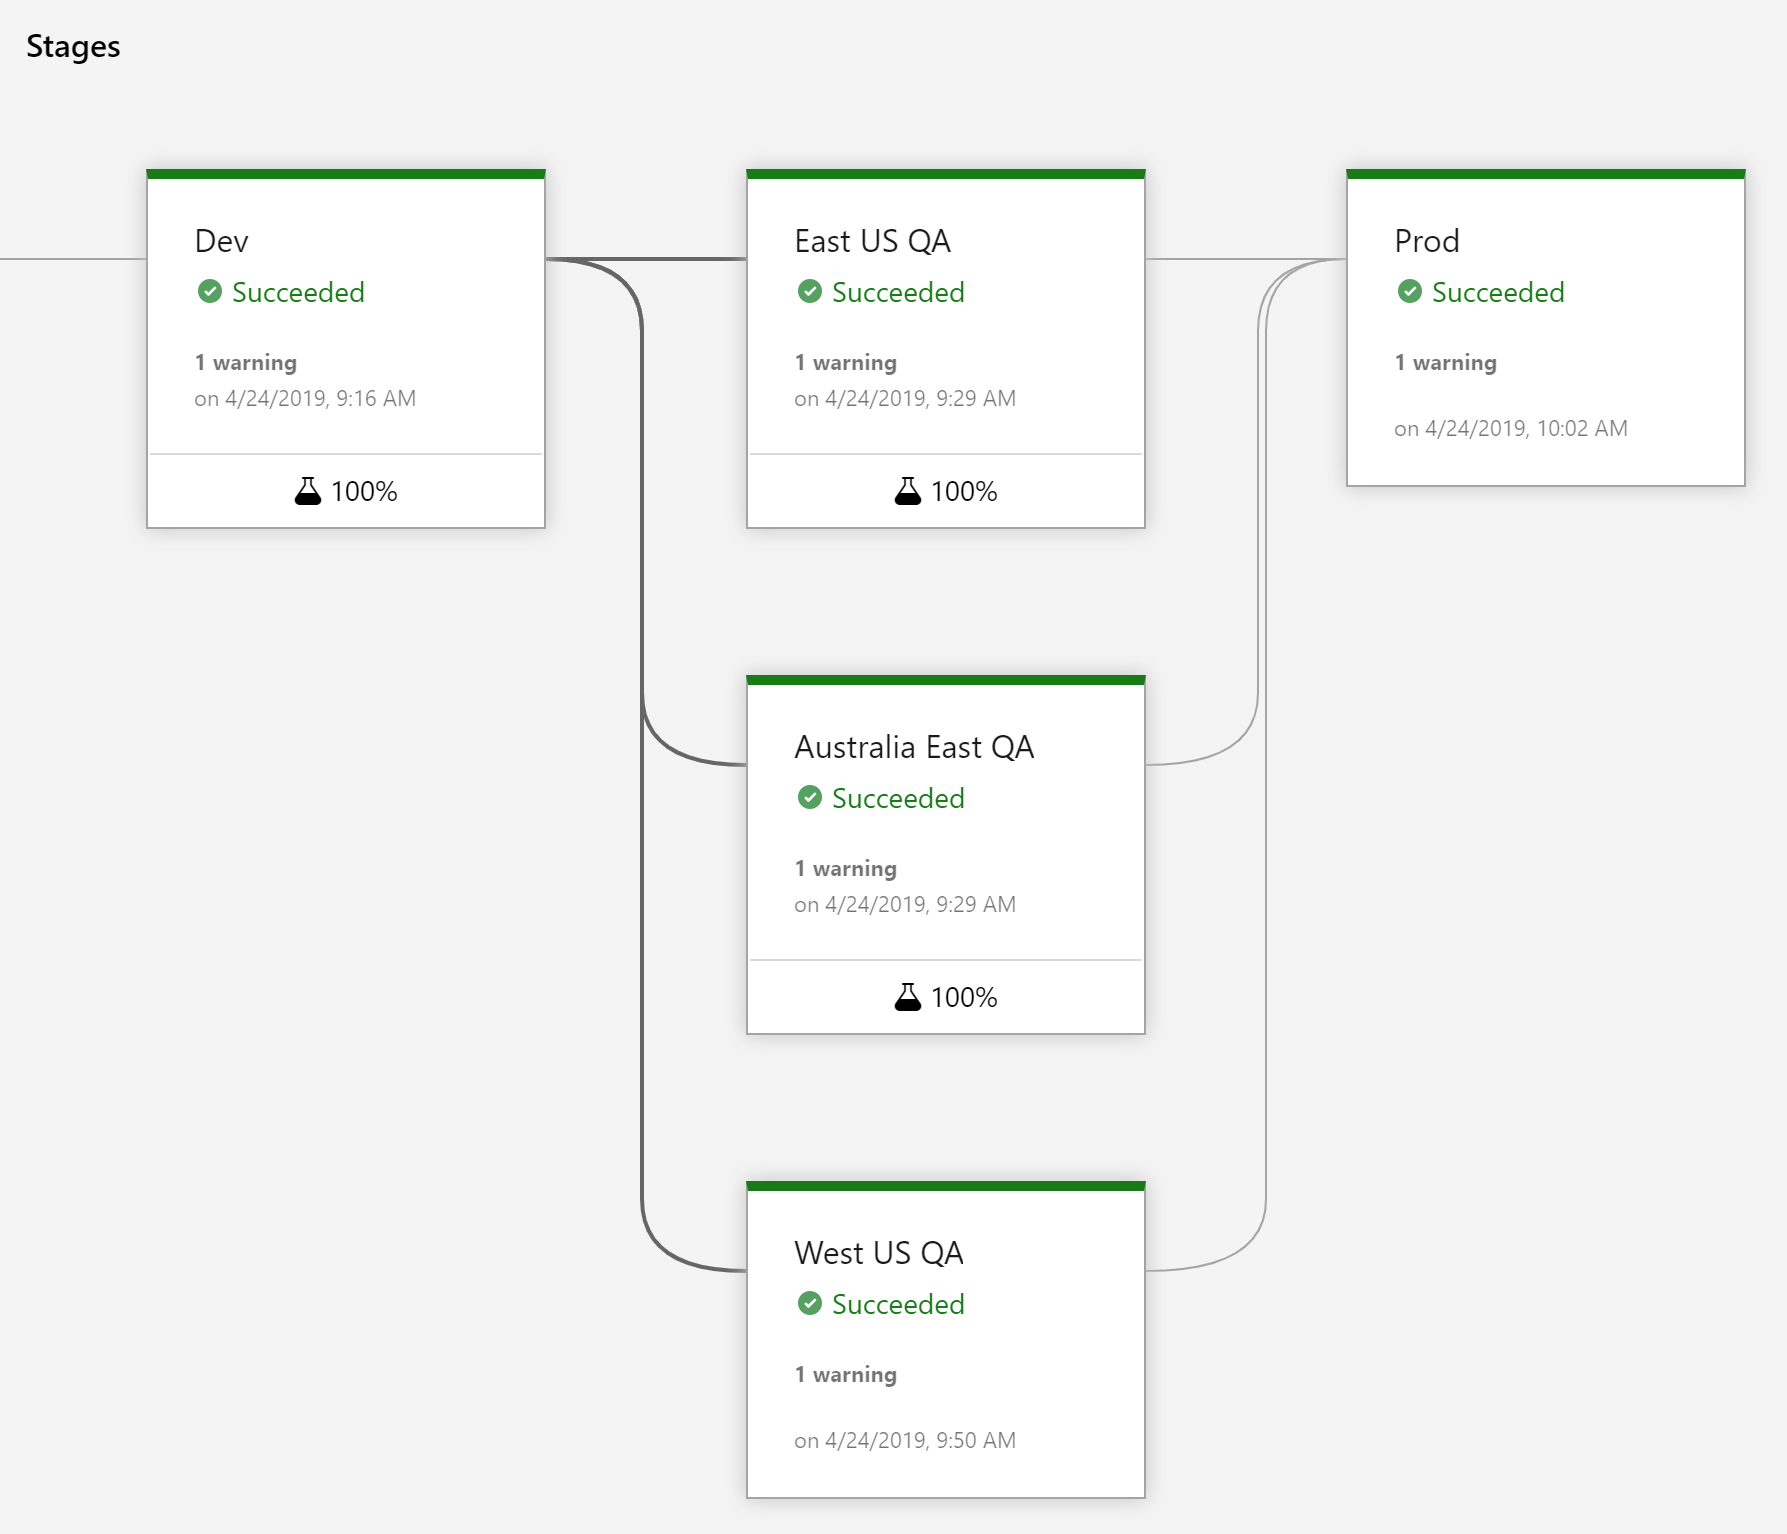
We deploy, and watch it successfully finish (!!!). This is a beautiful sight to see. Now we have the flexibility to add environments at anytime. As we don’t want to eat up a lot of $$$ on Azure, we remove the West US environment, but we are keeping Australia for our CDN post next week.
Deploying pull requests
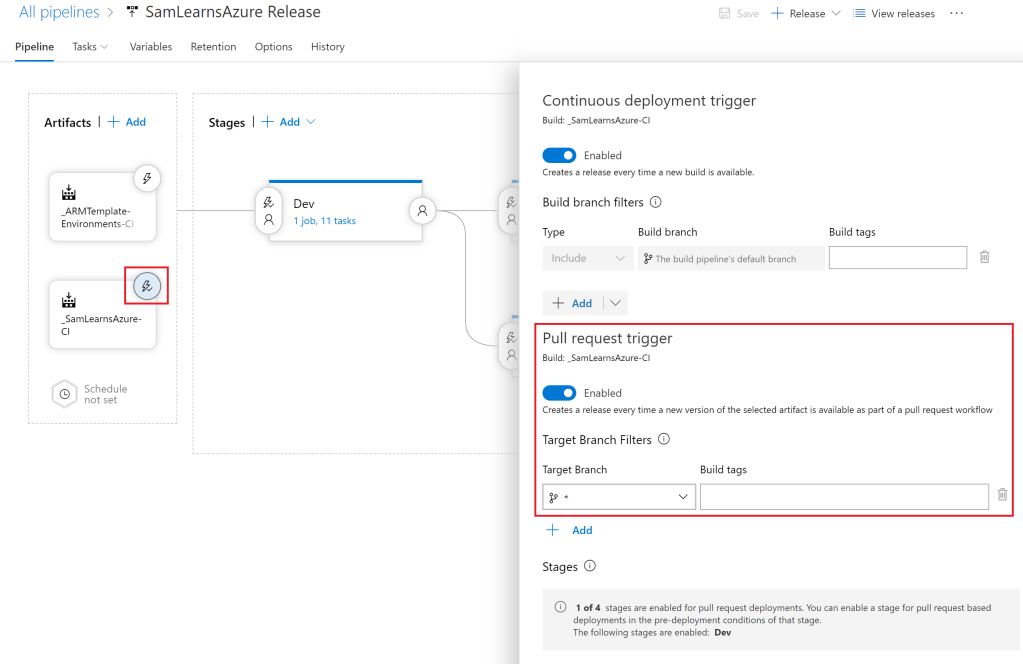
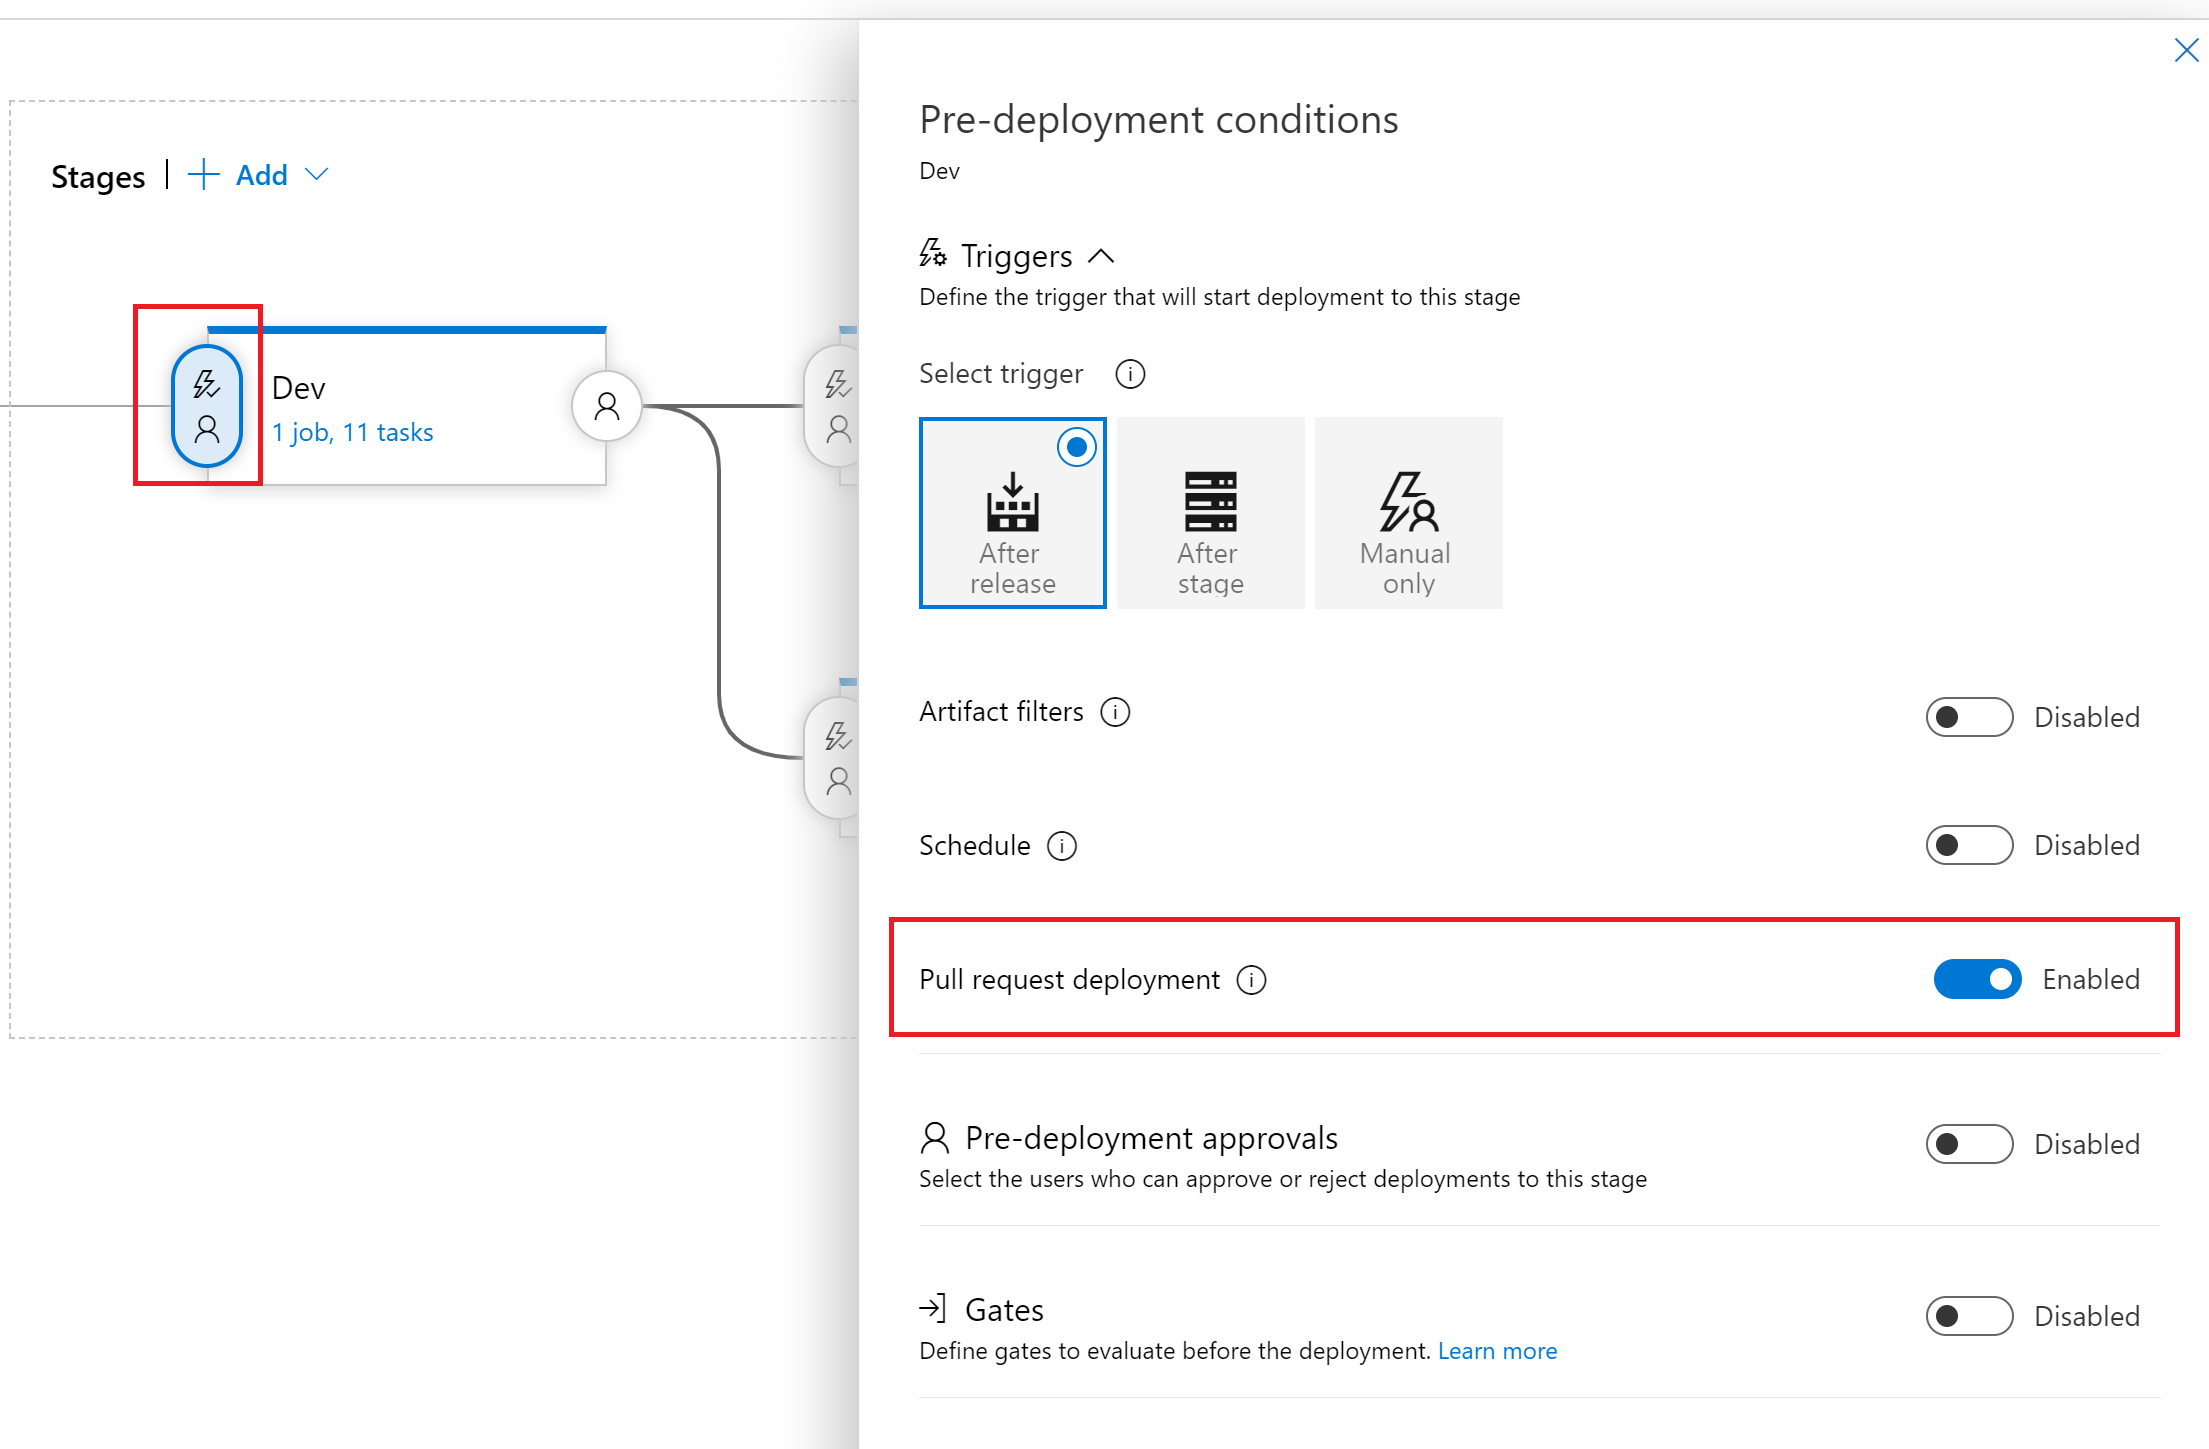
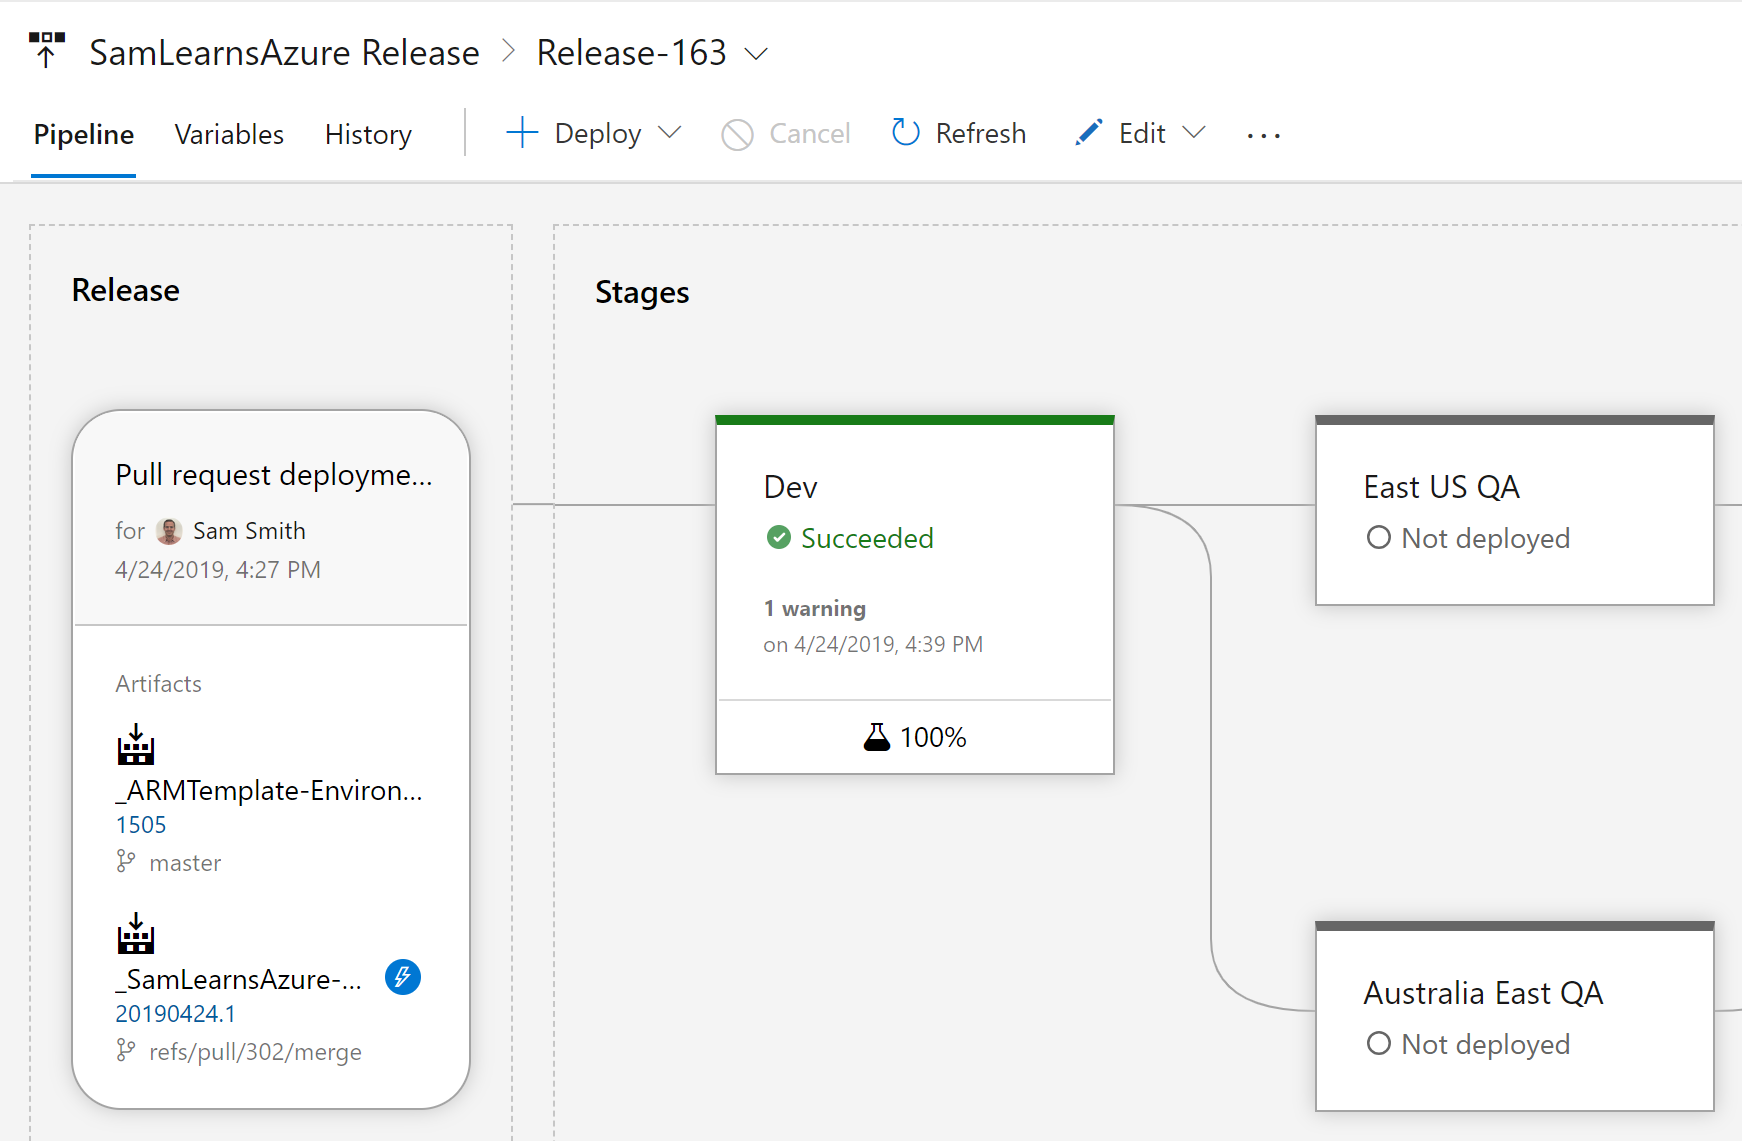
We also want to expand on our pull requests to be able to deploy our code. Eventually we want to create a dynamic environment and then tear it down, but for now, we will just piggy back on our “Dev” environment. We have the option to deploy every pull request, or just individual branches. We can do this in the “Continuous deployment trigger” page in the release. We do have to specify a branch, but in the screenshot below we can use “*” to deploy all Pull Requests. However, this can be dangerous – make sure you ask the question “do you really want to deploy everything on every commit?”
The last step is to specify which of the environments will deploy on a pull request – we definitely don’t want updates going to production. For this example, we only enable “Dev”, by browsing to the environment and enabling the “Pull request deployment” switch – this is off on all environments by default.
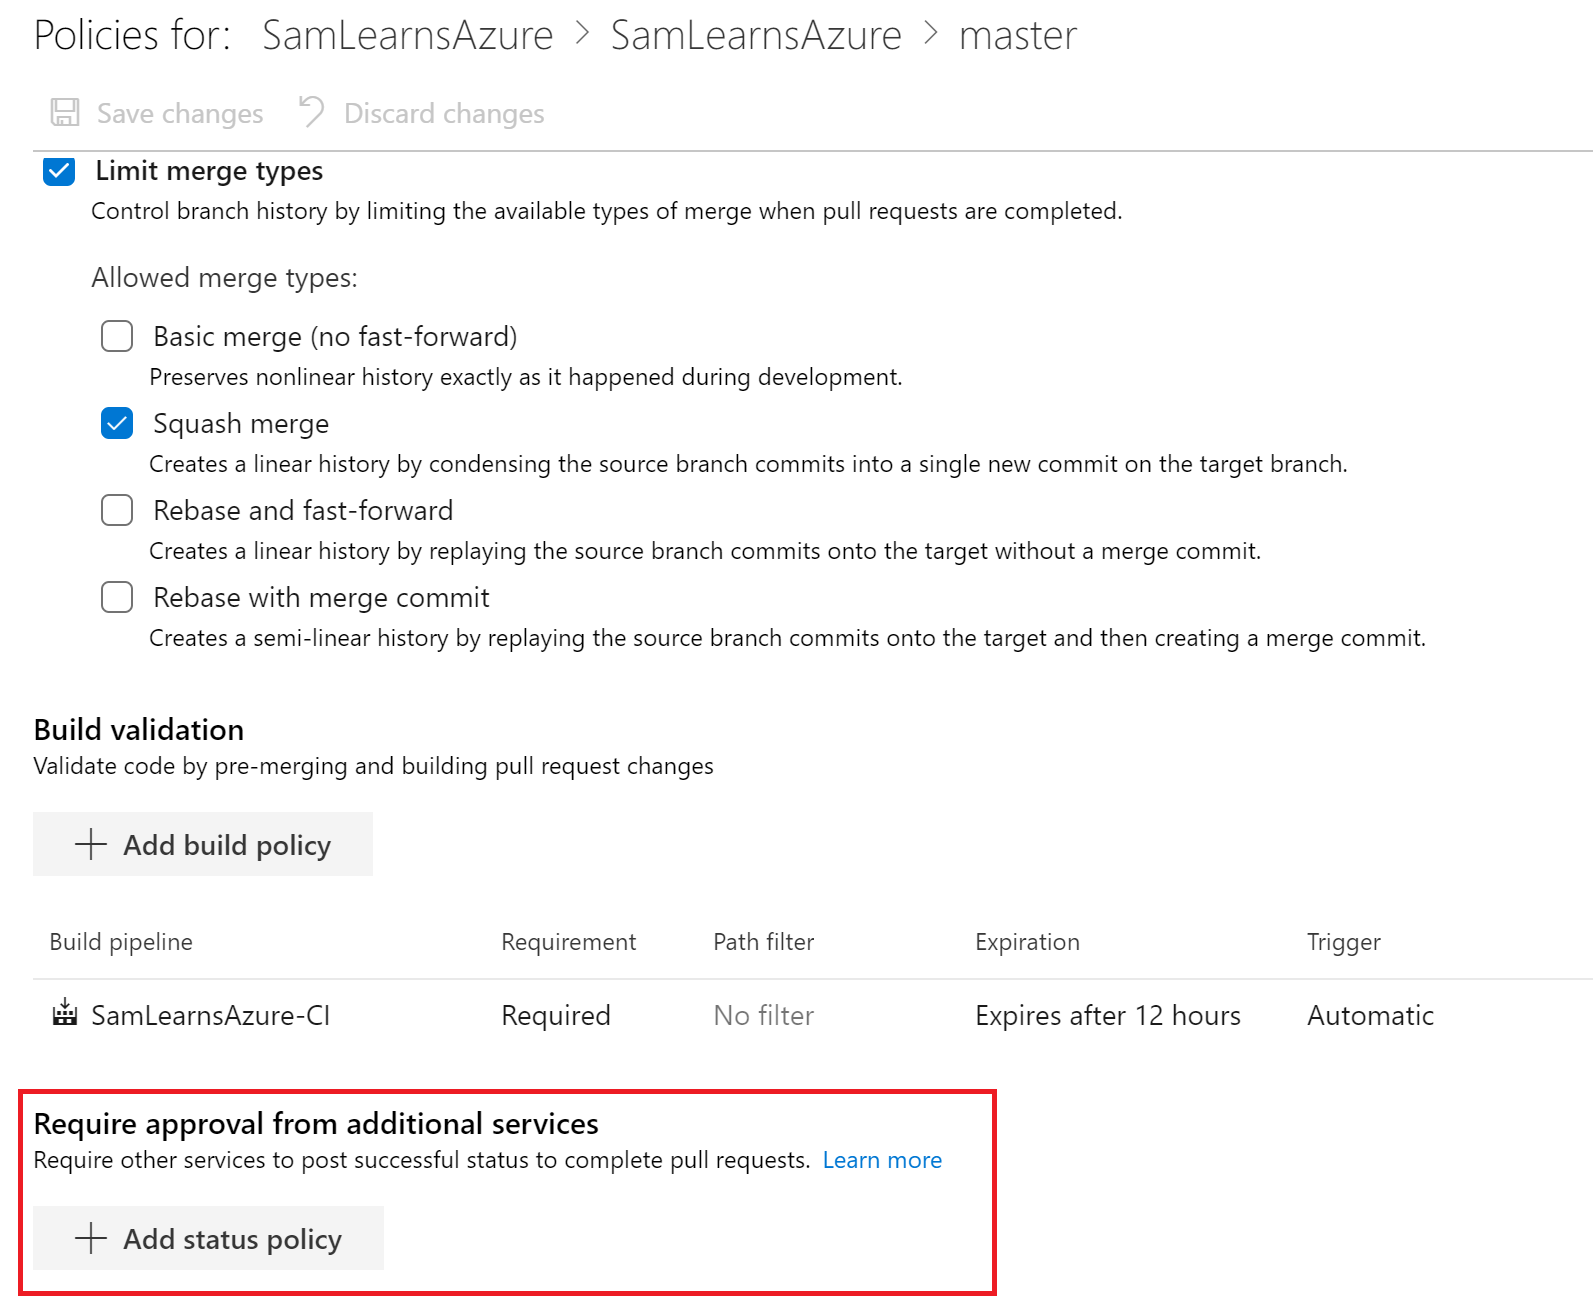
Next on the branch policies, we use the “Require approval from additional services” section to add a new “status policy”
In the status policy, we select our release.
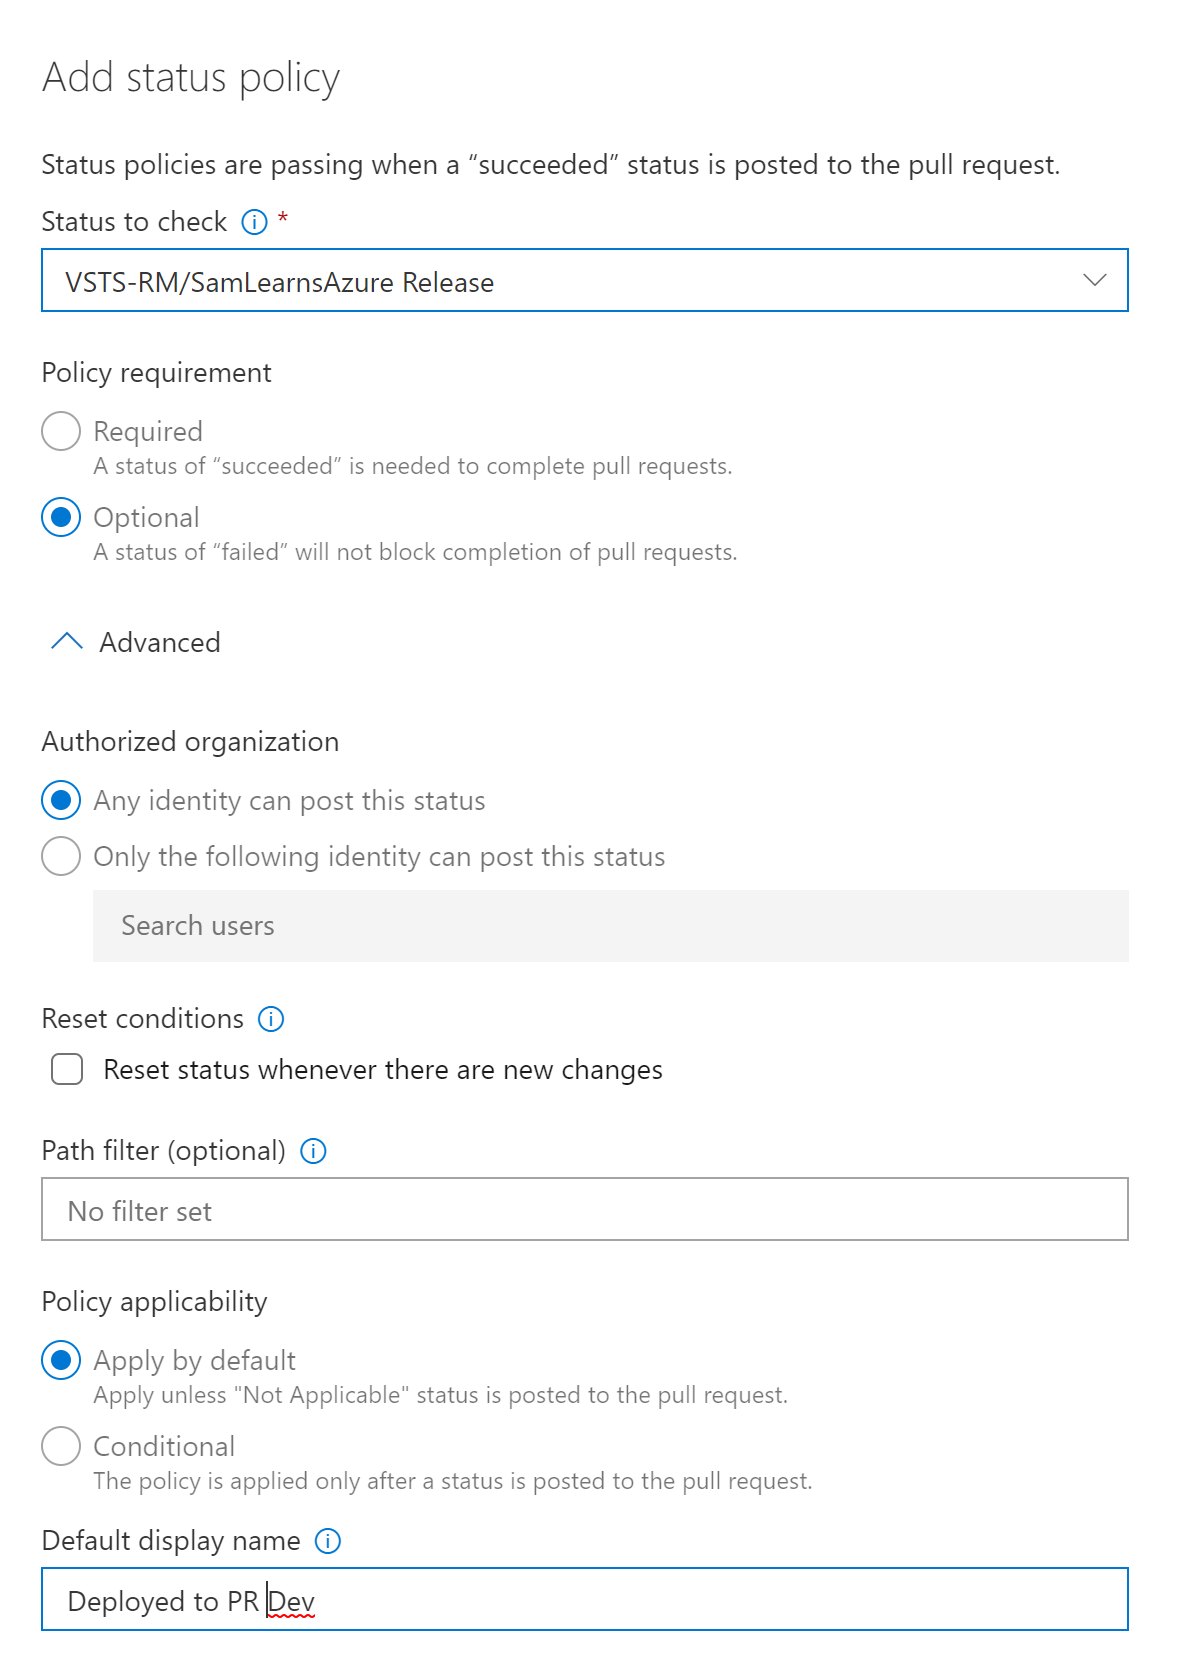
To now test these changes, we create a new branch, and start some of the CDN work we have planned, pushing the changes to a new Pull Request. After the build and watch the build finish, and then the release start with the branch. We can see the release is marked as a status, as we set the policy to be “optional”, instead of “required”.
This worked great when we changed the main “SamLearnsAzure.CI” build, but we quickly realized there doesn’t seem to be a way to get multiple builds to trigger – you can see in the screenshot below that one is using the master branch, and one is using the Pull Request branch…
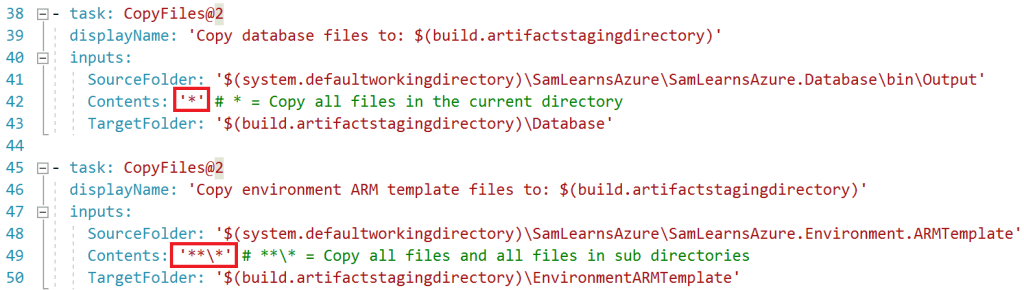
More to come for this later… but for now, we resolve this we are going back to one build. You may remember that we split the ARM template into a separate build, but practically, we are all deploying in one release. We add a new copy files task to copy the template to a new folder in our build YAML. It’s worth noting the “Contents” property of the copy task and the different ways we can copy just files, or files AND all sub-directories, highlighted in red below.
We make a last edit to the release to remove the separate ARM template artifact, and edit the stages to use the new path to our ARM templates.
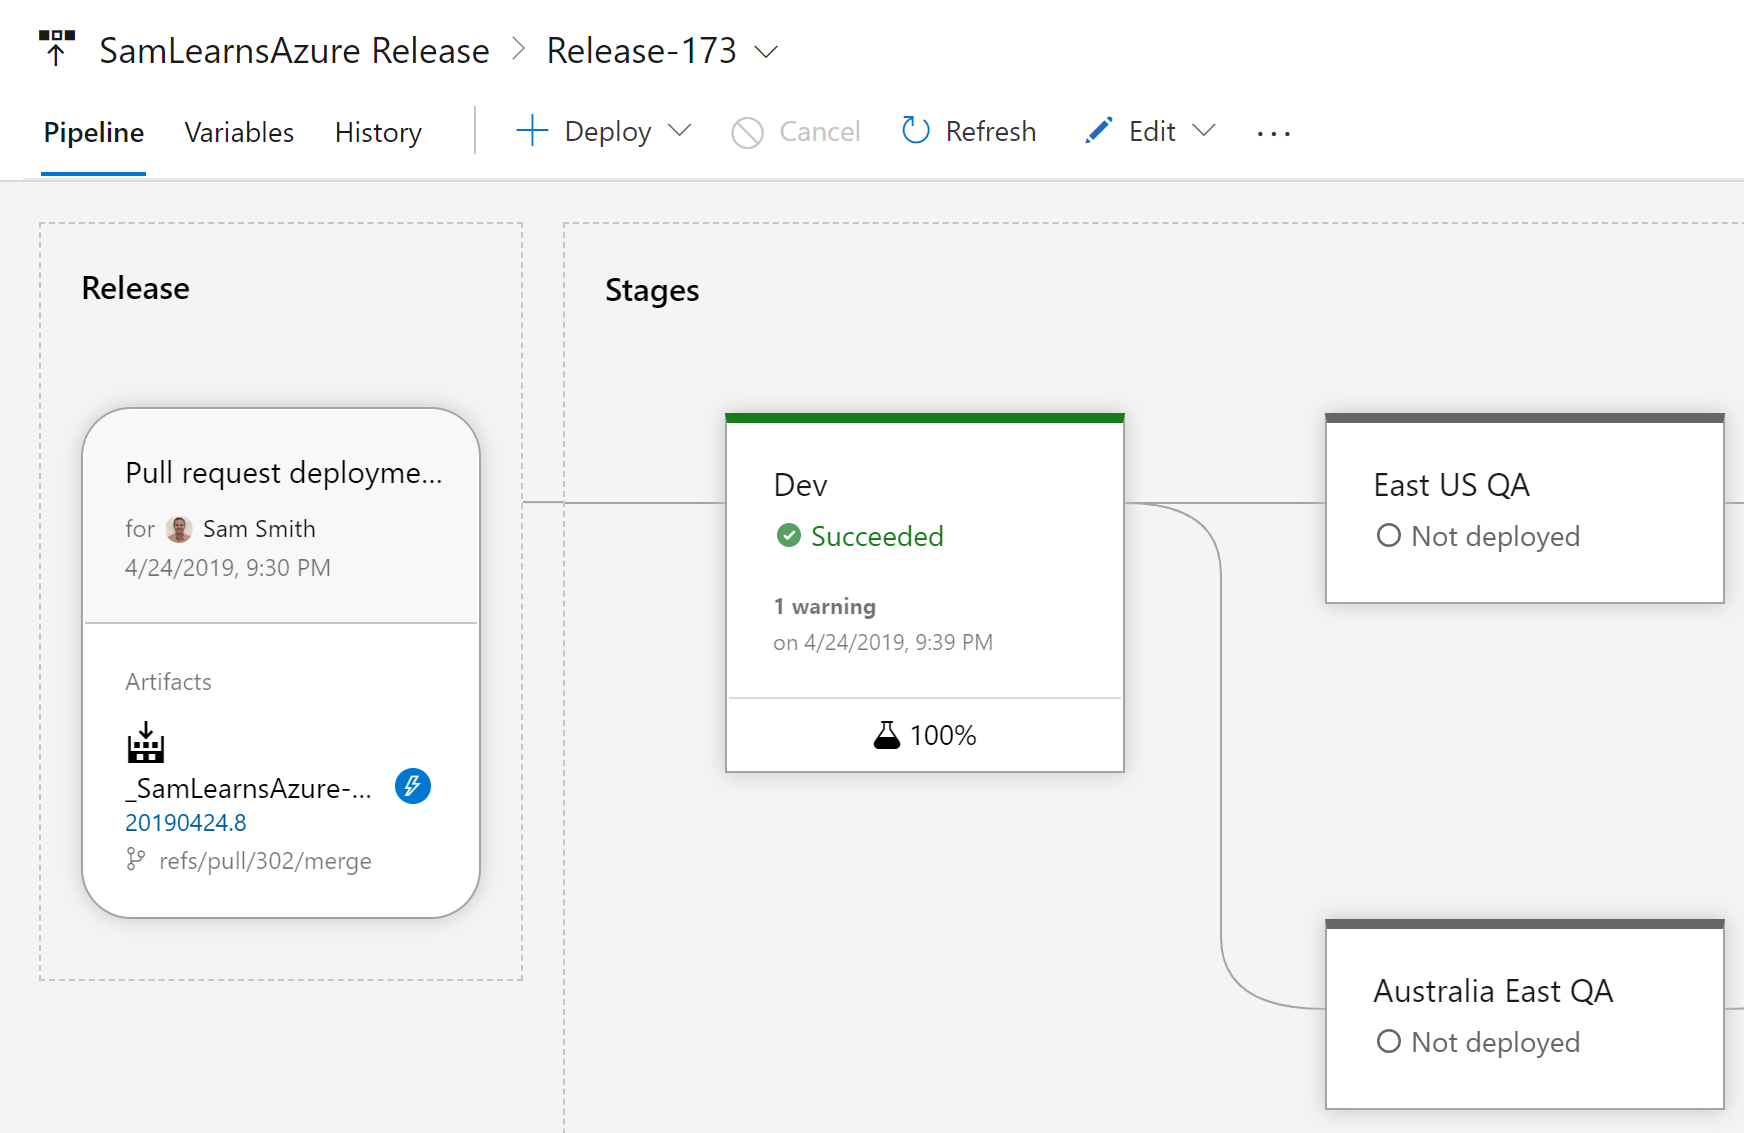
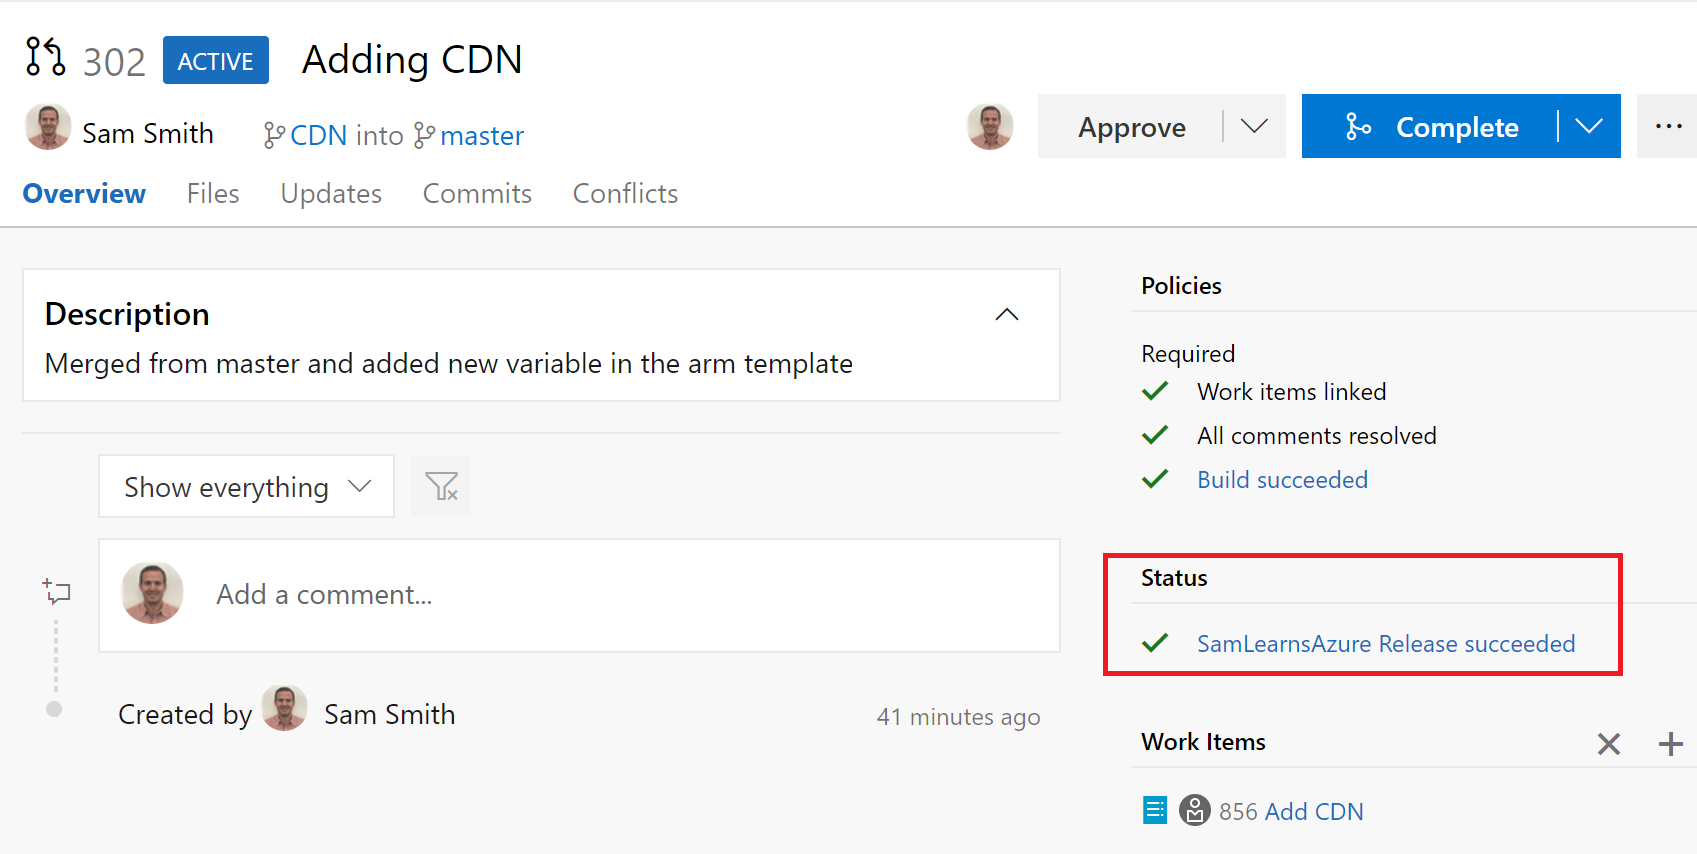
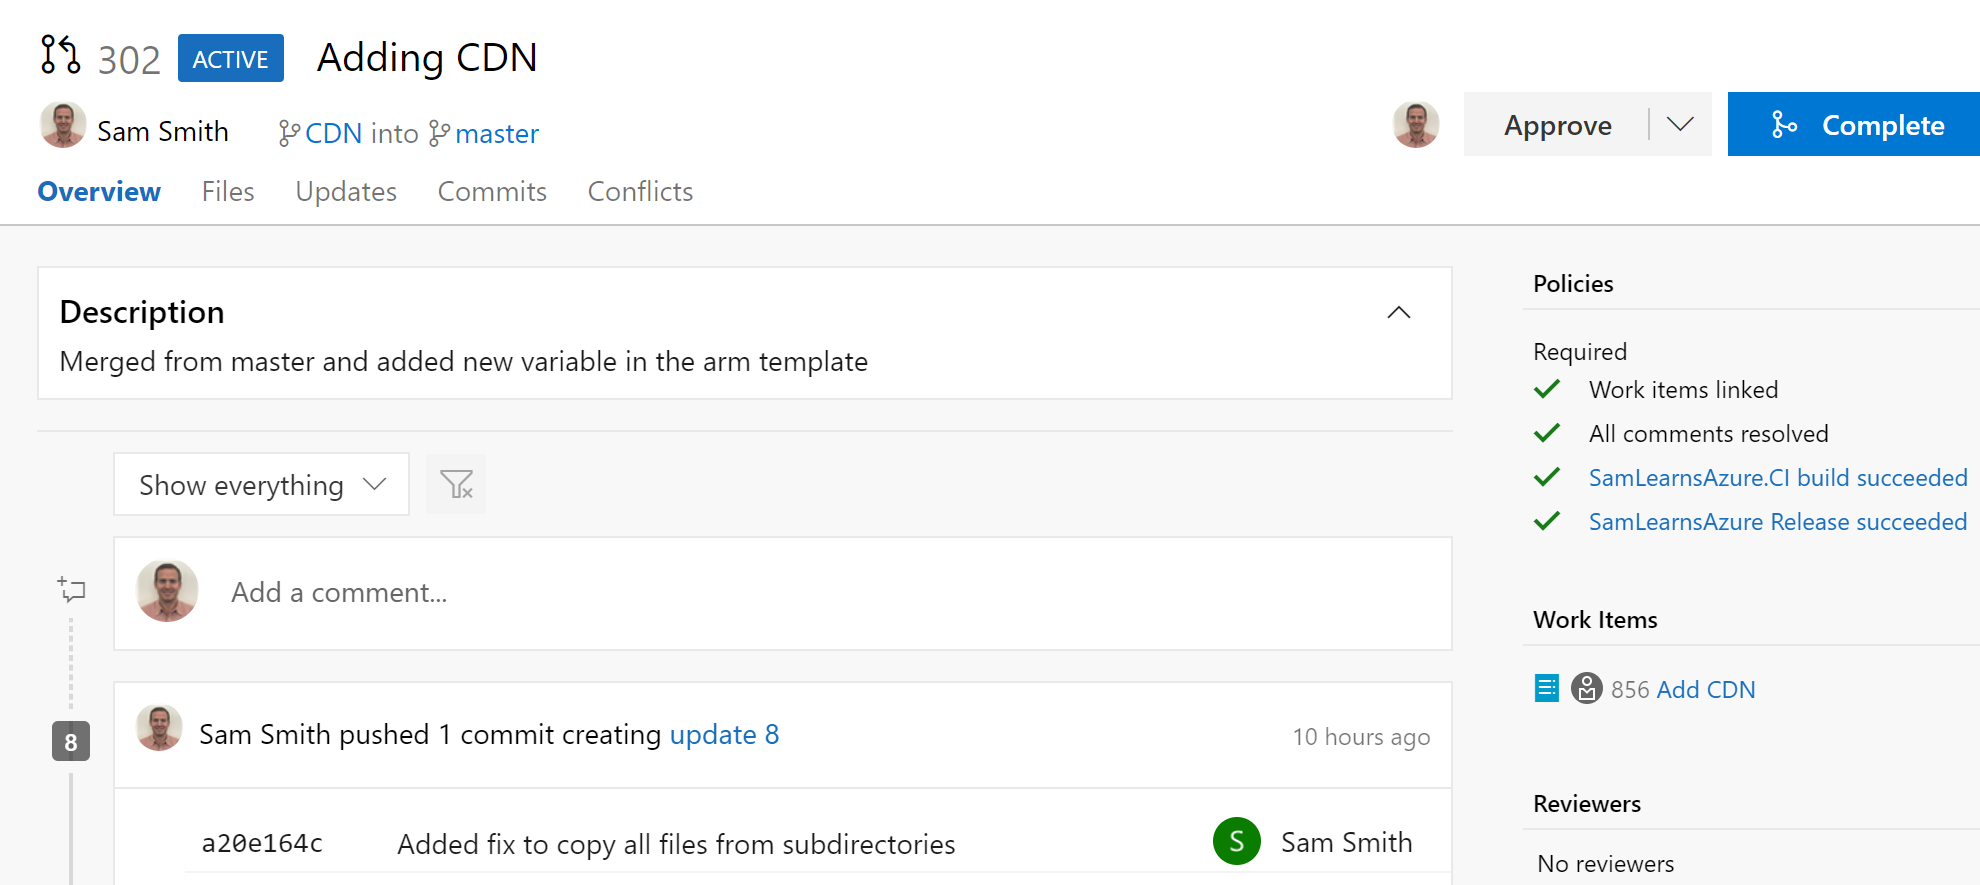
Now we can see our completed pull request, with all of the policies complete. Note that at this stage, we have made the successful deployment a requirement. Our pull requests are now testing an end to end build and deployment!
Some tips for sharing variables between tasks
One of the first tasks this week was to combine the inline PowerShell scripts we wrote into a single PowerShell file – then our changes going forward are stored in source control. One of the resultant challenges was understanding how to access and set PowerShell variables to be used by other tasks in the release. Why is all of this important to us? As we are using the “ARM Outputs” task to extract variables from the ARM template deployment. It is also useful to pass variables around our pipeline. Basically, all variables internal to the release pipeline are environment variables. To read a variable, we have to understand the different way that variables are processed.
Starting from the beginning, in PowerShell script, the $ character indicates a variable. Below is a regular variable, whose contents are only available within it’s script. For example:
$myVariable = "test text goes here"
What happens when we need to pass variables from task to task? We need to assign to a environment variable. The syntax for this is… unfortunately funky. While $(variableName) works when reading a variable, it doesn’t work when setting a variable. Instead, you need this horrible, horrible syntax:
Write-Output ("##vso[task.setvariable variable={variable name};]{variable value}")
For example, to assign the text “hello” to the environment variable “$helloWorld:
Write-Output ("##vso[task.setvariable variable=helloWorld;]hello")
To assign a variable value to the environment variable “$helloWorld”:
Write-Output ("##vso[task.setvariable variable=helloWorld;]$helloWorld")
Side note: what is the difference between RM and AZ PowerShell functions?
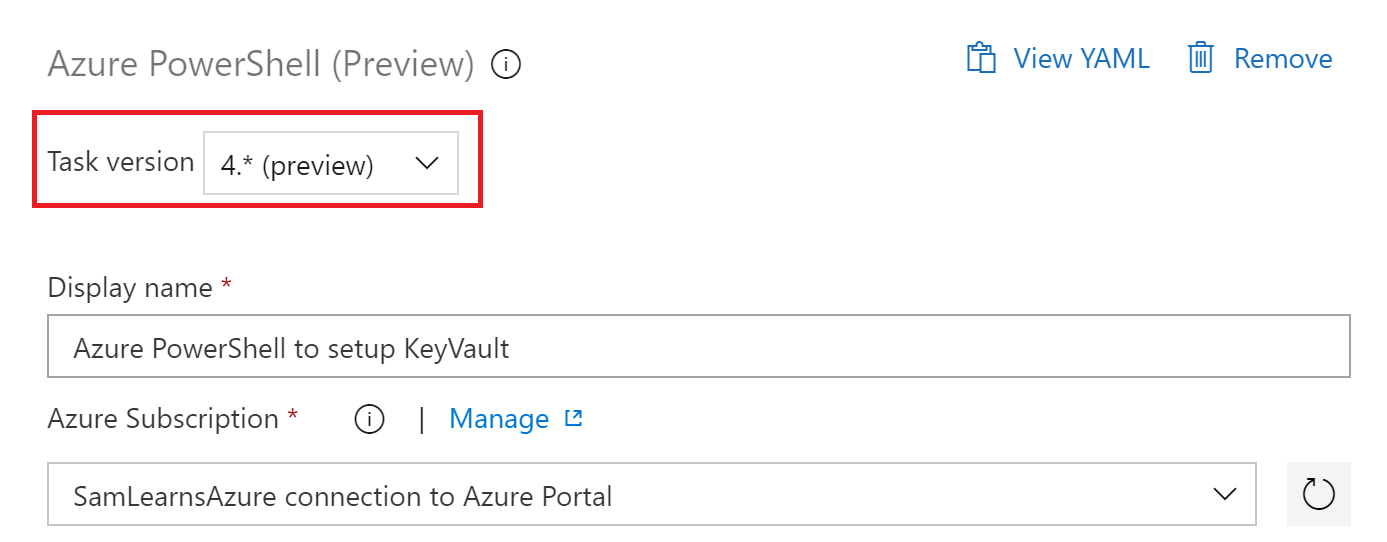
You may have also noticed that there are two main types of Azure PowerShell – functions with RM in the name, and functions with AZ in the name. AZ is the newer version, and will eventually replace the RM functions. To use AZ, you need to use “4.*” version in the Azure PowerShell task in Azure DevOps. It is recommended that as you write new PowerShell scripts, you avoid the RM commands and use AZ commands.
Wrapup
Today we have setup our DevOps pipeline to deploy dynamically, created more confidence in our Pull Request policy with pull request deployments,
and learned a bit more about sharing PowerShell variables. We can now only test both a build AND release in our Pull Requests, increasing our confidence that merges to the master branches will work and therefore increasing our DevOps maturity.
References
- Pull Request deployments:
https://docs.microsoft.com/en-us/azure/devops/pipelines/release/deploy-pull-request-builds?view=azure-devops - Azure Key Vault PowerShell:
https://docs.microsoft.com/en-us/azure/key-vault/quick-create-powershell - Persisting variables between tasks:
https://blogs.objectsharp.com/post/2016/11/08/Persisting-PowerShell-variables-between-steps.aspx - Featured image credit:
https://www.archer-soft.com/sites/default/files/images/blog/2018/04/337.png

2 comments