

It is important in this industry to be flexible and be able to evolve – especially when just about everything turns up on it’s head, every 3 or 4 years. It is equally important – and ok, to admit that you made a mistake -this week was tough for us on this project, and we made a lot of mistakes. We have made some good decisions in our architecture, but we’ve also made some decisions that haven’t turned out well are sub-optimal. This week we are going to do the best we can to address the biggest of them, but we met with roadblocks at every direction – MSI is frankly tough to use. We were close to giving up and trying a new approach, but at the 11th hour, we came out on top with a decent solution.
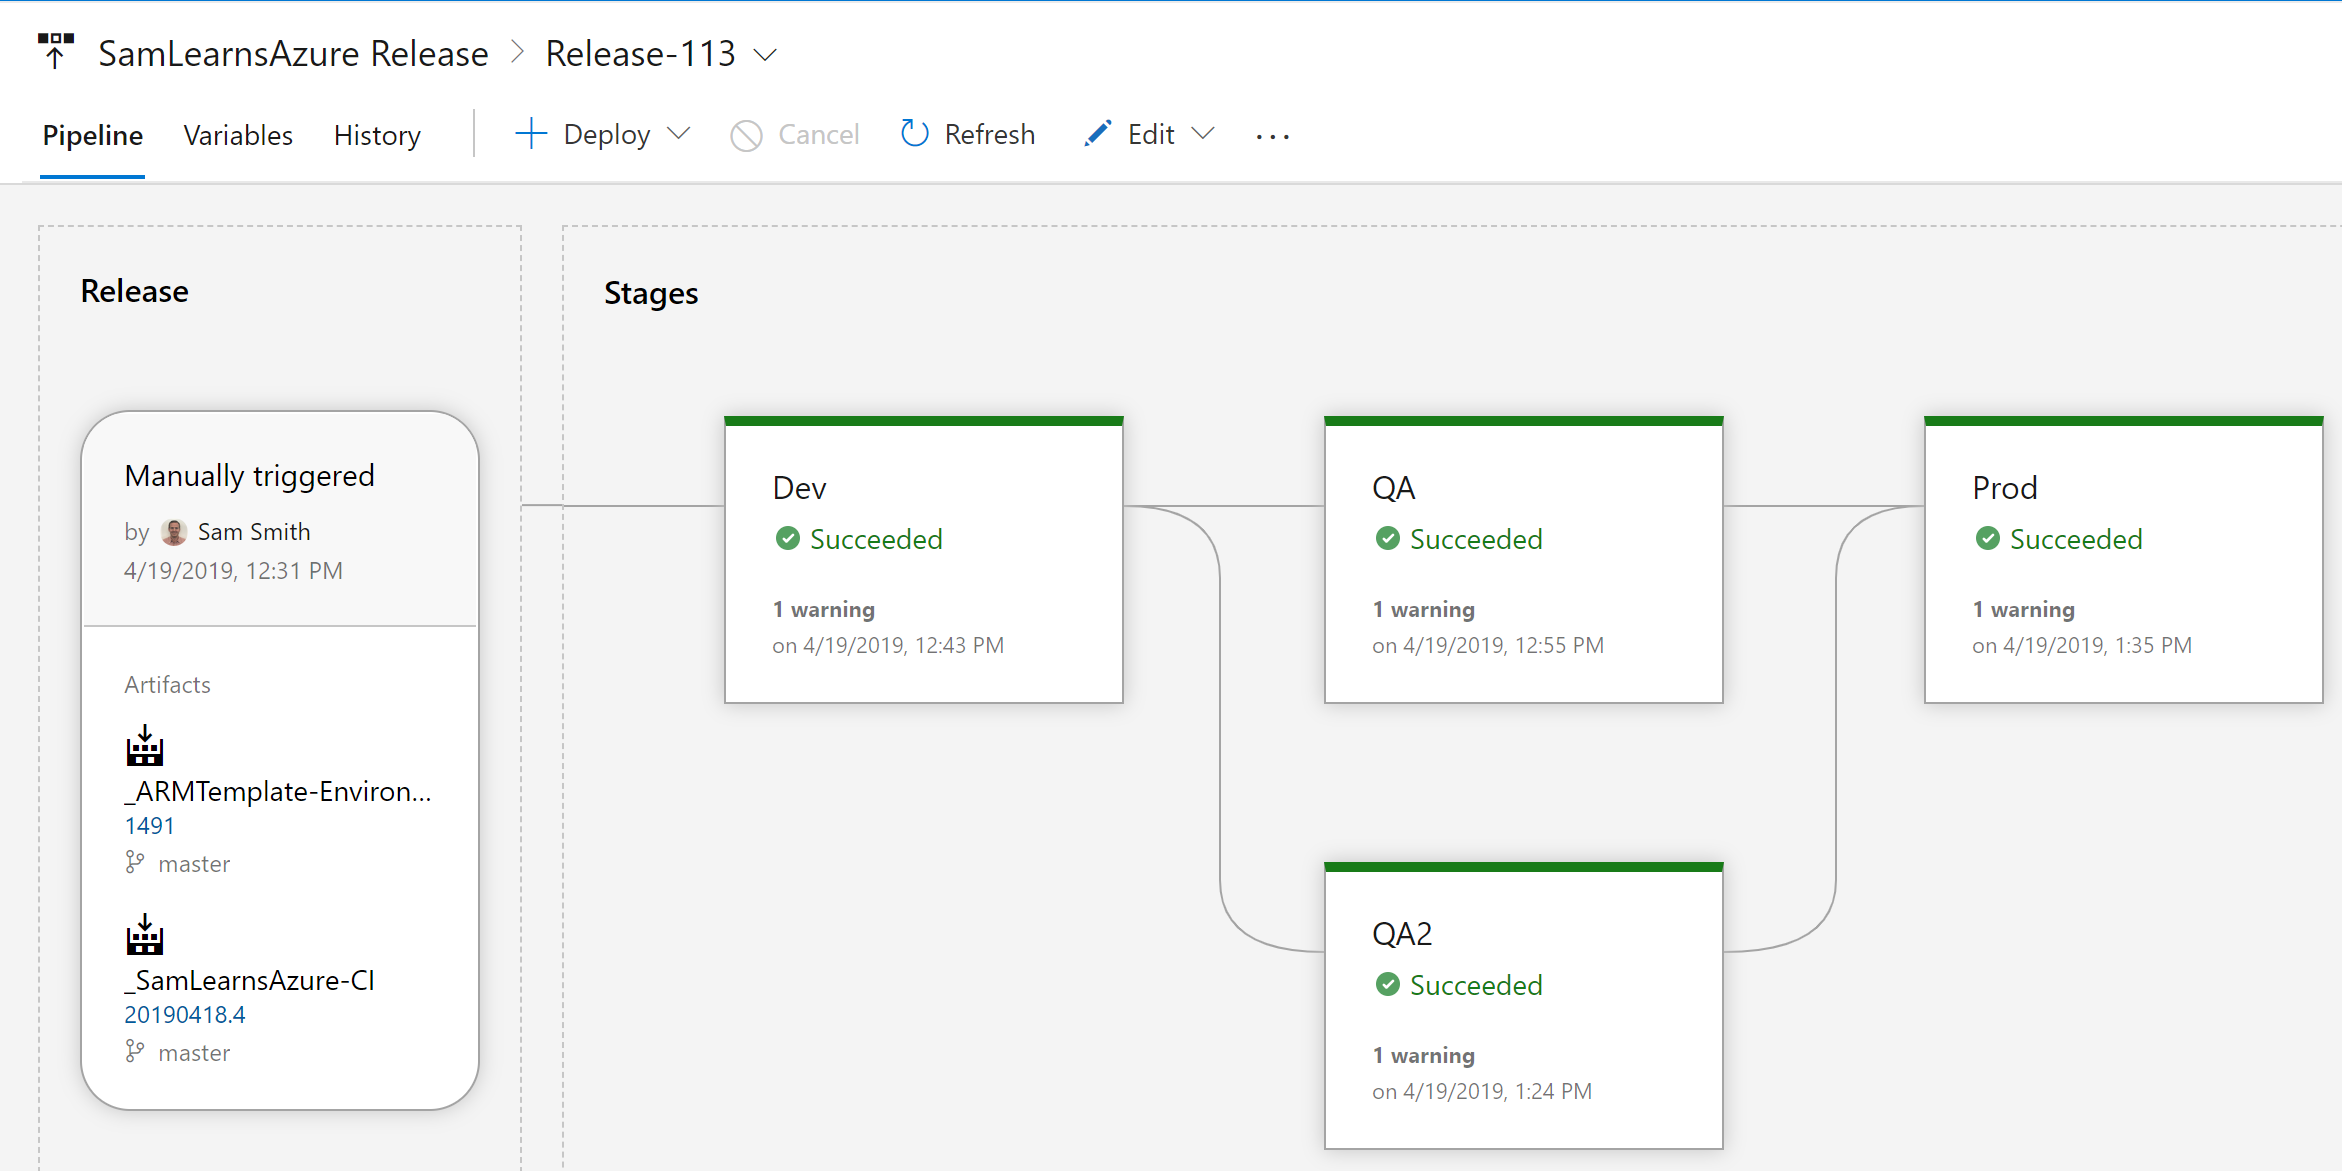
This all started with well made plans – we started writing a post about using a CDN – and quickly realized that some of the technical debt we had collected over the past three months was preventing us from completing our work easily. We were trying to deploy a second QA environment to Australia East we named “QA2”, however we quickly found that it wasn’t easy to add another environment. The promise of MSI security was proving to be more more pain than gain, and layered on top of this, we discovered some of our resources in the ARM templates were hard-coded to the location “East US”. Hence, the short list of items we are going to solve this week include:
- Overall, creating a new environment is a chicken and egg situation when deploying. We first need to deploy the ARM template to deploy the resources, and then after the ARM template deploys, (and the rest of the release fails), we can manually upload the Key Vault passwords, before we can continue. We’d also like the capability to potentially deploy a pull request into a temporary environment. Proposed solution: Setup our environments so we can deploy a new environment with a few clicks. This will require some rework to use ARM Outputs to create the resources and populate this information into pipeline variables for later.
- As we mentioned in the previous paragraph, when we put a key vault in each environment, the application will not function until the key vault is deployed and populated with secrets. We currently manually populate the key vault with secrets after it’s deployed, extracting various keys from the newly deployed resources. This leads to a challenging situation when deploying to a new environment, that requires multiple failed deployments before we see success. Proposed solution: We are going to centralize our key vault into a shared resource group. We originally planned to use PowerShell to setup the MSI security for each key vault, but due to restrictions in our Azure environment, we don’t have the correct permissions. We did find a workaround using the “ARM Output” marketplace item. All of this will change the way we read from the key vault in Azure DevOps and in our website and web service.
- Finally we realized our DevOps pipeline is not working with the database reload process, and our storage is still reading from the data migration… Proposed solution: We are going to move these items to a separate release.
Consolidating to one key vault
Our first step is to consolidate the three key vaults from each of our environments to one shared key vault. We edit the environment ARM template to remove the key vault, and create a new key vault in the core ARM template, which will deploy to our “SamLearnsAzureData” resource group. We are removing the references to the web service and website service principals, keeping the administrator, Azure DevOps, and integration test service principals.

Updating the key vault
We now deploy this new key vault with our core ARM template, and then add a new set of secrets into it, using Excel to generate PowerShell we run directly on the Azure Portal. Note that we’ve appended a new suffix to our secrets, to identify them by environment. There are a number of secrets here we would really like to extract from the ARM template outputs in the future, in particular the Application Insights instrumentation key, storage account key, and Redis connection string. We believe the items we will need to continue to manually populate are the database login, database password, and application insights API key, but we will continue to look for ways to reduce this manual list.

Updating the code
Next we update our web service code, to read from these new settings – for example, now instead of reading “ConnectionStrings:SamsAppConnectionString” from the key vault – we are going to read “ConnectionStrings:SamsAppConnectionStringDev“, so we need to append these two variable names together before we read from the key vault. Here is the updated code in Startup.cs

Updating the release
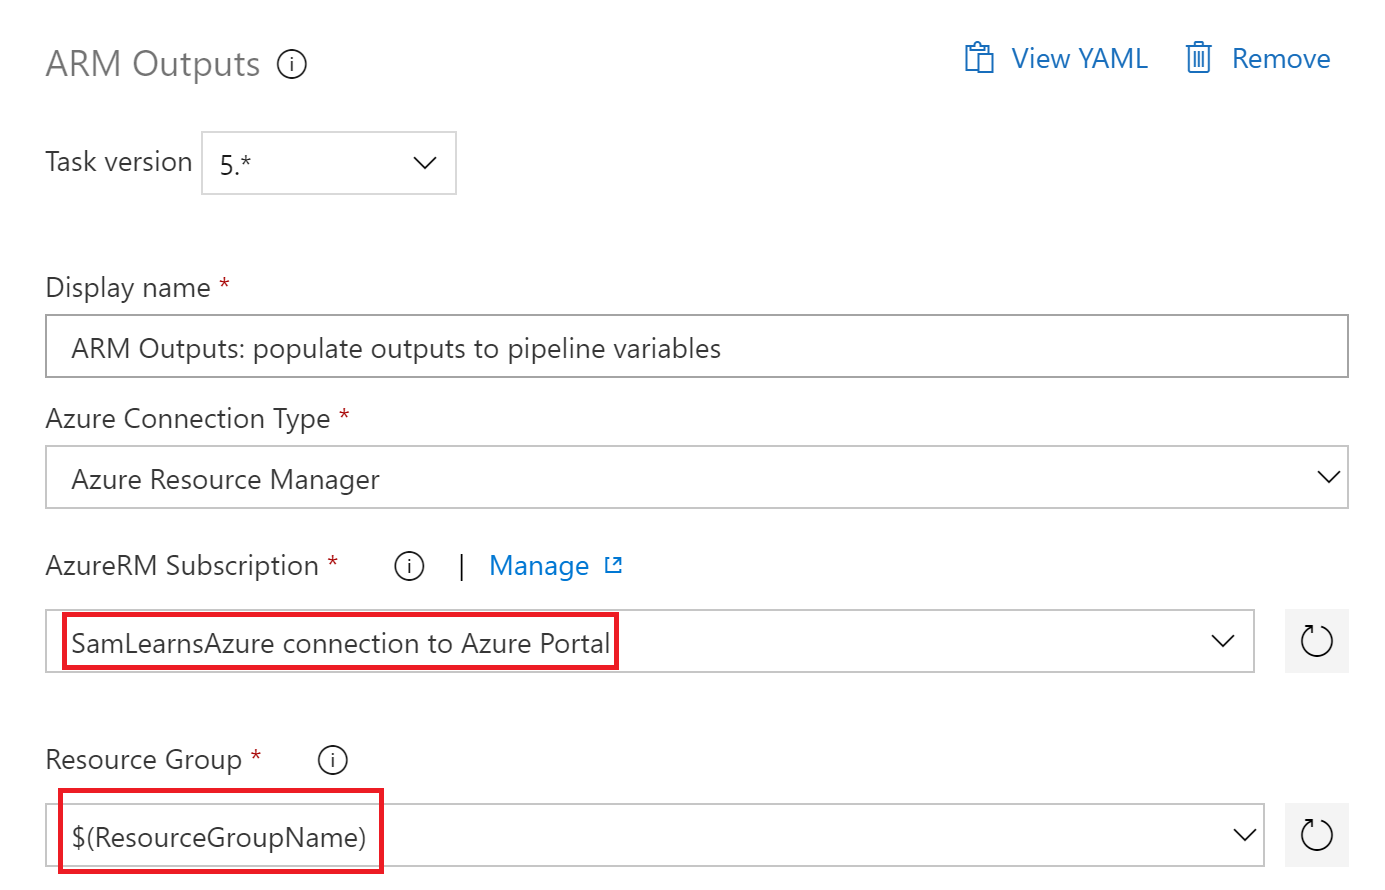
Finally, we update our release pipeline. We are going to use theARM Output marketplace item. In our environment ARM template, we add two new outputs, to extract the principal id’s for our website and web service to pipeline variables. This is really important – we initially tried to use PowerShell to get these principal id’s, but it requires a lot of extra crazy configuration of permissions in Azure Active Directory and your organizations global Azure administrator – you don’t want to get this involved – the output solution is better.

After adding the new “ARM Outputs” task, we then add a Azure Powershell script task, both right after the “Azure Resource Group Deployment” task to deploy the ARM template.

To configure the ARM Outputs task, we only need to select a subscription and add in our resource group variable.
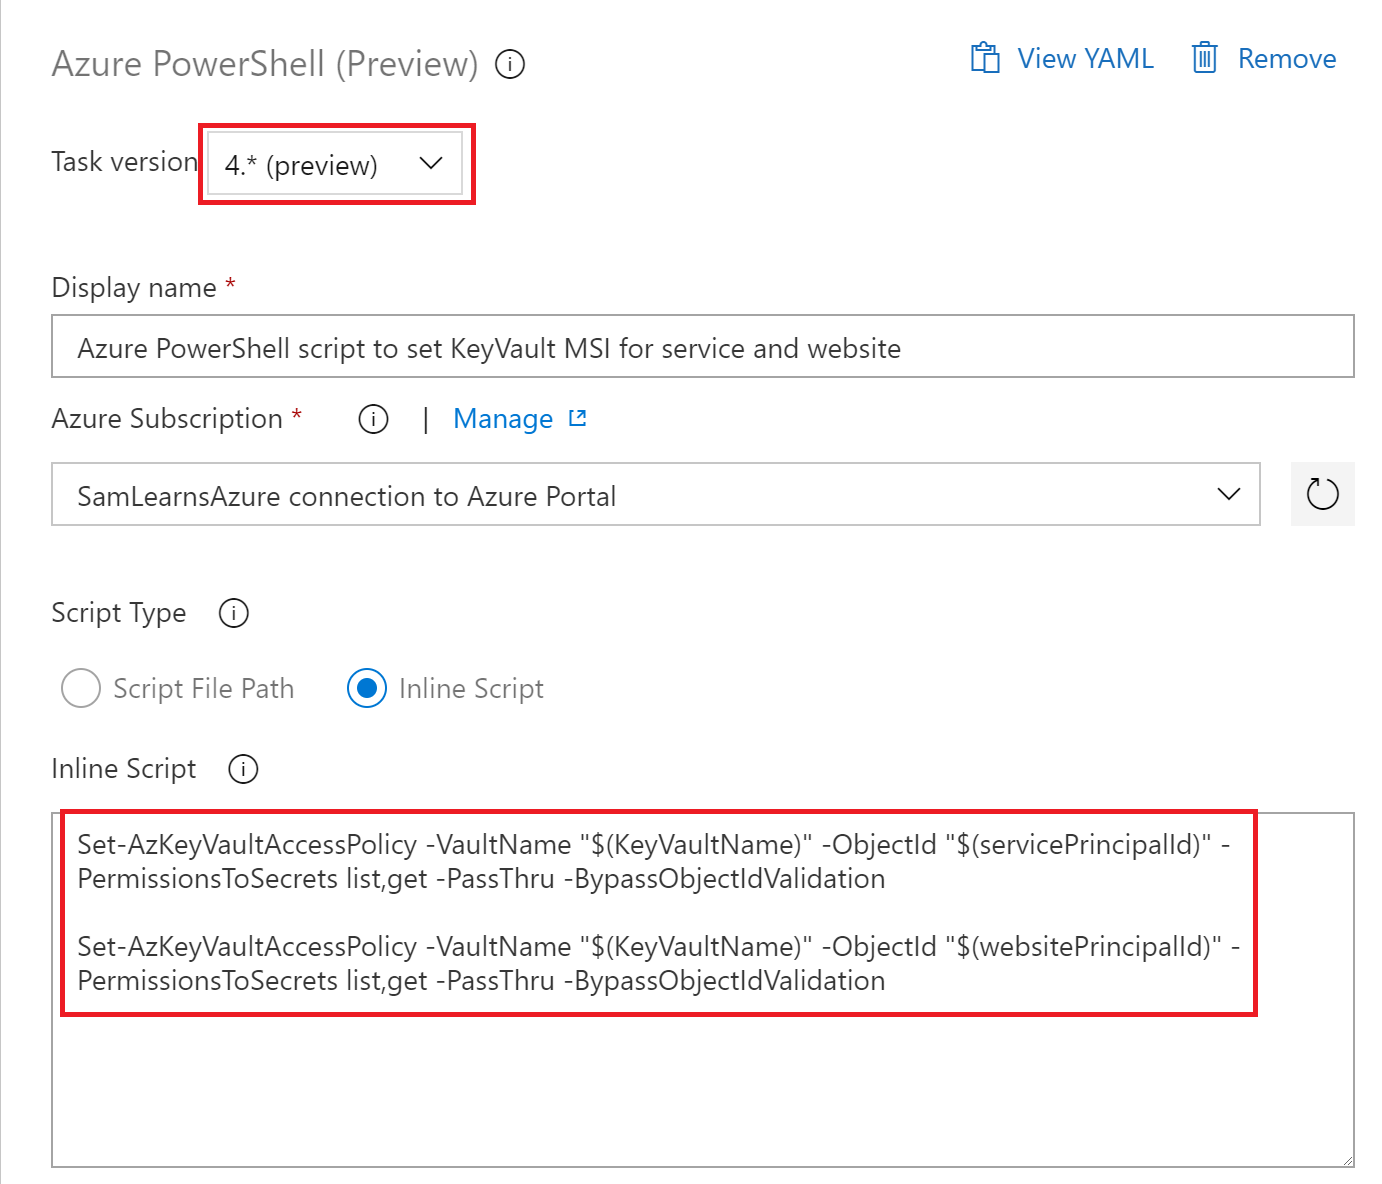
In the PowerShell task, we need to set the Task version to “4.*” – this allows us to use the newer “Az” PowerShell commands. We also select our subscription, the “Inline script” option, and paste in the following PowerShell text to set the access policy of our shared key vault using the service principal id we retrieved from the ARM outputs task. Note the usage of the options to “PassThru” and “BypassObjectIdValidation”, without these the PowerShell task will throw an error.
$WebsitePrincipal = Get-AzADServicePrincipal -DisplayName "$(WebsiteName)"

Set-AzKeyVaultAccessPolicy -VaultName "$(KeyVaultName)" -ObjectId $(WebsitePrincipal.Id) -PermissionsToSecrets list,get -PassThru -BypassObjectIdValidation
Below you can see what the final task looks like with both the service and website PowerShell.
We start a new deployment, and after it completes, we verify that the access policies have been dynamically setup correctly in the shared key vault. As you can see in the screenshot below, this worked – which is brilliant! Now when we deploy to a new environment, our key vault will be automatically setup for us.

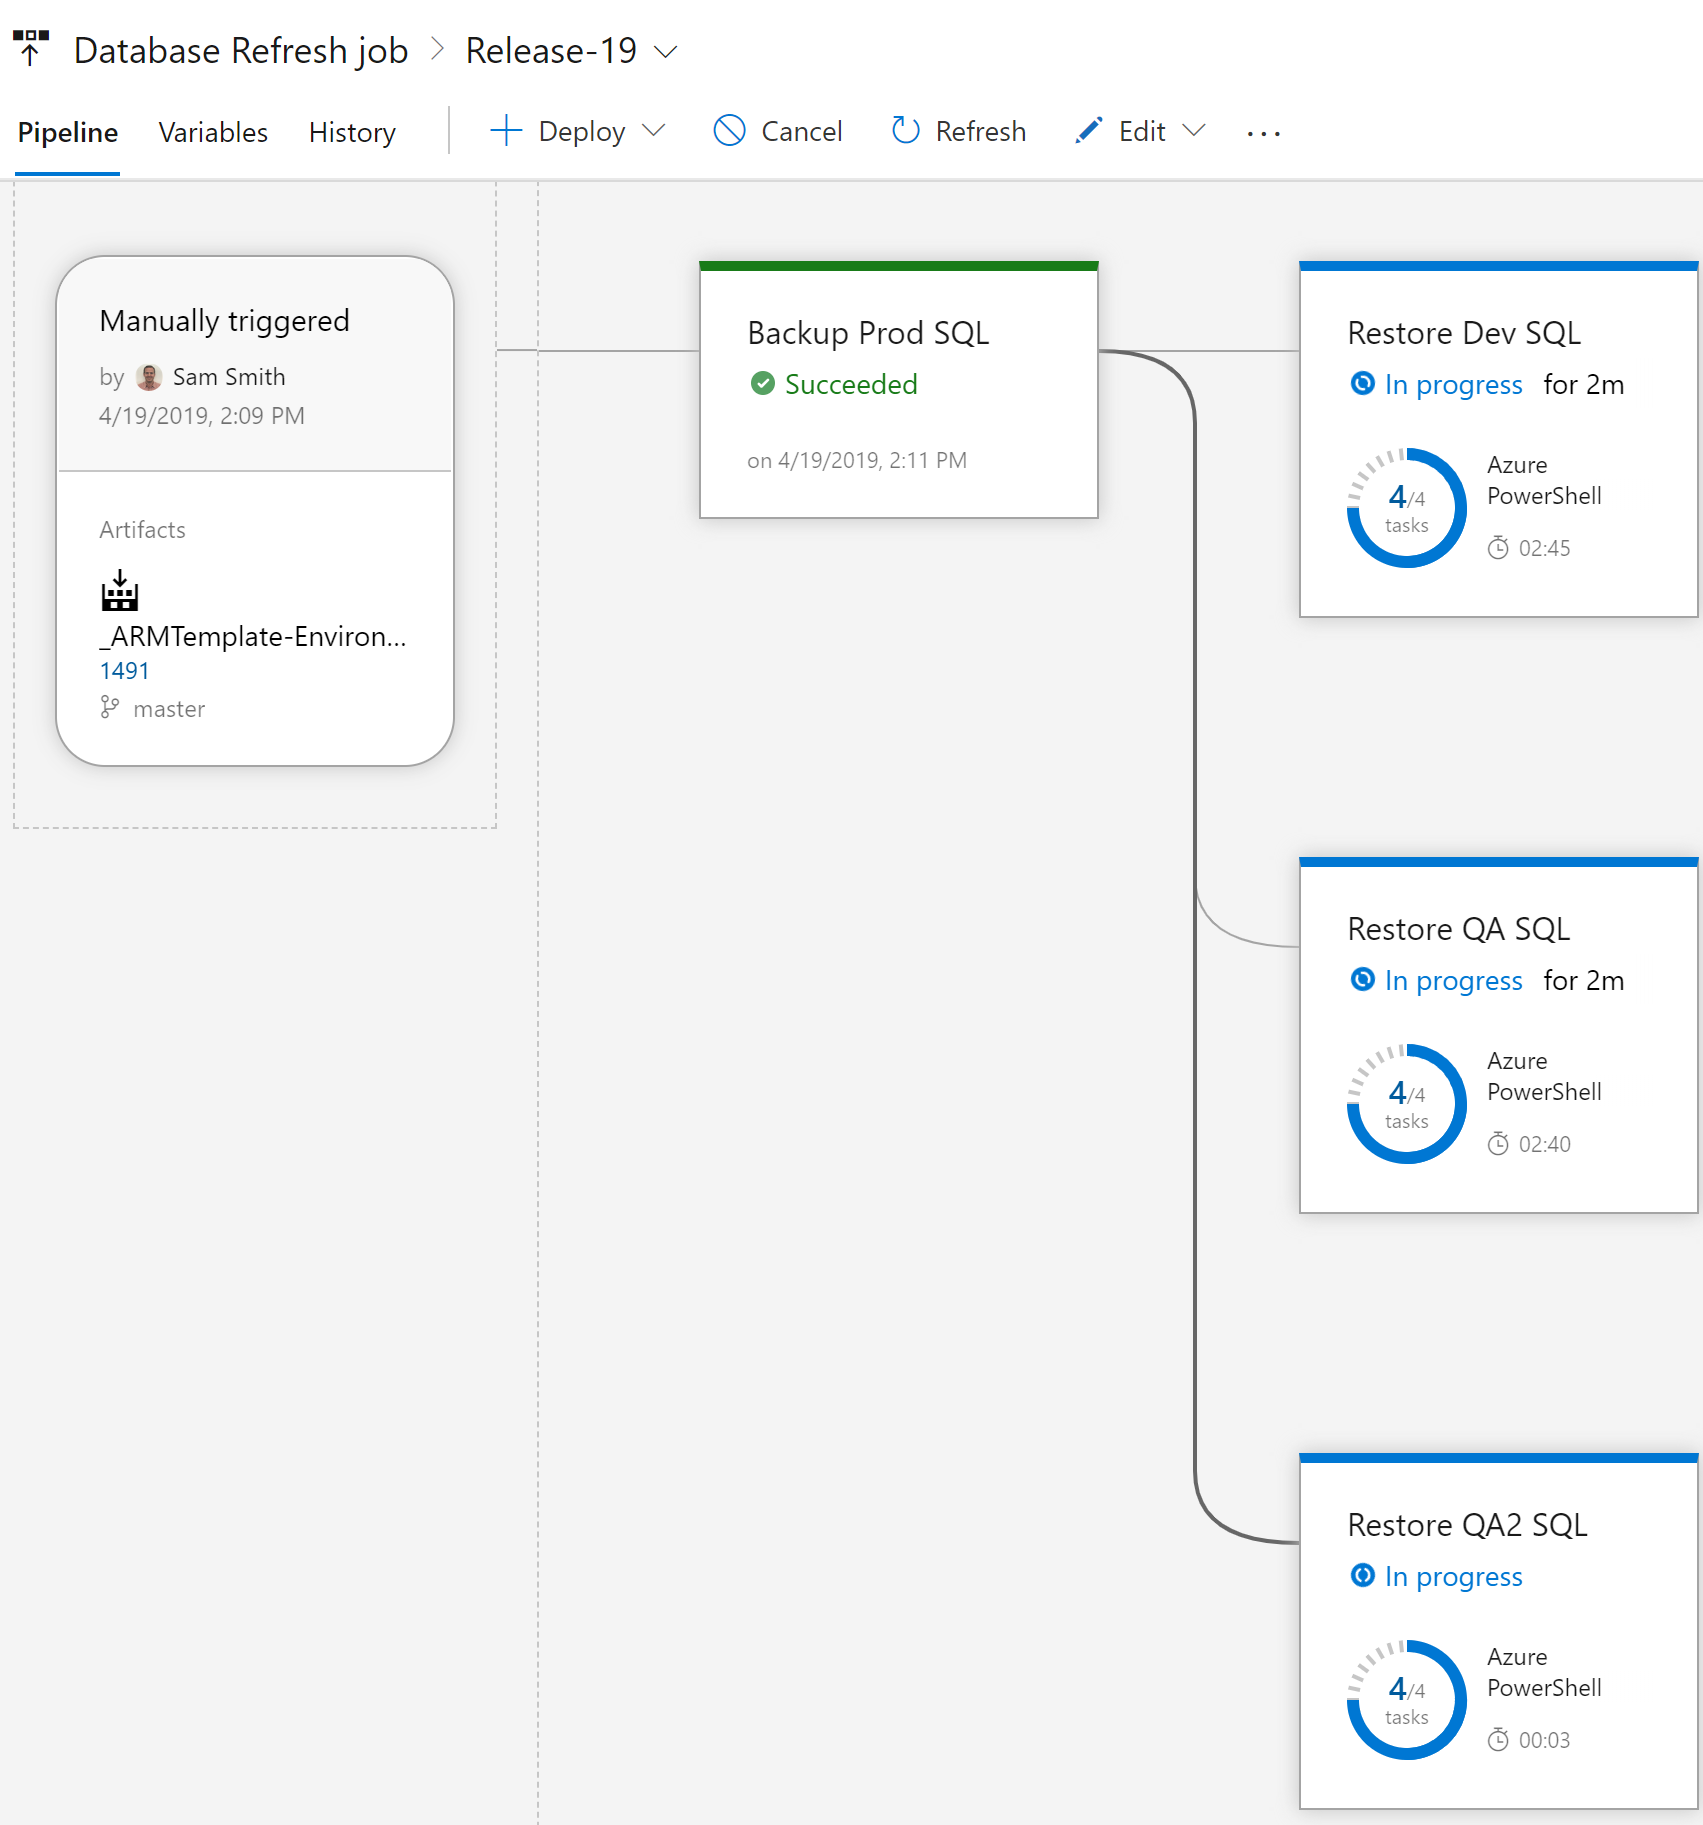
Next, we are going to remove the database backup and restoration pieces from our release, creating a new release, naming it “Database refresh”. This will start with running a backup from production, and then restoring the backup to Dev, QA and our new QA2.
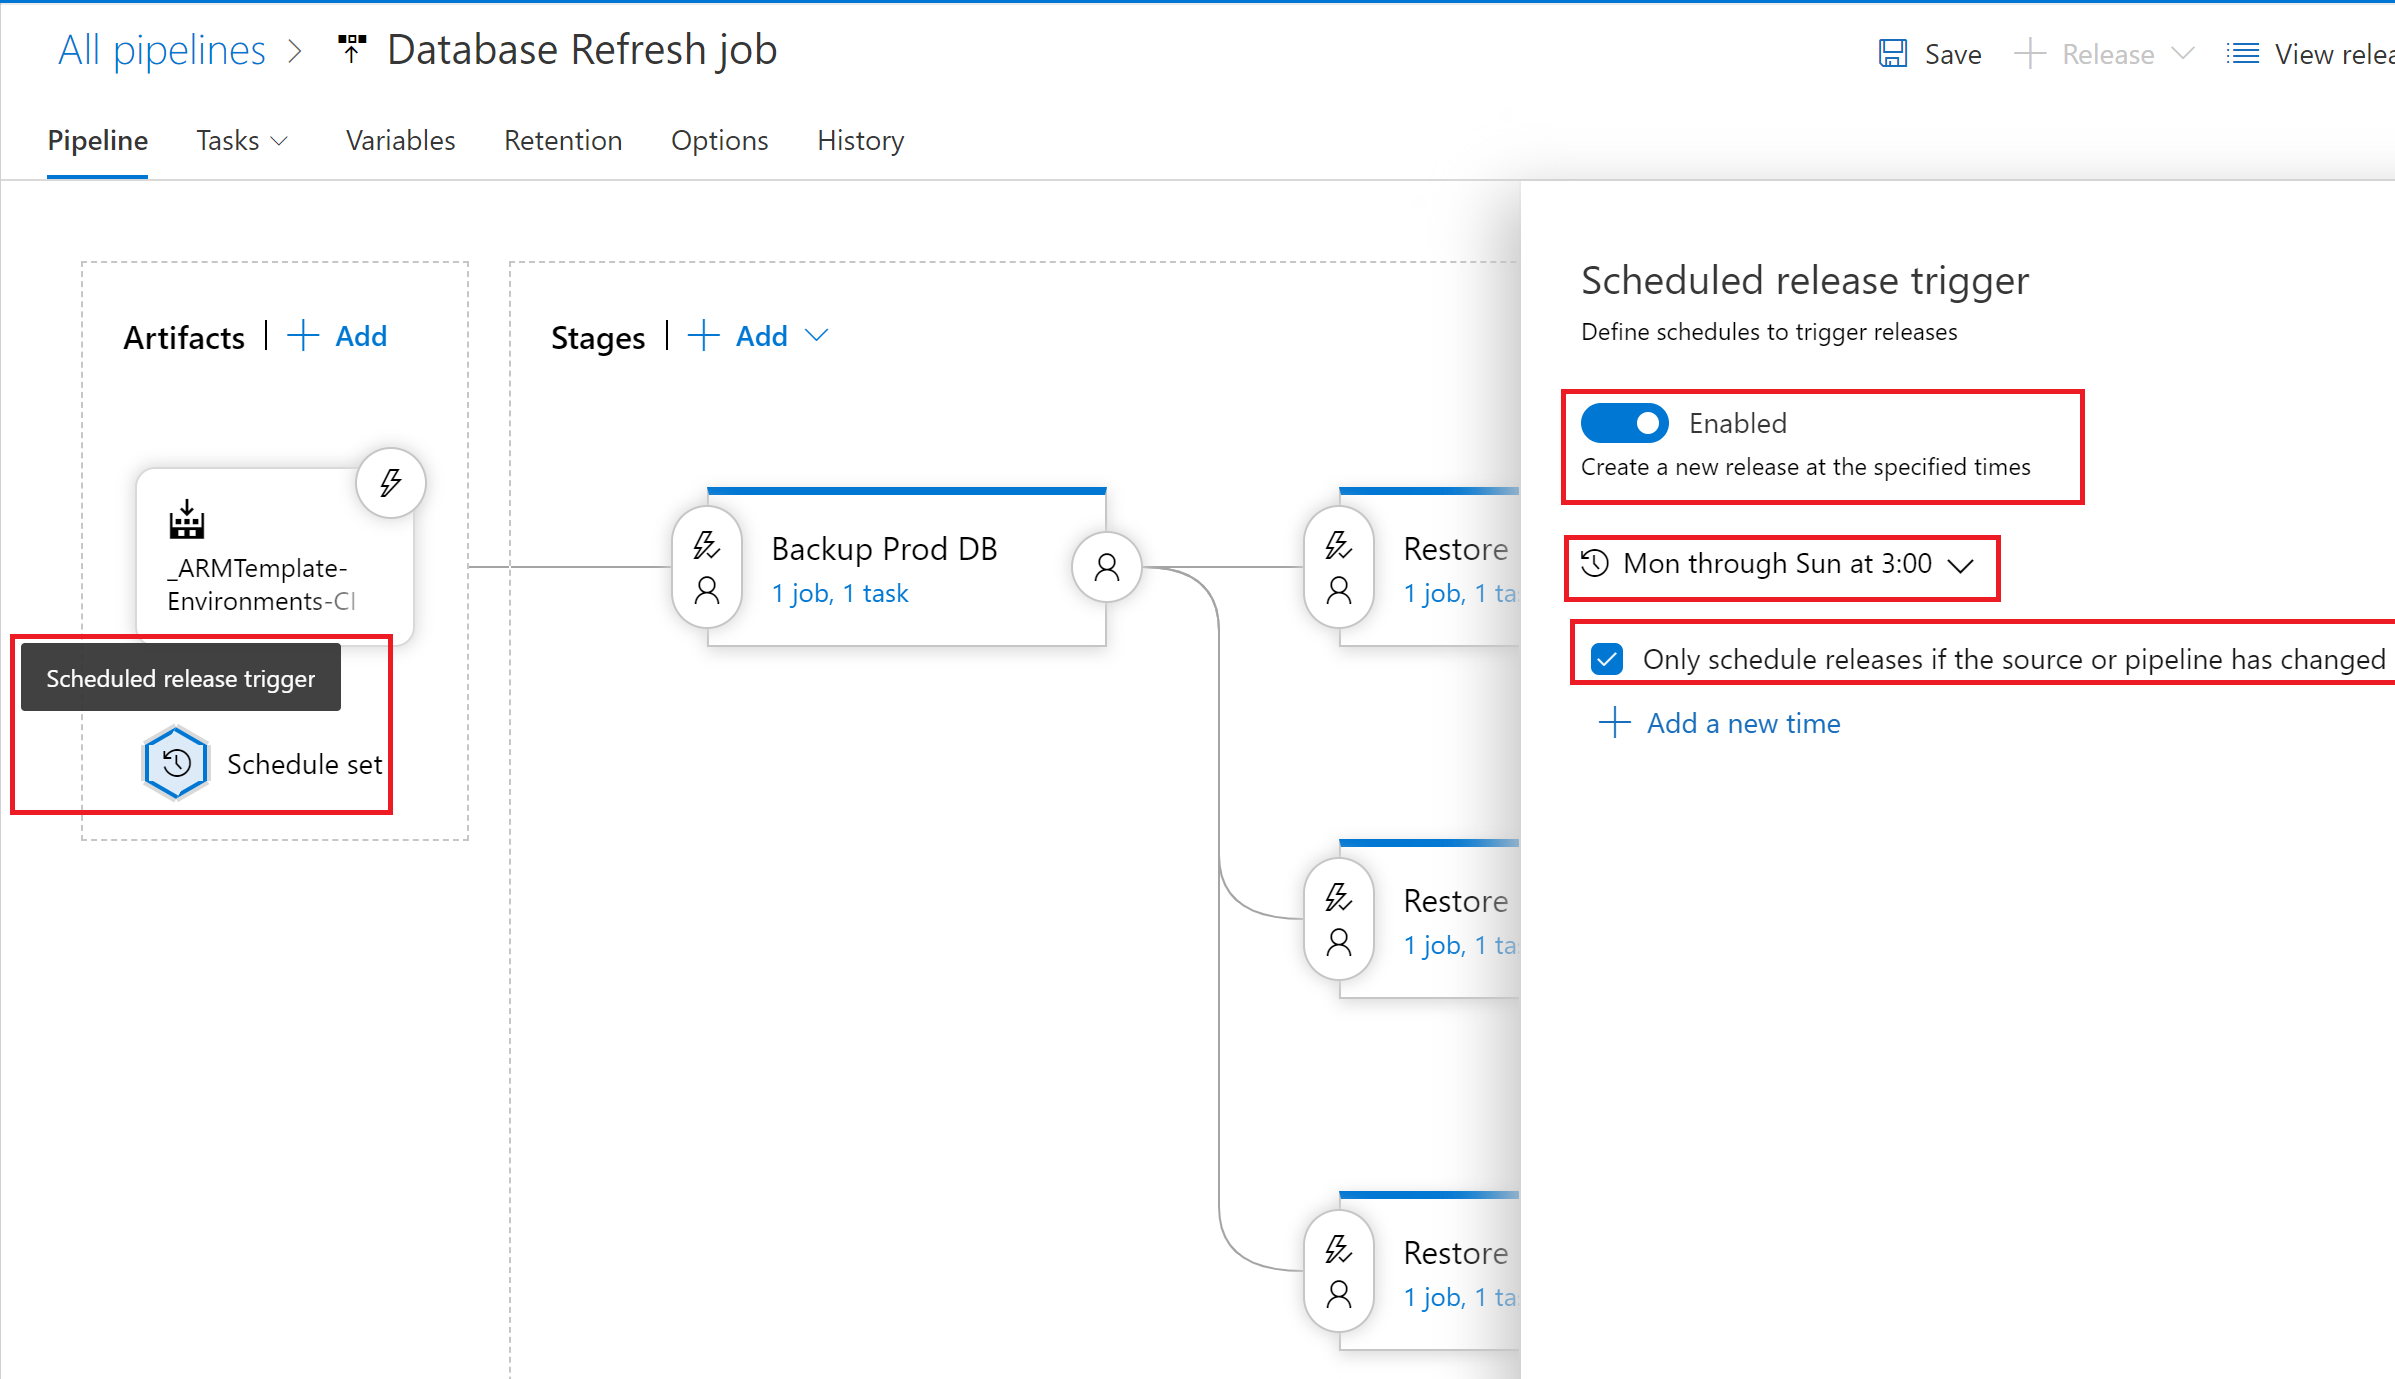
We will setup a schedule for this release – running it nightly, but only when there has been a source code or release pipeline change in the last 24 hours. You can see the options that enable this below. In certain situations, we might consider to run this more or less often. If you implement a similar model, make sure you really think about that Dev restoration – you don’t want to overwrite developers work!
Wrapup
Today, we solved a difficult deployment situation. When deploying to a new environment, we have three steps:
- Add variables to our shared key vault for the new environment
- Clone an existing environment, rename it and edit the pipeline variables as needed
- Deploy the new release with new environment
We tested this with a new QA environment in “Australia East”, we are calling “QA2”, and were able to load it quickly. There is still some work to do to automate more of the ARM outputs to populate more of the key vault. Shortly YAML pipelines will be launched, and we will revisit this again, but we are much better positioned for this now.
References
- PowerShell to set Key Vault access policies: https://docs.microsoft.com/en-us/powershell/module/azurerm.keyvault/set-azurermkeyvaultaccesspolicy?view=azurermps-6.13.0#examples
- Service Principal: https://docs.microsoft.com/en-us/azure/active-directory/managed-identities-azure-resources/how-to-view-managed-identity-service-principal-powershell
- ARM Output marketplace item:
https://marketplace.visualstudio.com/items?itemName=keesschollaart.arm-outputs - Featured image credit: https://i.imgur.com/BJgS1TX.jpg
- Permissions needed to query AAD:
https://docs.microsoft.com/en-us/graph/permissions-reference#application-resource-permissions - Stackoverflow similar issue (added this solution as a new answer):
https://stackoverflow.com/questions/45080489/service-principal-set-azurermkeyvaultaccesspolicy-insufficient-privileges-to?noredirect=1&lq=1 - Types of AAD permissions:
https://docs.microsoft.com/en-us/azure/active-directory/develop/v1-permissions-and-consent - More about troubles getting permission to query AAD:
https://github.com/Azure/azure-powershell/issues/8719 - Using Set-AzKeyVaultAccessPolicy:
https://docs.microsoft.com/en-us/powershell/module/az.keyvault/set-azkeyvaultaccesspolicy?view=azps-1.7.0#syntax

3 comments